Help Center
Set up Attributer with HubSpot Forms
Attributer is a little bit of code you add to your website. It tracks where your visitors are coming from (I.e. Paid Search, Paid Social, Organic Search, etc) and passes the data through to HubSpot with each form submission.
In order for it to work, you need to add a series of contact properties to your account. FOllow the steps below:
Step 1: Add the first Contact Property to your Hubspot account
If you are using Hubspot, you first need to create a series of properties on the Contact object before those properties can be added as hidden fields on your forms.
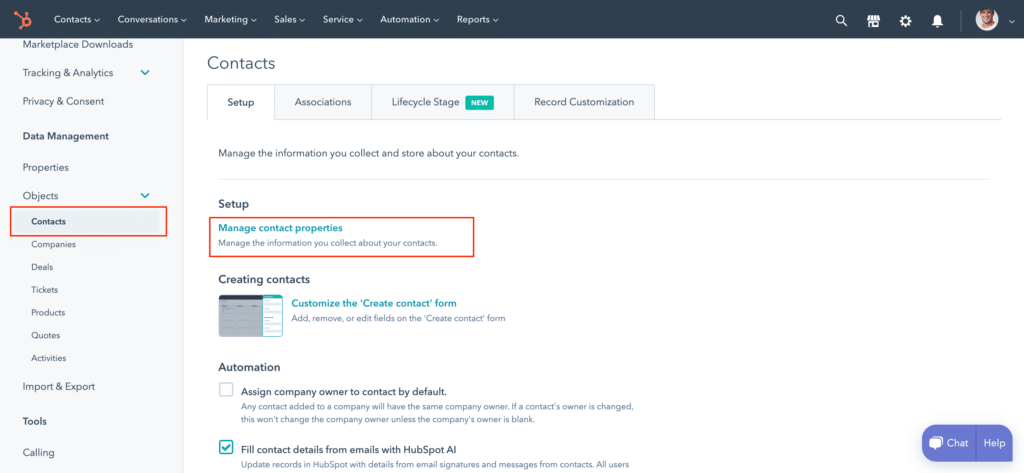
To do this, navigate to the ‘Settings’ section by clicking the gear icon in the top menu bar, and then select the ‘Contacts’ menu option from left-hand nav bar before clicking the ‘Manage Contact Properties’ link.
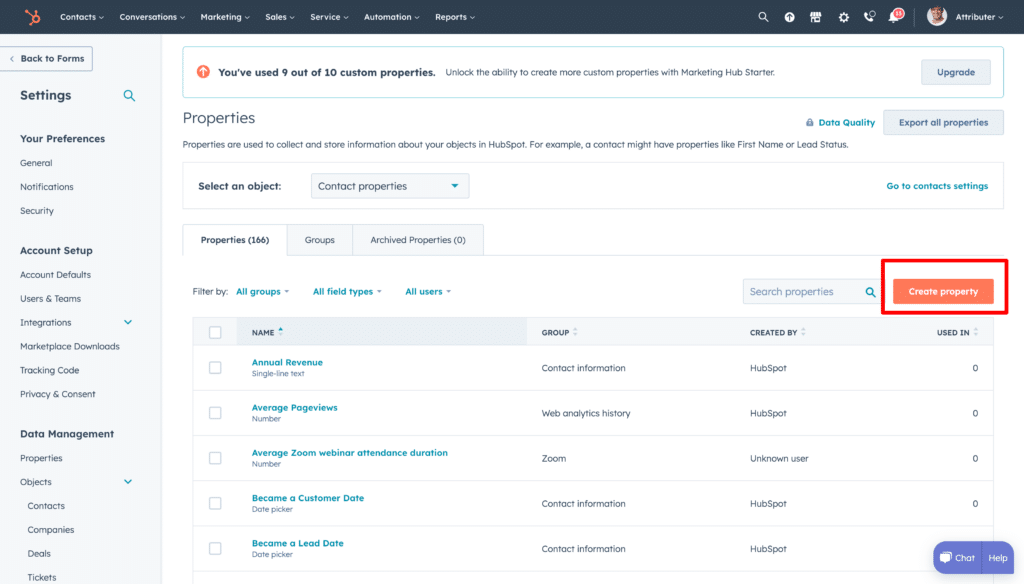
Once in the contact fields section, select the ‘Create Property’ button in the top right.
A sidebar will appear that looks a bit like this:
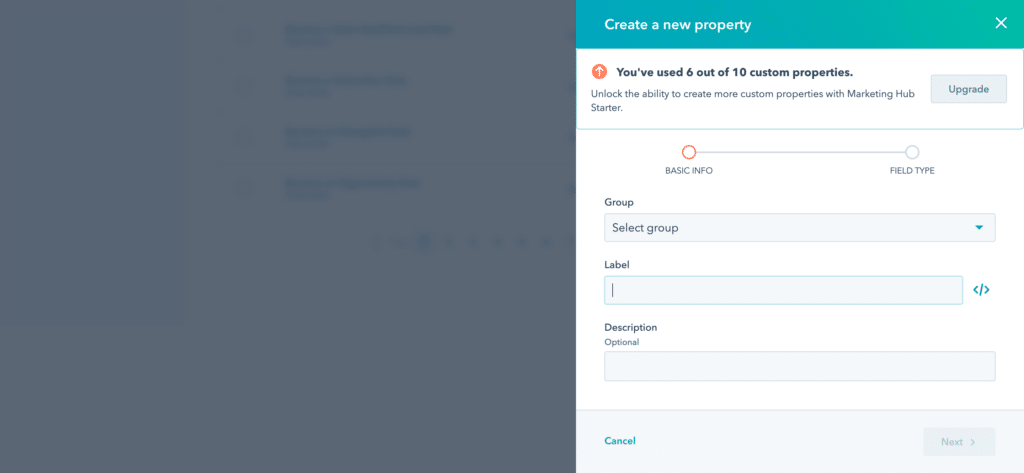
Enter the following information into the fields
- Group = Your choice as to where you want this field to appear on the Contact record
- Label = Channel
- Description: Add a description if you wish, but it isn’t necessary
Before clicking the ‘Next’ button, you need to click the </> icon next to the label field to open up the internal name settings:
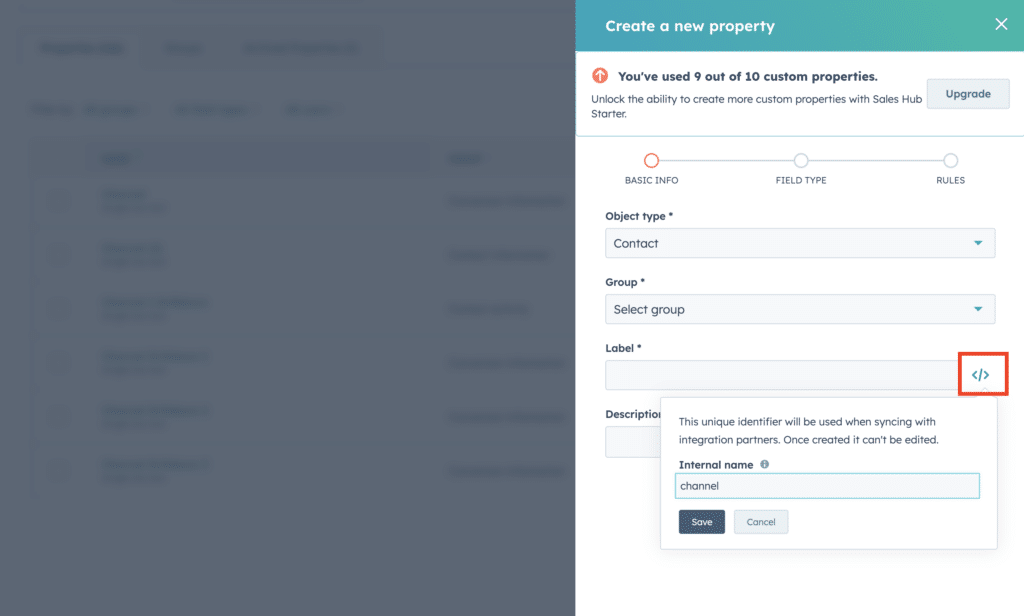
Once open, ensure the internal name for this field is ‘channel’ then select the Next button at the bottom of the screen to move to the next stage of field creation.
On this page, select the ‘Single Line Text’ option in the Field Type box.
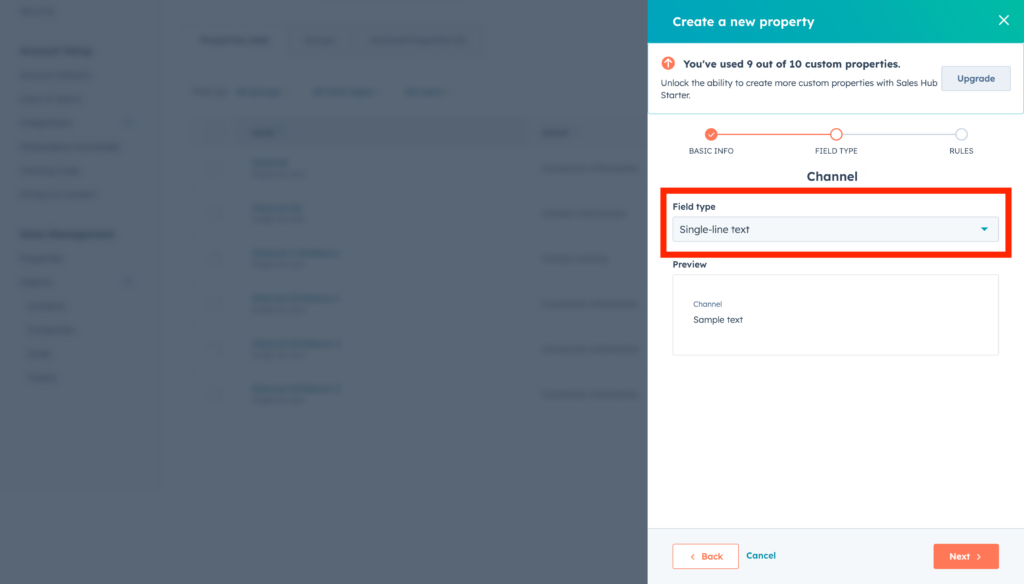
Then click the ‘Next’ button
On the final page of the form creation wizard (the Rules page), just leave the Default options selected.
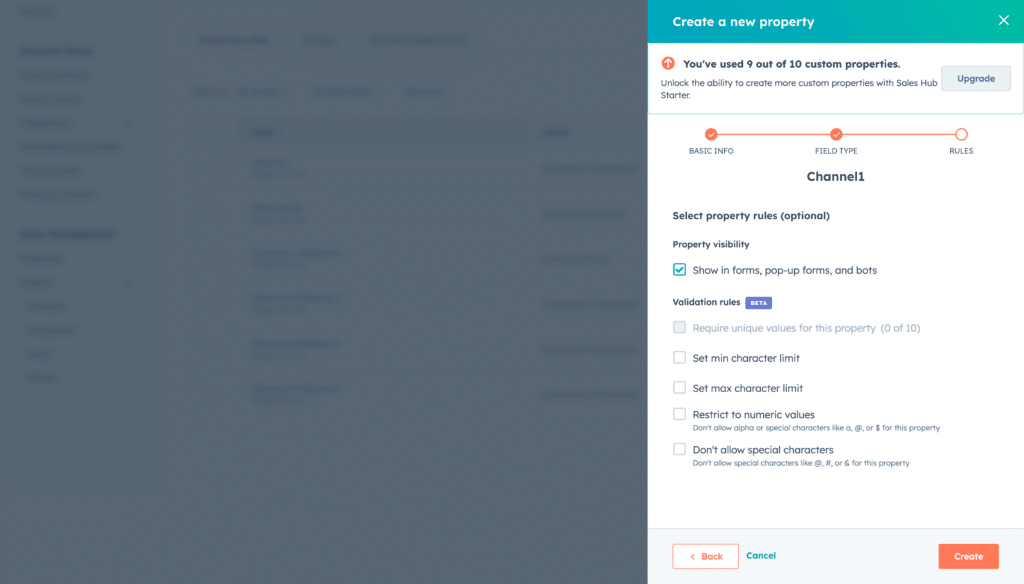
Finally, click the ‘Create’ button to finish creating the first custom field.
Step 2: Add the rest of the Contact Properties to Hubspot
Now that you understand how to add a new Property to the Contact object in Hubspot, we need to repeat this process a few more times to add all the properties Attributer needs to work.
The following details are what you’ll need to enter into the wizard:
Property #2
- Group = Your choice as to where you want this field to appear
- Label = Channel Drilldown 1
- Internal Name = channeldrilldown1 (Hubspot will by default add underscores between the words)
- Field Type = Single line text
- Rules = Leave Default
Property #3
- Group = Your choice as to where you want this field to appear
- Label = Channel Drilldown 2
- Internal Name = channeldrilldown2
- Field Type = Single line text
- Rules = Leave Default
Property #4
- Group = Your choice as to where you want this field to appear
- Label = Channel Drilldown 3
- Internal Name = channeldrilldown3
- Field Type = Single line text
- Rules = Leave Default
Property #5
- Group = Your choice as to where you want this field to appear
- Label = Landing Page
- Internal Name = landingpage
- Field Type = Single line text
- Rules = Leave Default
Property #6
- Group = Your choice as to where you want this field to appear
- Label = Landing Page Group
- Internal Name = landingpagegroup
- Field Type = Single line text
- Rules = Leave Default
Important: HubSpot auto-generates the internal name from the label you type. It will often add underscores between words (e.g. ‘channel_drilldown_1’ instead of ‘channeldrilldown1’). You need to manually edit the internal name during creation to remove any underscores and ensure it matches exactly what is listed above. HubSpot only lets you edit the internal name during creation, not after, so it’s important to get this right the first time
Step 3: Add some additional code to any page that contains the form
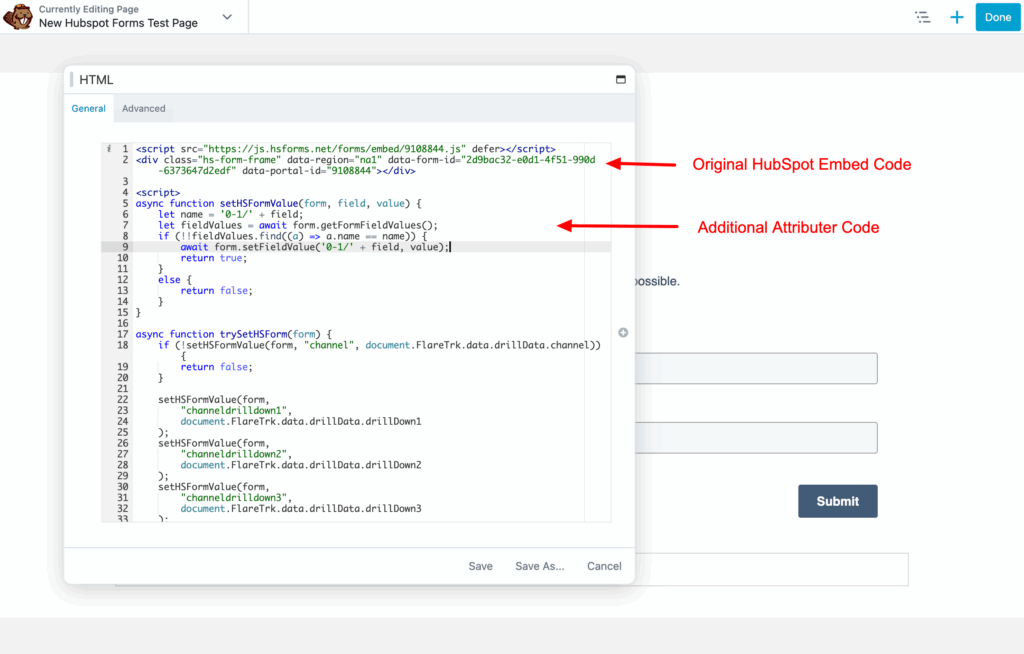
The final step is to add some additional code to any page that contains the HubSpot form you want Attributer to work with. The code you need to add is:
<script>
    /**
     * Attributer.io → HubSpot Unified Integration
     * One script for Forms (V3 + V4), Meetings, Chat, and Chatbots.
     * Pushes attribution data to HubSpot contact properties via _hsq identify.
     */
    (function () {
      'use strict';

      var TAG = '[Attributer > HubSpot] ';
      var DEBUG = true;
      var MAX_WAIT_MS = 15000;
      var POLL_INTERVAL_MS = 100;

      var MEETING_ORIGINS = [
        'https://meetings.hubspot.com',
        'https://meetings-eu1.hubspot.com',
        'https://meetings-na1.hubspot.com'
      ];

      var attributerData = null;
      var hasPushedWithEmail = false;

      function log(msg, data) {
        if (!DEBUG) return;
        if (data !== undefined) console.log(TAG + msg, data);
        else console.log(TAG + msg);
      }
      function warn(msg) {
        if (!DEBUG) return;
        console.warn(TAG + msg);
      }

      // -----------------------------------------------------------------
      // BUILD PROPERTIES
      // -----------------------------------------------------------------

      // HubSpot silently drops properties with the value "None",
      // so we replace it with "(none)" which HubSpot accepts.
      function hsVal(value) {
        if (!value) return null;
        return value === 'None' ? '(none)' : value;
      }

      function buildProperties(contactEmail) {
        if (!attributerData) return null;
        var props = {};
        if (contactEmail) props.email = contactEmail;

        // First-touch attribution (channel + drilldowns)
        if (attributerData.drillData) {
          if (attributerData.drillData.channel)    props.channel = hsVal(attributerData.drillData.channel);
          if (attributerData.drillData.drillDown1) props.channeldrilldown1 = hsVal(attributerData.drillData.drillDown1);
          if (attributerData.drillData.drillDown2) props.channeldrilldown2 = hsVal(attributerData.drillData.drillDown2);
          if (attributerData.drillData.drillDown3) props.channeldrilldown3 = hsVal(attributerData.drillData.drillDown3);
          if (attributerData.drillData.drillDown4) props.channeldrilldown4 = hsVal(attributerData.drillData.drillDown4);
        }

        // Page data
        if (attributerData.landing_url)        props.landingpage = attributerData.landing_url;
        if (attributerData.landing_page_group) props.landingpagegroup = attributerData.landing_page_group;
        if (attributerData.submitPage)         props.submitpage = attributerData.submitPage;

        // Click IDs — only pushed if data exists. HubSpot silently drops
        // any property without a matching contact property in the account,
        // so customers only need to create the ones they want to capture.
        if (attributerData.gclid)   props.gclid = attributerData.gclid;
        if (attributerData.fbclid)  props.fbclid = attributerData.fbclid;
        if (attributerData.msclkid) props.msclkid = attributerData.msclkid;
        if (attributerData.gbraid)  props.gbraid = attributerData.gbraid;
        if (attributerData.wbraid)  props.wbraid = attributerData.wbraid;

        // Session / visit data
        if (attributerData.conversiondays !== undefined && attributerData.conversiondays !== null) {
          props.conversiondays = attributerData.conversiondays;
        }
        if (attributerData.visits !== undefined && attributerData.visits !== null) {
          props.visits = attributerData.visits;
        }
        if (attributerData.id)     props.id = attributerData.id;
        if (attributerData.device) props.device = attributerData.device;

        return props;
      }

      // -----------------------------------------------------------------
      // PUSH TO HUBSPOT
      // -----------------------------------------------------------------

      function pushToHubSpot(contactEmail, source) {
        var props = buildProperties(contactEmail);
        if (!props || Object.keys(props).length === 0) {
          warn('No properties to push (' + source + ').');
          return;
        }
        var hsq = window._hsq = window._hsq || [];
        hsq.push(['identify', props]);
        hsq.push(['trackPageView']);
        if (contactEmail) hasPushedWithEmail = true;
        log('Pushed identify (' + source + '):', props);
      }

      // -----------------------------------------------------------------
      // WAIT FOR ATTRIBUTER
      // -----------------------------------------------------------------

      function waitForAttributer(callback) {
        var elapsed = 0;
        var interval = setInterval(function () {
          elapsed += POLL_INTERVAL_MS;
          if (document.FlareTrk && document.FlareTrk.data && document.FlareTrk.data.drillData) {
            clearInterval(interval);
            attributerData = document.FlareTrk.data;
            log('Attributer data found after ' + elapsed + 'ms.', attributerData);
            callback();
          } else if (elapsed >= MAX_WAIT_MS) {
            clearInterval(interval);
            warn('Timed out waiting for Attributer data after ' + MAX_WAIT_MS + 'ms.');
          }
        }, POLL_INTERVAL_MS);
      }

      // -----------------------------------------------------------------
      // HANDLER: HubSpot Forms V4 (new builder, cross-origin iframe)
      // -----------------------------------------------------------------

      function handleFormV4(event) {
        if (hasPushedWithEmail || !attributerData) return;
        log('V4 form submission detected.');

        try {
          var hsForm = window.HubSpotFormsV4 && window.HubSpotFormsV4.getFormFromEvent
            ? window.HubSpotFormsV4.getFormFromEvent(event)
            : null;

          if (!hsForm) {
            warn('Could not get form from V4 event.');
            return;
          }

          hsForm.getFormFieldValues().then(function (fields) {
            var emailField = null;
            for (var i = 0; i < fields.length; i++) {
              var name = fields[i].name || '';
              if (name.indexOf('email') > -1 && fields[i].value) {
                emailField = fields[i].value;
                break;
              }
            }
            if (emailField) {
              log('V4 form email extracted: ' + emailField);
              pushToHubSpot(emailField, 'Form V4');
            } else {
              warn('No email field found in V4 form submission.');
            }
          });
        } catch (e) {
          warn('Error handling V4 form event: ' + e.message);
        }
      }

      // -----------------------------------------------------------------
      // HANDLER: HubSpot Forms V3 (legacy hbspt builder)
      // -----------------------------------------------------------------

      function handleFormV3(event) {
        if (hasPushedWithEmail || !attributerData) return;
        if (!event.data || event.data.type !== 'hsFormCallback') return;
        if (event.data.eventName !== 'onFormSubmit') return;

        log('V3 form submission detected.');

        try {
          var formData = event.data.data;
          if (!formData || !Array.isArray(formData)) {
            warn('No form data in V3 submission.');
            return;
          }
          var emailField = null;
          for (var i = 0; i < formData.length; i++) {
            if (formData[i].name === 'email' && formData[i].value) {
              emailField = formData[i].value;
              break;
            }
          }
          if (emailField) {
            log('V3 form email extracted: ' + emailField);
            pushToHubSpot(emailField, 'Form V3');
          } else {
            warn('No email field found in V3 form submission.');
          }
        } catch (e) {
          warn('Error handling V3 form event: ' + e.message);
        }
      }

      // -----------------------------------------------------------------
      // HANDLER: HubSpot Meetings
      // -----------------------------------------------------------------

      function handleMeetings(event) {
        if (hasPushedWithEmail || !attributerData) return;
        if (MEETING_ORIGINS.indexOf(event.origin) === -1) return;
        if (!event.data || !event.data.meetingBookSucceeded) return;

        log('Meeting booking detected.');

        try {
          var email = event.data.meetingsPayload.bookingResponse.postResponse.contact.email;
          if (email) {
            log('Meeting email extracted: ' + email);
            pushToHubSpot(email, 'Meetings');
          } else {
            warn('No email in meeting payload.');
          }
        } catch (e) {
          warn('Could not extract email from meeting payload: ' + e.message);
        }
      }

      // -----------------------------------------------------------------
      // HANDLER: HubSpot Chat (page-load identify, no email needed)
      // -----------------------------------------------------------------

      function pushForChat() {
        log('Pushing attribution data for Chat/Chatbot (cookie-based).');
        pushToHubSpot(null, 'Chat/page-load');
      }

      // -----------------------------------------------------------------
      // INITIALISE
      // -----------------------------------------------------------------

      function init() {
        log('Initialising unified HubSpot integration.');

        waitForAttributer(function () {
          // Push on page load for Chat/Chatbot (cookie-based, no email)
          pushForChat();

          // Listen for V4 form submissions
          window.addEventListener('hs-form-event:on-submission:success', handleFormV4, false);
          log('V4 form listener registered.');

          // Listen for V3 form submissions AND Meetings (both use postMessage)
          window.addEventListener('message', function (event) {
            handleFormV3(event);
            handleMeetings(event);
          }, false);
          log('V3 form + Meetings listeners registered.');

          log('All listeners active. Ready for Forms, Meetings, and Chat.');
        });
      }

      if (document.readyState === 'loading') {
        document.addEventListener('DOMContentLoaded', init);
      } else {
        init();
      }
    })();
    </script>
You can place this anywhere on the page that contains the HubSpot form, but probably the easiest thing to do is place it directly beneath the standard HubSpot embed code in the same embed block/container.
If you have many HubSpot Forms on different pages of your website, you can also add this extra bit of code to the Head of your site so it loads on all pages. You can usually do this through the Settings section of your site or through tools like Google Tag Manager (likely in the same way you added the main Attributer code you got from your account).
Step 4: Test it works
To verify everything is working, open an incognito or private browsing window (this ensures a fresh session with no existing HubSpot cookies), visit your website with UTM parameters in the URL (i.e. yoursite.com?utm_medium=cpc&utm_source=google), and then submit a form.
After a minute or two, navigate to the contact record in HubSpot for the email you used and check that the Channel, Channel Drilldown 1, Channel Drilldown 2, Landing Page, and Landing Page Group fields are populated with the attribution data!
Can't find the answer you need? Contact us!
Our team are available to answer any questions you have
