Help Center
Add hidden fields to Keap forms
Attributer is a little bit of code you add to your website. It tracks where your visitors are coming from (I.e. Paid Search, Paid Social, Organic Search, etc) and writes the data into hidden fields you add to your forms. This data is then captured in Keap and can be used to run reports that show where your leads & customers are coming from.
In order for it to work, you need to add a series of hidden fields to your Keap forms. Here’s how to do it:
Step 1: Add 6x custom fields to the Contact object
To get started, you first need to add a number of custom fields to the Contact object in Keap.
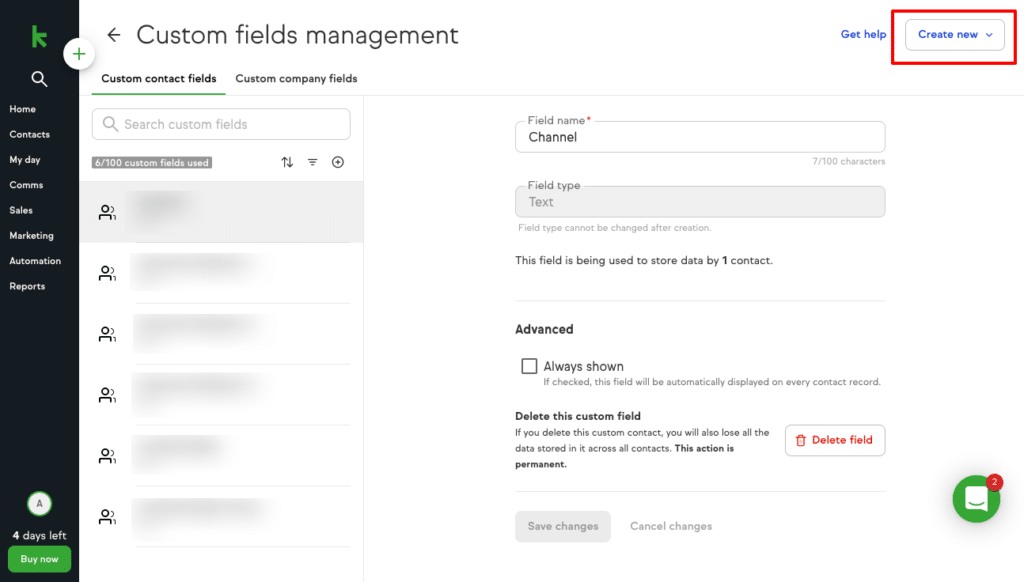
To do this, navigate to the Settings section and select the Custom Fields option.

Once on the Custom Fields page, select the ‘Create New’ button in the top right corner.
In the popup that appears, enter ‘Channel’ as the Field Name and select ‘Text’ as the Field Type.
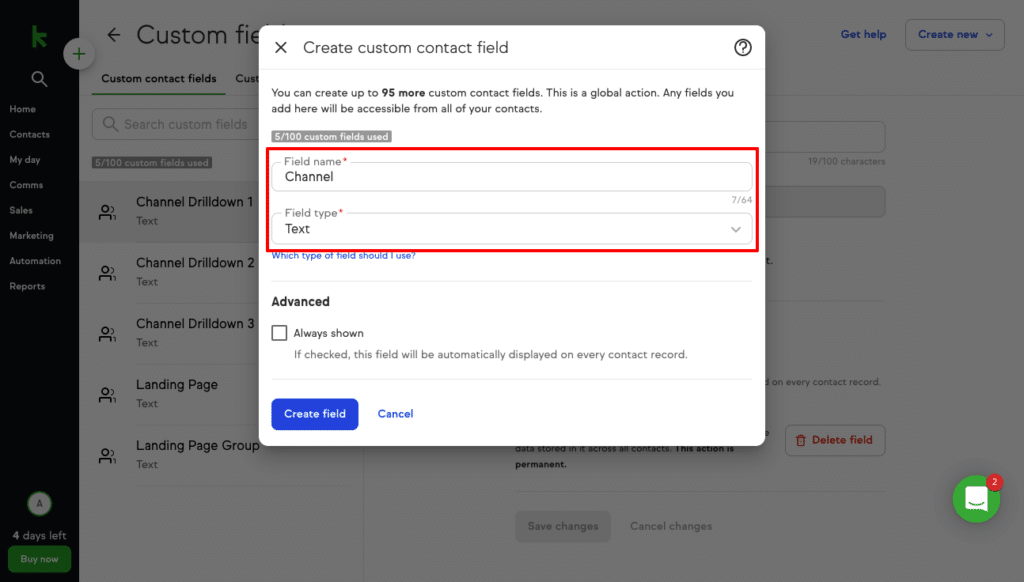
Once you’ve entered the above information, click the ‘Create Field’ button at the bottom of the popup to add the field.
Congratulations you have now successfully created a custom field called ‘Channel’ which is the first custom field that Attributer needs.
Now, you need to repeat this process a few more times to add all the required fields. Here’s the data you need for the following fields:
Field #2
- Field Name = Channel Drilldown 1
- Field Type = Text
Field #3
- Field Name = Channel Drilldown 2
- Field Type = Text
Field #4
- Field Name = Channel Drilldown 3
- Field Type = Text
Field #5
- Field Name = Landing Page
- Field Type = Text
Field #6
- Field Name = Landing Page Group
- Field Type = Text
Step 2: Add the new fields to your form
Now that you have added Attributer’s required fields to the contact object in Keap, you can now add them to your website forms.
It’s worth noting here though that Keap’s basic form building tool doesn’t have the features needed to work with Attributer (you can’t create hidden fields). However, the ‘Advanced Automation’ feature of Keap does allow you to create a form with hidden fields, so that is what we’ll use here.
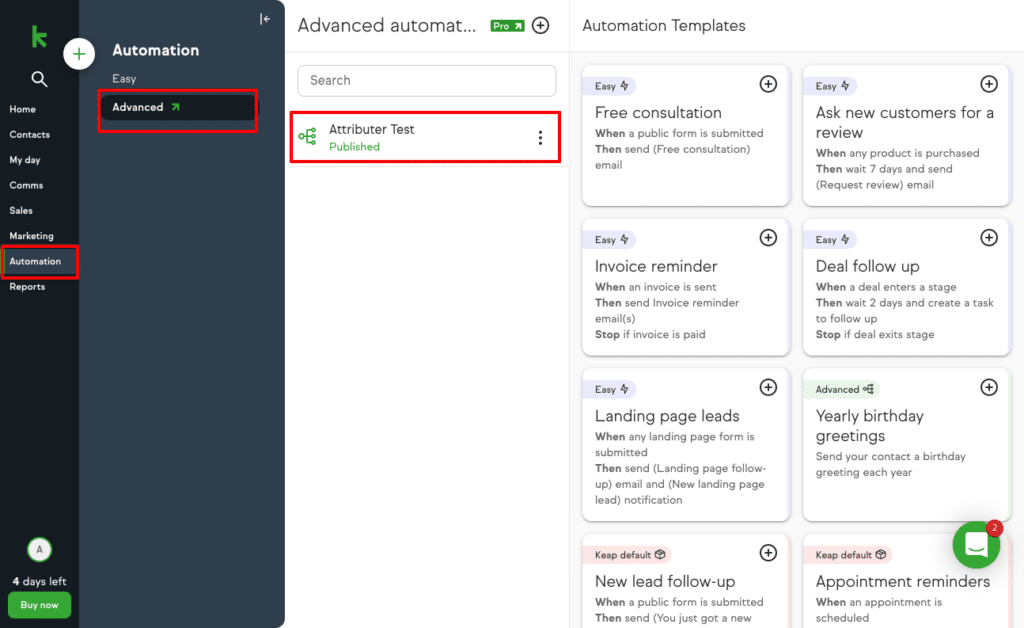
To add the new fields to your form, select the ‘Automation’ option from the left-hand menu, then select the ‘Advanced’ option from the secondary menu and finally select the Automation that includes the form you want Attributer to work with.
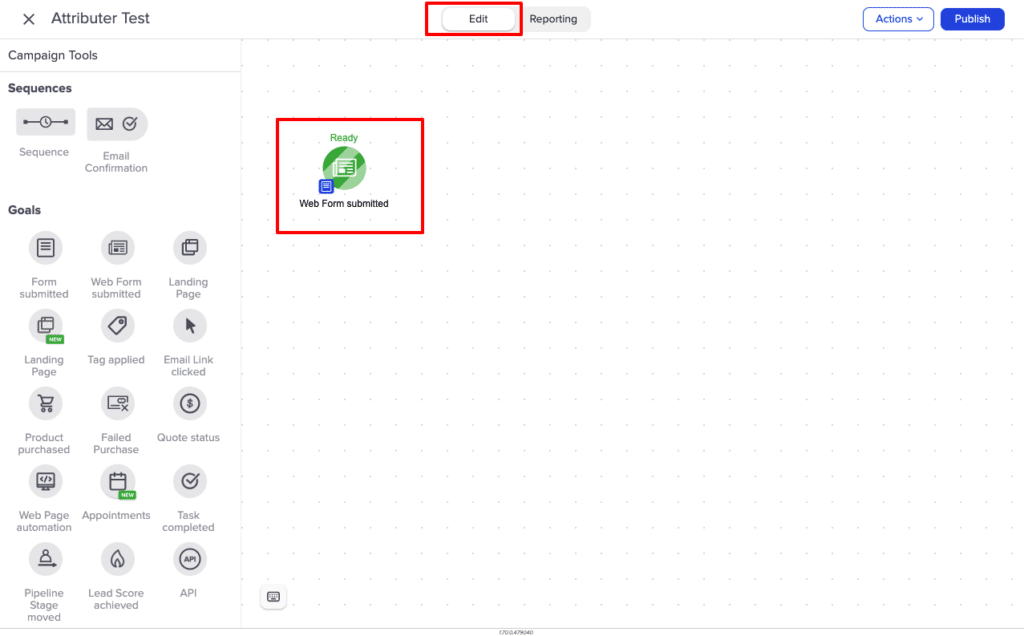
Once on inside the Automation editor, select the ‘Edit’ tab from the top and then click on the Web Form step that you want Attributer to work with.
Once the form editor opens, make sure you are on the Design tab in the main tab row and then select the ‘Field Snippets’ tab in the second row.
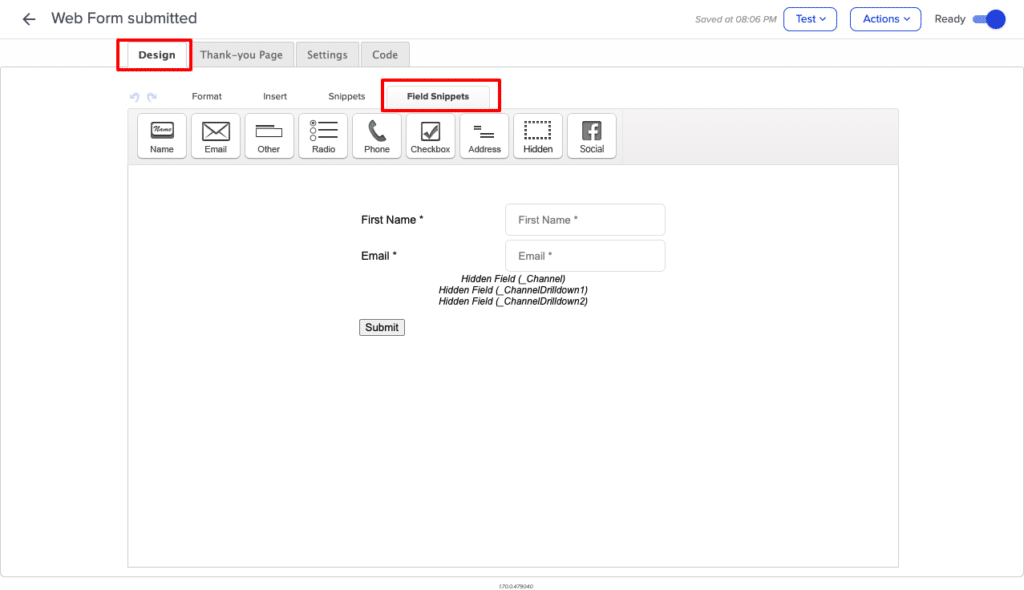
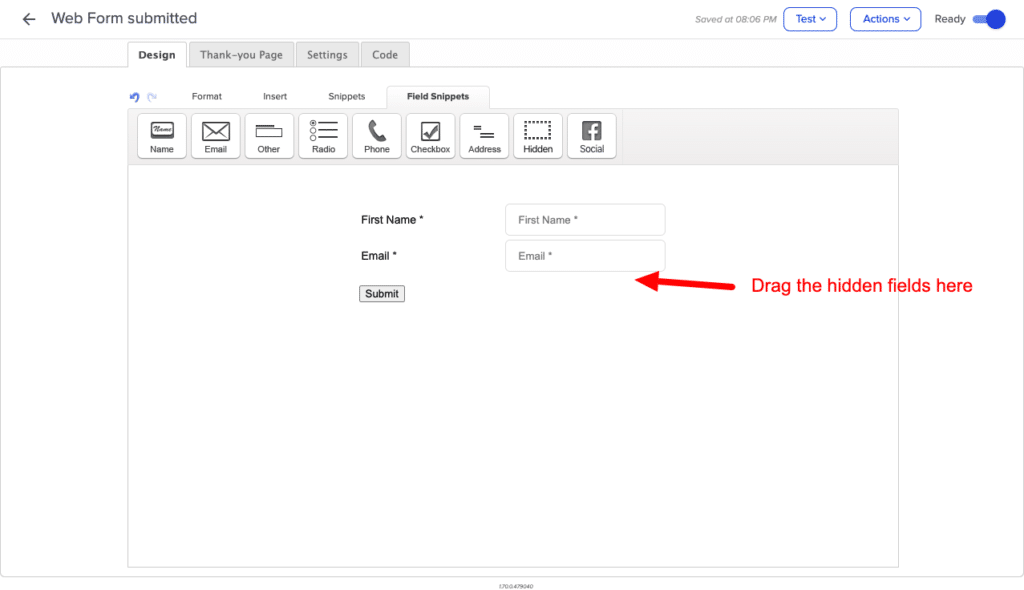
To add the fields Attributer requires to your form, select the ‘Hidden’ field type from the icon bar and drag it into your form. We generally recommend adding the hidden fields below the last visible form field but above the submit button.
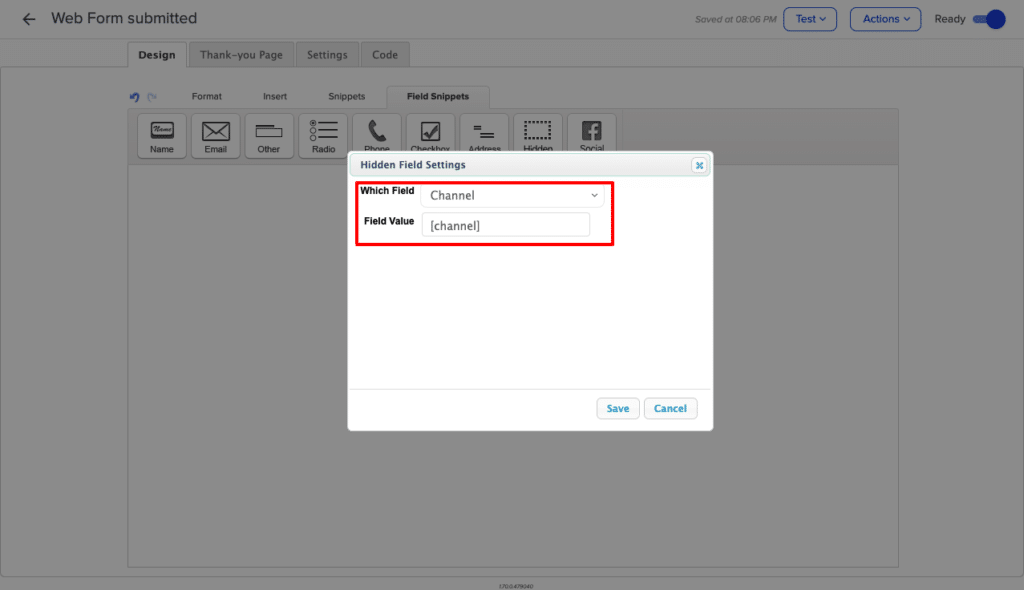
Once you have dragged in the first hidden field, a popup will appear with some options. Select the ‘Channel’ field and then enter ‘[channel]’ in the Field Value textbox like below.
Congratulations, you have now added your first hidden field to your form!
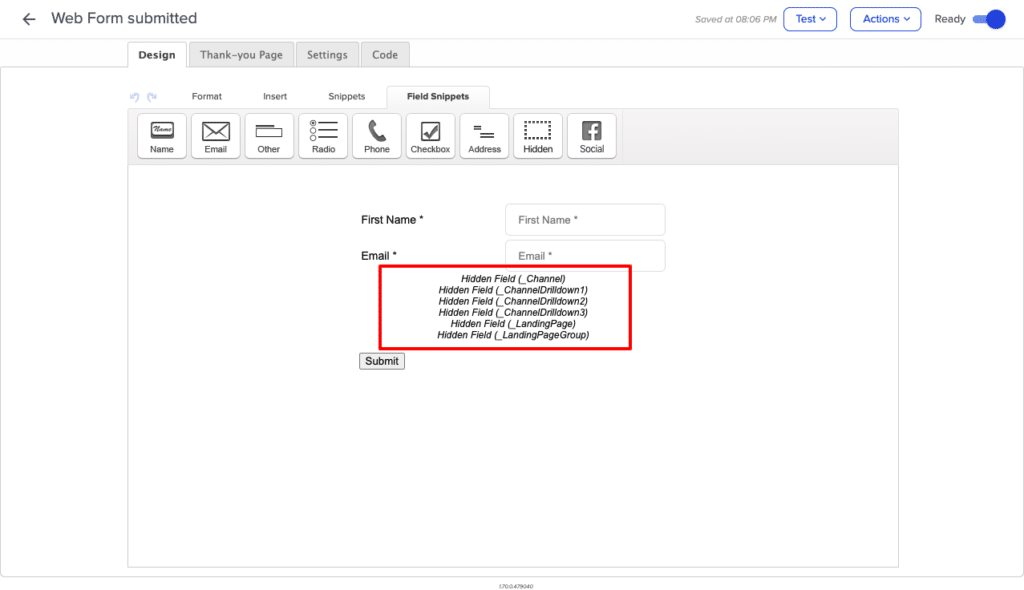
You now want to repeat this same process to add the rest of Attributer’s fields (I.e. Channel, Channel Drilldown 1, Landing Page, etc) to your form. The table below shows what you need to add to the Field Value option for each of Attributer’s required form fields:
| Attributer Field | Field Value |
| Channel | [channel] |
| Channel Drilldown 1 | [channeldrilldown1] |
| Channel Drilldown 2 | [channeldrilldown2] |
| Channel Drilldown 3 | [channeldrilldown3] |
| Landing Page | [landingpage] |
| Landing Page Group | [landingpagegroup] |
You should ultimately end up with a form that looks a bit like this:
Step 3: Embed the form in your website
Once you’ve added all the hidden fields, select the ‘Code’ tab from the main row of tabs and then select either ‘HTML Embed’ option or the ‘HTML Embed (No Styling)’ option. At this stage, Attributer only works with the ‘HTML Embed’ or ‘HTML Embed (No Styling)’ options and does not work with the ‘Javascript Snippet’ option.
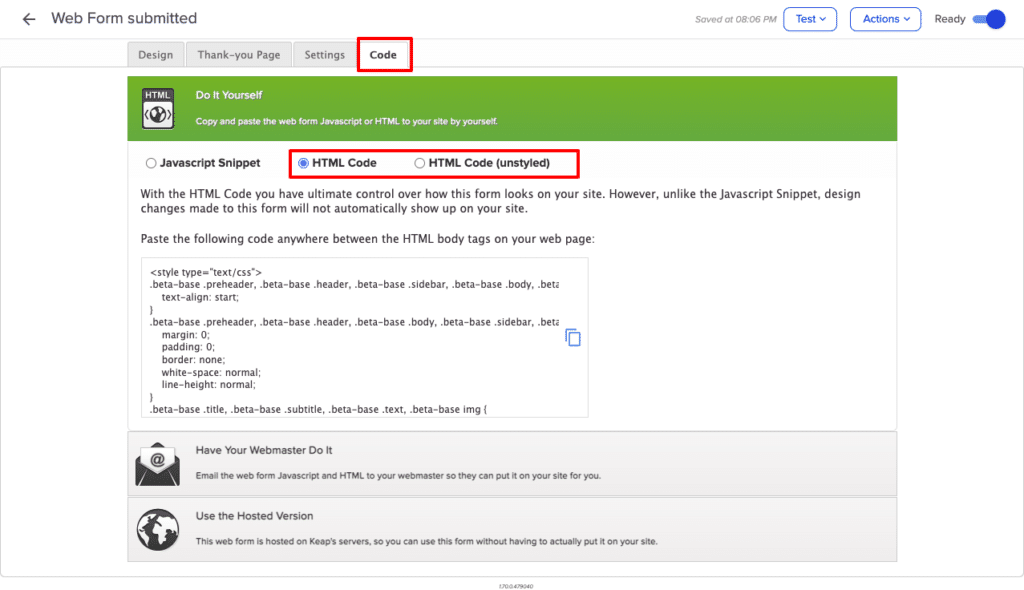
Copy the form code from the box and paste it onto your website to embed the form on your site.
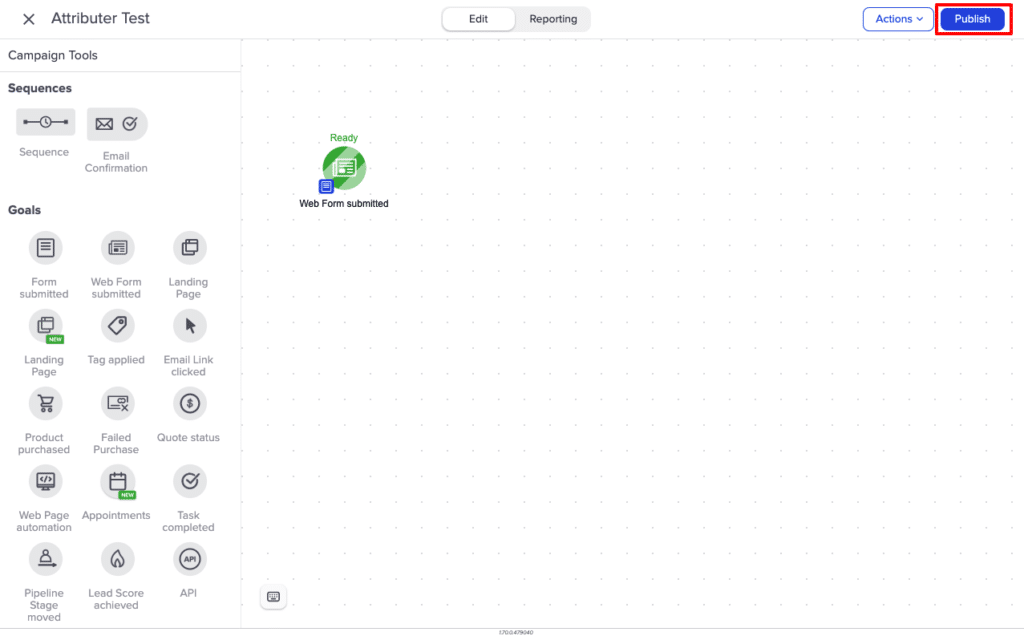
Step 3: Publish the automation
To save the changes you made to the form (the hidden fields you added), you need to go back to the Automation Editor and select the Publish button in the top right corner.
If you want, you can add some additional steps to the automation to automatically send a series of emails to anyone who completes the form. However, you don’t need to do this. Anyone who fills out the form you just created will be added as a Contact in your Keap account and the attribution data provided by Attributer will be added to their contact record.
Can't find the answer you need? Contact us!
Our team are available to answer any questions you have
