Help Center
Add hidden fields to Pipedrive forms

Attributer is a little bit of code you add to your website. It tracks where your visitors are coming from and writes the data into hidden fields you add to your forms, which is then captured by your Pipedrive form and stored against the person or deal in Pipedrive.
In order for it to work, you need to add a series of hidden fields to your Pipedrive forms. Here’s how to do it:
Step 1: Add new custom fields to your Person records
In your Pipedrive account, click your profile icon in the top right and select ‘Company settings’. In the left hand menu that appears, select ‘Data fields’ and then choose the ‘Person’ tab.
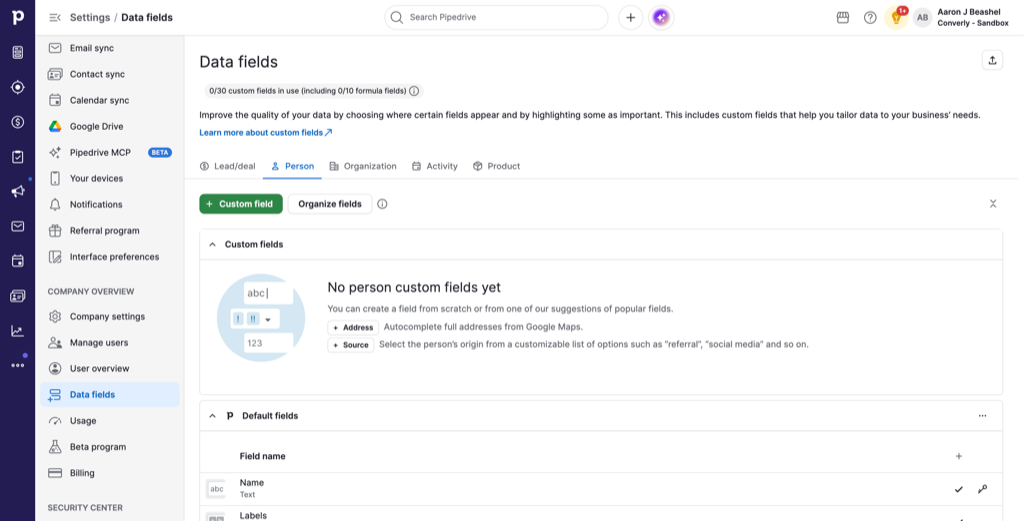
Once in the Person section, select the ‘Add custom field’ button and you will see a window appear that looks like this:
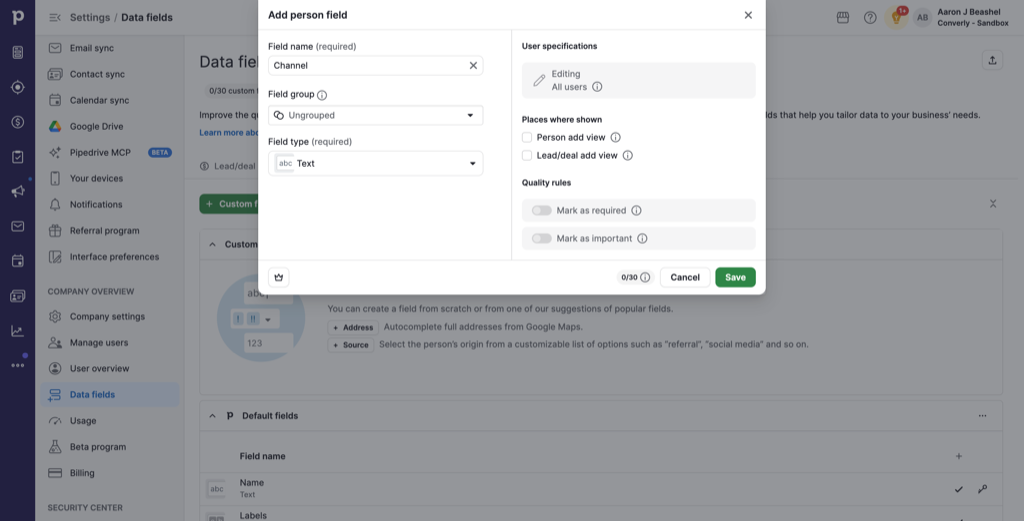
You’ll need to create 6x custom fields with the following details:
Custom Field #1
- Name = Channel
- Type = Text
Custom Field #2
- Name = Channel Drilldown 1
- Type = Text
Custom Field #3
- Name = Channel Drilldown 2
- Type = Text
Custom Field #4
- Name = Channel Drilldown 3
- Type = Text
Custom Field #5
- Name = Landing Page
- Type = Text
Custom Field #6
- Name = Landing Page Group
- Type = Text
You should select the other options for each field as you see fit for your particular Pipedrive setup.
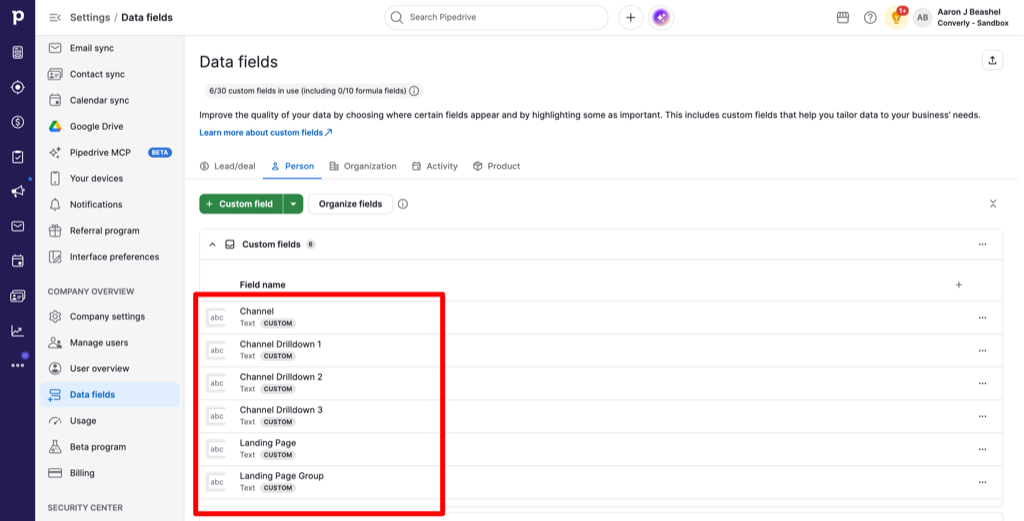
Ultimately, you should end up with custom fields that look like this:
Step 2: Open the form you want Attributer to work with
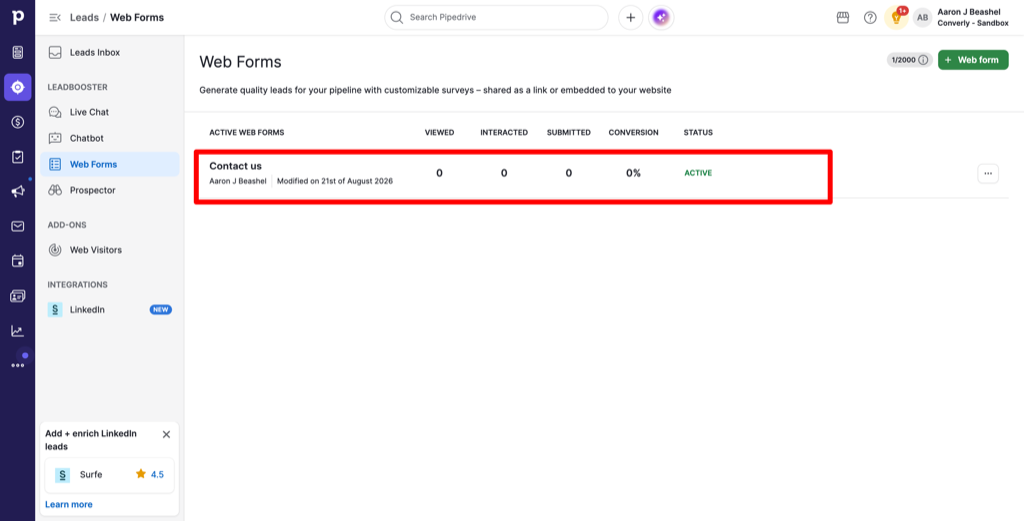
In your Pipedrive account, select the ‘Leads’ menu option in the left hand menu and then select ‘Web forms’. Once in the Web forms section, select the form you want Attributer to work with.
Step 3: Add 6x ‘Hidden’ fields to the form
Now that the form builder is open, select the ‘Add field’ button and choose ‘Hidden field’. A panel will appear where you choose which Pipedrive field to fill and where the value should come from.
For each field, you’ll want to set the source to ‘JavaScript variable’ and then type in the variable name exactly as shown below.
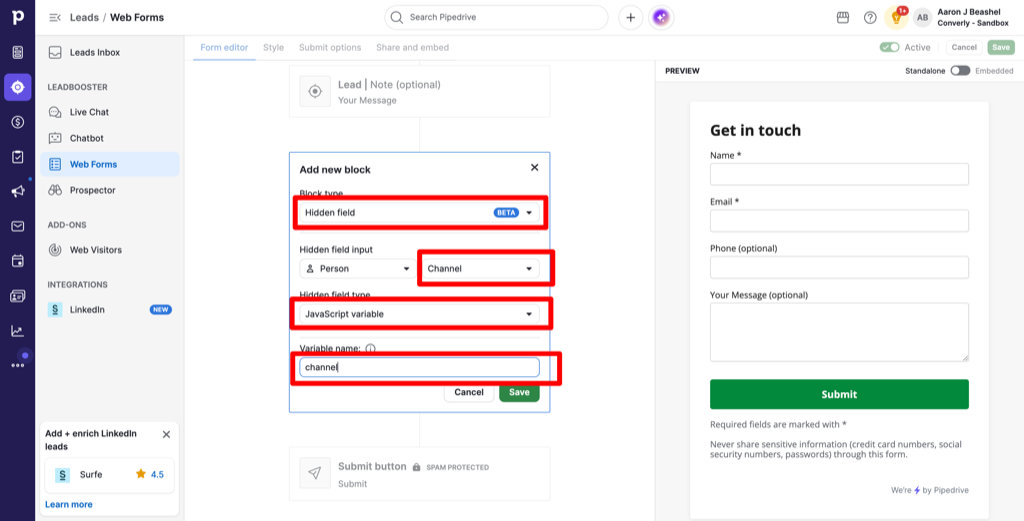
You’ll need to add 6x fields with the following configuration:
Field #1
- Hidden Field Input = Person | Channel
- Value source = JavaScript variable
- Variable name = channel
Field #2
- Hidden Field Input = Person | Channel Drilldown 1
- Value source = JavaScript variable
- Variable name = channeldrilldown1
Field #3
- Hidden Field Input = Person | Channel Drilldown 2
- Value source = JavaScript variable
- Variable name = channeldrilldown2
Field #4
- Hidden Field Input = Person | Channel Drilldown 3
- Value source = JavaScript variable
- Variable name = channeldrilldown3
Field #5
- Hidden Field Input = Person | Landing Page
- Value source = JavaScript variable
- Variable name = landingpage
Field #6
- Hidden Field Input = Person | Landing Page Group
- Value source = JavaScript variable
- Variable name = landingpagegroup
Ultimately, you’ll want to end up with a form that looks like this:
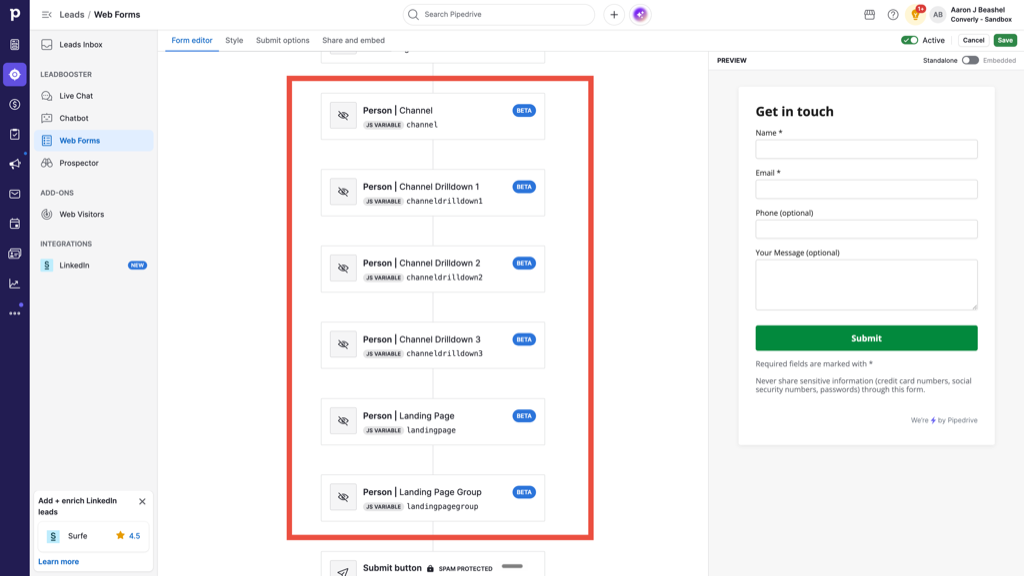
You’ll want to make sure the variable names are exactly as shown above, all lowercase and with no spaces, as that is what the Attributer code looks for.
Once you’re done, remember to publish your changes to the form.
Step 4: Add a small piece of extra code to your website
Pipedrive forms work a little differently to most other form tools, so there’s one extra step.
When you embed a Pipedrive form, you’re not really adding the form to your website. You’re basically adding a window (known as an iFrame), and the form itself displays inside that window. Because the form lives inside that window rather than on your page, Attributer can’t write into its fields the way it does with most other form tools.
This is where the ‘JavaScript variable’ setting comes in. Pipedrive forms allows tools like Attributer to write data into a JavaScript object on the page, and when the form is submitted it pulls the data from that object and saves it with the form submission.
This is what the code below does. It writes the Attributer data into the JavaScript object so Pipedrive forms can grab it at submission time. Copy the code below and add it to any page that has a Pipedrive form on it:
<script>
(function(){
var start=Date.now();
function publish(){
var d=document.FlareTrk&&document.FlareTrk.data;
if(!d||!d.drillData)return false;
var k=d.drillData,c=d.customFields||{},n,v;
var f={channel:k.channel,channeldrilldown1:k.drillDown1,channeldrilldown2:k.drillDown2,channeldrilldown3:k.drillDown3,channeldrilldown4:k.drillDown4,gclid:d.gclid,fbclid:d.fbclid,msclkid:d.msclkid,gbraid:d.gbraid,wbraid:d.wbraid,device:d.device,id:d.id,landingpage:d.landing_url,submitpage:d.submitPage,landingpagegroup:d.landing_page_group,conversiondays:d.conversiondays,visits:d.visits};
for(n in c){if(Object.prototype.hasOwnProperty.call(c,n))f["custom"+n]=c[n];}
if(!window.pd_webform||typeof window.pd_webform!=="object")window.pd_webform={};
for(n in f){
if(!Object.prototype.hasOwnProperty.call(f,n))continue;
v=f[n];
if(v===null||v===undefined)v="";
else if(typeof v!=="string"&&typeof v!=="number"&&typeof v!=="boolean")v=String(v);
window.pd_webform[n]=v;
}
console.log("Attributer for Pipedrive: attribution data ready.",window.pd_webform);
return true;
}
if(publish())return;
var t=setInterval(function(){if(publish()||Date.now()-start>30000)clearInterval(t);},300);
})();
</script>
This code doesn’t replace the Attributer code you got from your account. It’s an additional bit of code specifically for customers using Pipedrive forms.
This code needs to be present on any page where there is a Pipedrive form, but it’s also harmless to load it on a page where there isn’t. So you can add it to a specific page (usually by adding some sort of Code block to the page) or you can add it to all pages of your website (in the same way you added the main Attributer code)
Step 5: Check that it’s working
Visit a page with your form on it, fill the form in and submit it. Then open the person’s record in Pipedrive and you should see the six fields filled in with details of where that visit came from.
If the fields come through empty, the most common causes are a variable name that doesn’t match exactly, or changes to the form that haven’t been published yet.
A final note
We understand editing code can be a bit scary, so if you need help then we are happy to jump on a video call with you and walk you through it. Feel free to contact us here.
Can't find the answer you need? Contact us!
Our team are available to answer any questions you have