Help Center
Add hidden fields to Salesforce Web to Lead forms
Salesforce is one of the most popular CRM tools on the planet, and it comes with a basic but functional form builder that you can use to capture leads on your website and import them into Salesforce.
Attributer can work with Salesforce’s Web to Lead forms to capture marketing attribution information on each of your leads. Here’s how to set it up.
Step 1: Add 6x custom fields to the Lead Object
To get started, you first need to add a number of custom fields to the Lead object in Salesforce.
Navigate to the ‘Setup’ app within your Salesforce account and use the search box to search for ‘Lead’. In the dropdown that appears, select the Lead Object option to navigate the the settings section for the Lead object.
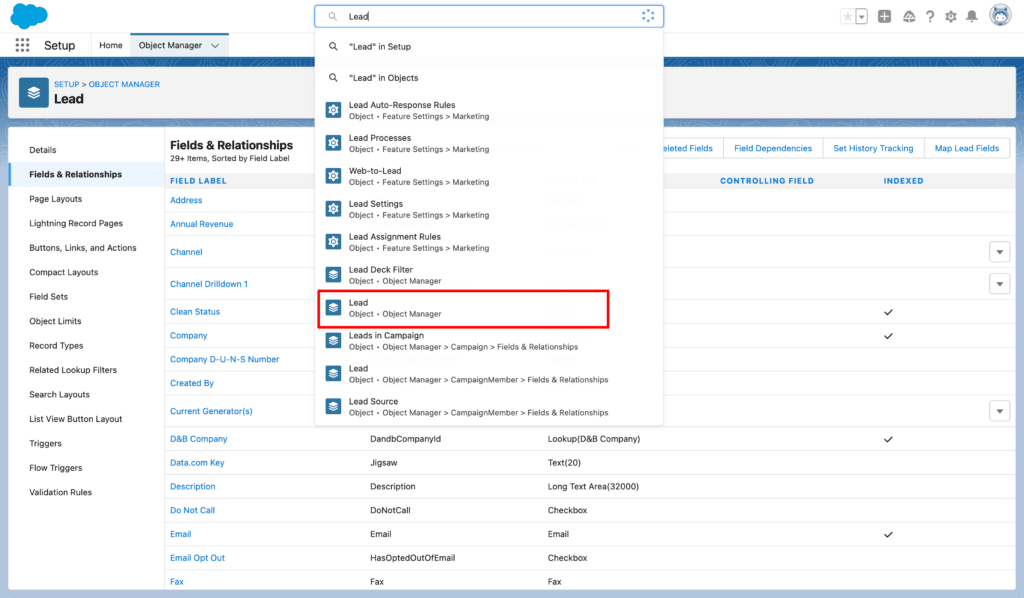
Once in the settings section for the Lead object, select the Fields & relationships option from the left-hand menu and then select the ‘New’ button in the top right.

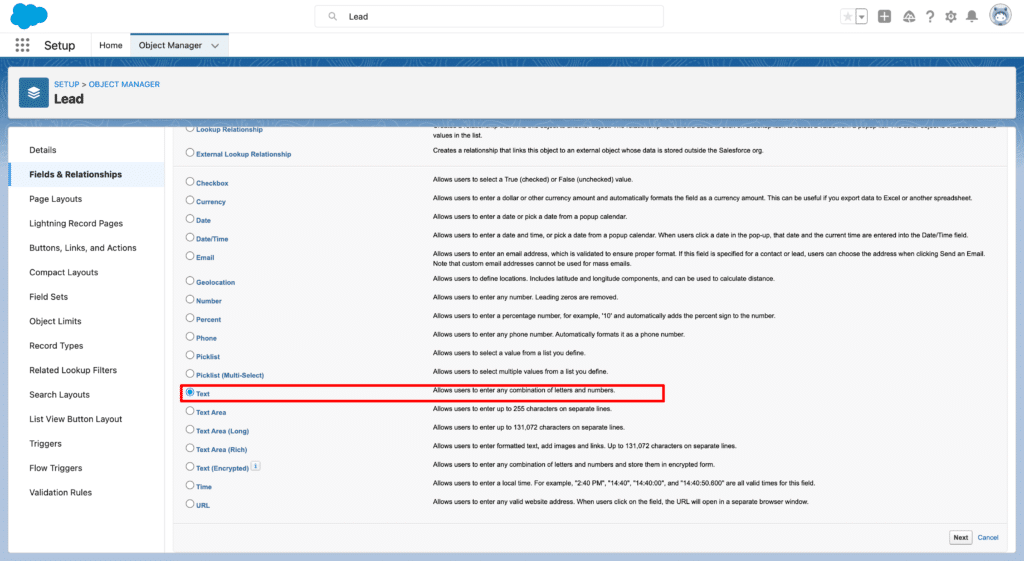
On the screen that appears, select the ‘Text’ option to make this new custom field you are adding a text field.
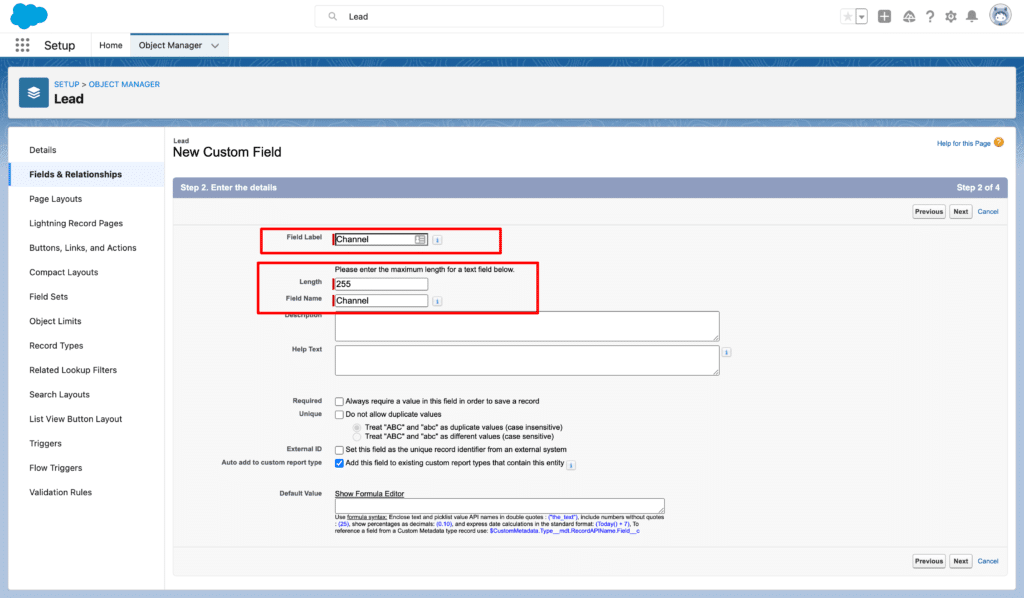
Once completed, you’ll be redirected to a screen where you can specify a name for the field. Name the field ‘Channel’ by entering it into the ‘Field Label’ textbox and then set the ‘Length’ to ‘255’ (which is the maximum length for a text field in Salesforce). Finally, the Field Name should have automatically been generated, you can leave this as is.
Your options should look like this:
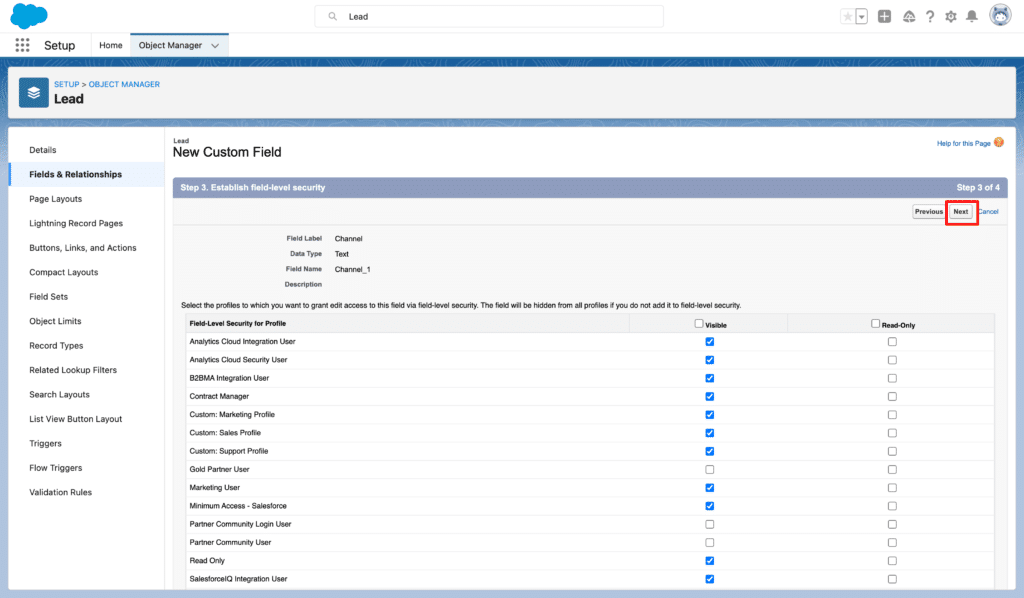
Once you’ve enter the above information, click the ‘Next’ button in the top right corner. This should take you to a screen where you can establish field-level security permissions. This determines who can see and edit the values of this custom field in Salesforce and which boxes to tick or not tick will be specific to your Salesforce setup. If you’re not sure what this means, just leave the default options ticked and click ‘Next’.
Finally, you will be directed to a set of options that allow you to choose which Lead Layouts you want this field to appear on. Again, what to choose here will be specific to your Salesforce setup but if you don’t know what this means just leave them all ticked (which will mean this field shows on all Lead Layouts) and click ‘Save’
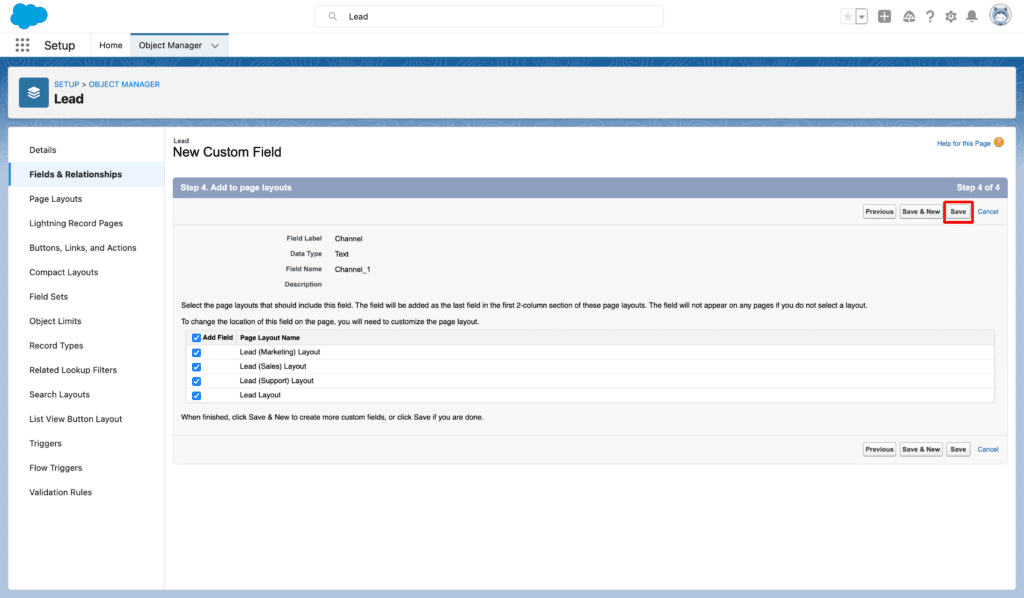
Congratulations you have now successfully created a custom field called ‘Channel; which is the first custom field that Attributer needs.
Now, you need to repeat this process a few more times to add all the required fields. Here’s the data you need for the following fields:
Channel Drilldown 1
- Field Label = Channel Drilldown 1
- Length = 255
Channel Drilldown 2
- Field Label = Channel Drilldown 2
- Length = 255
Channel Drilldown 3
- Field Label = Channel Drilldown 3
- Length = 255
Landing Page
- Field Label = Landing Page
- Length = 255
Landing Page Group
- Field Label = Landing Page Group
- Length = 255
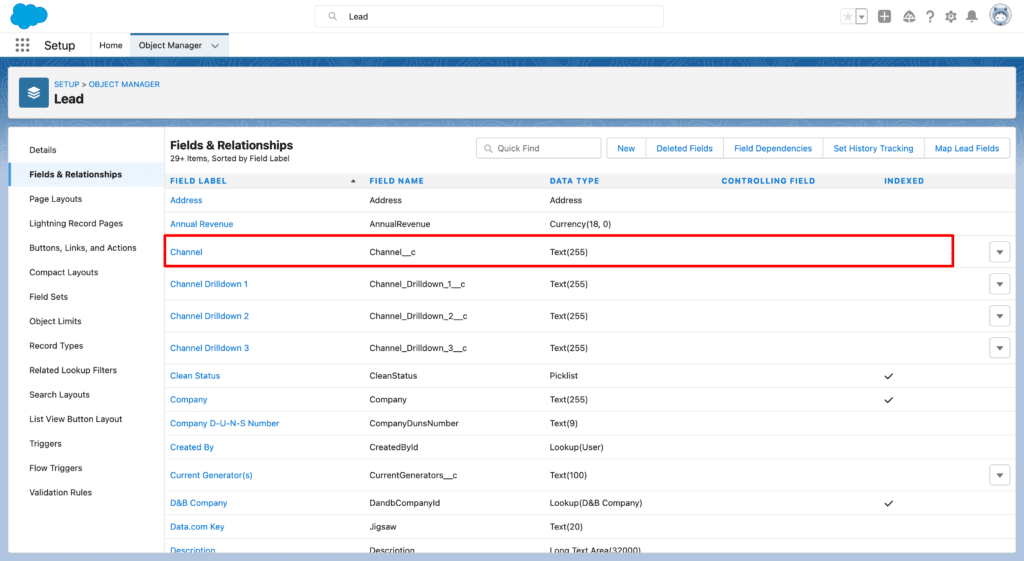
Step 2: Get the ID of each custom field you added
The next step is to get the ID number for each of the custom fields you just added. The easiest way to do this is to select the field from the list of fields:
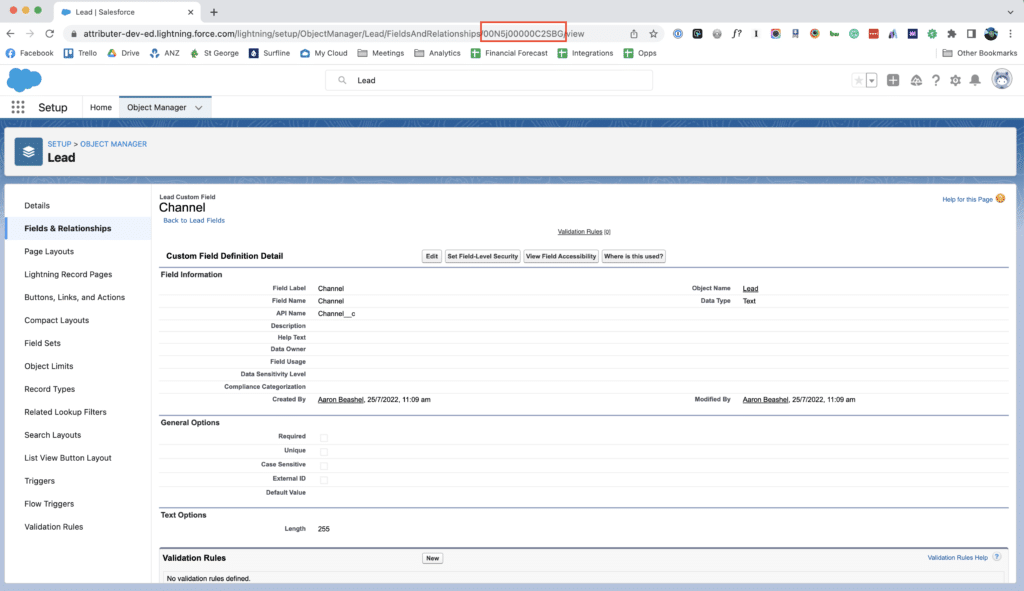
Then once you’re on the Field Detail page, look at the URL in your web browser and copy the random series of numbers and letters you see (like the screenshot below) and paste them somewhere for later use.
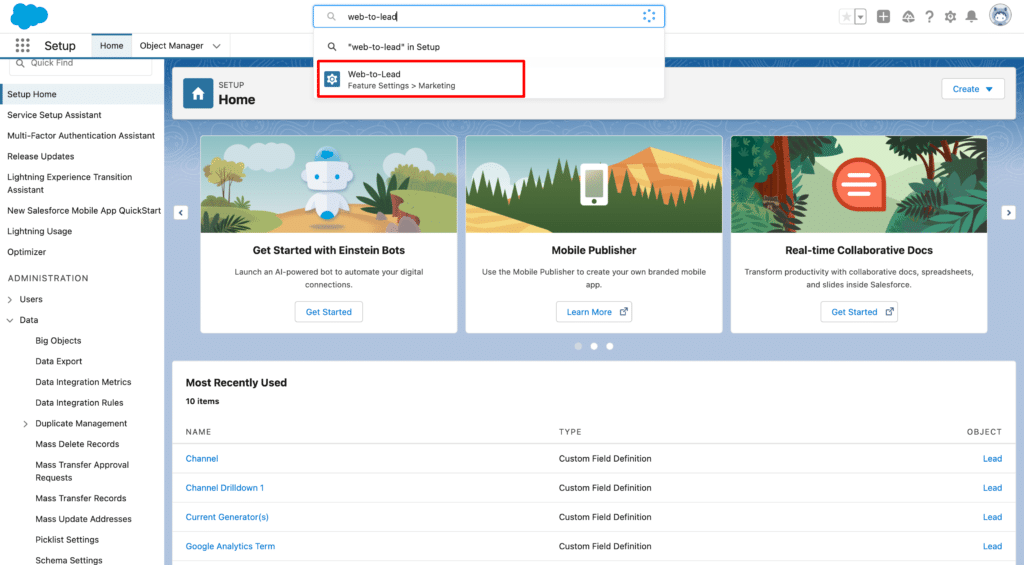
Step 3: Generate a Web to Lead form
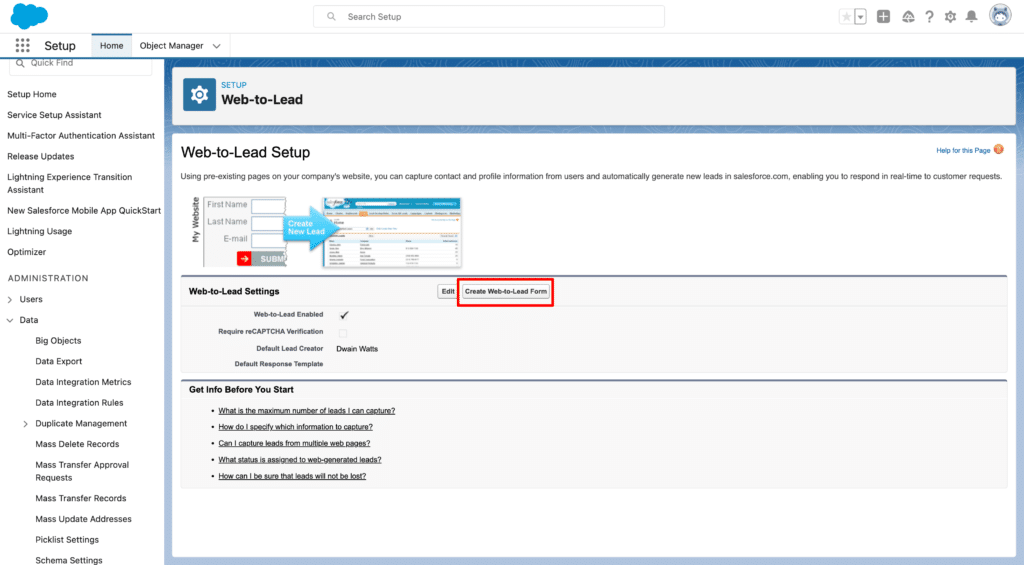
Within the Setup app, search for ‘Web-to-lead’ in the search box and select the result that appears.
Once on the Web to Lead settings page, select the ‘Create Web to Lead Form’ option as seen in the screenshot below. Note that Salesforce does not give you the ability to edit existing forms, so if you already have one on your site then you’ll need to generate a new one for Attributer as opposed to editing your existing one.
Once inside the Web to Lead form editor, select the fields you wish to display in your form (I.e. Name, email, phone, etc) as well as the URL to redirect people to upon form submission.
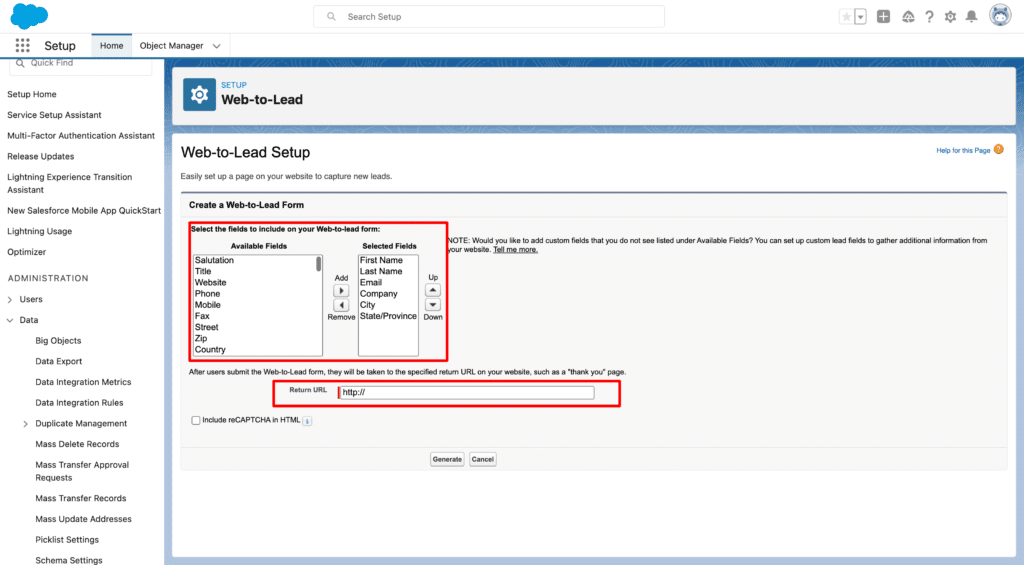
Once you’ve finished configuring your form, click the ‘Generate’ button at the bottom of the page.
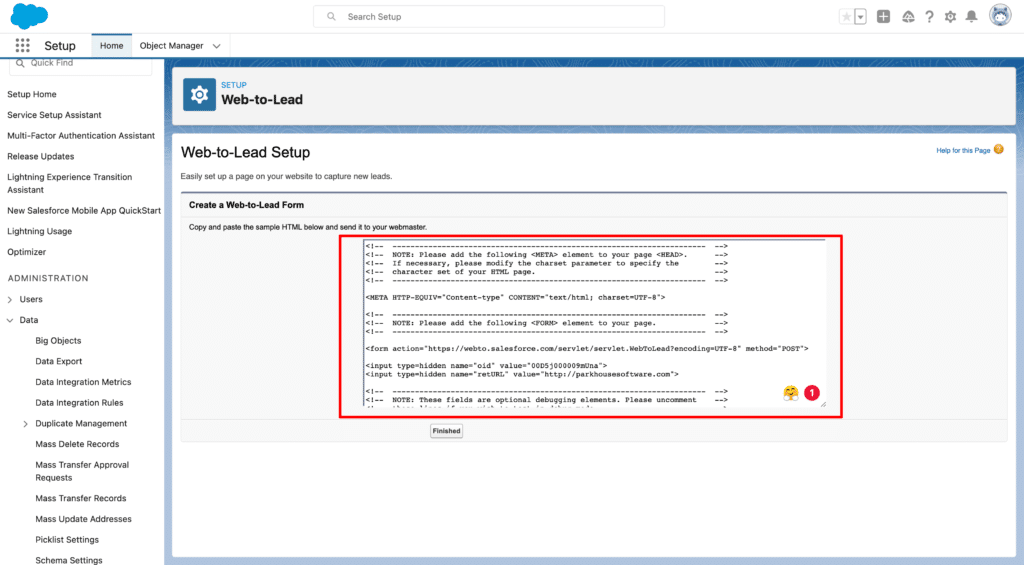
Once you’ve clicked Generate, you’ll be redirected to a page that shows your form code. Copy the code you see in the box.
Step 3: Edit the Web to Lead form code
Paste the code you just copied into some sort of text editing tool (Microsoft Word, Google Docs, etc) so that you can make some changes to it.
You’ll need to copy the below code snippet and paste it into the code you got from Salesforce.
<input type="hidden" name="XXXXXXXXXXXXXXX" id="XXXXXXXXXXXXXXX" value="[channel]">

<input type="hidden" name="XXXXXXXXXXXXXXX" id="XXXXXXXXXXXXXXX" value="[channeldrilldown1]">

<input type="hidden" name="XXXXXXXXXXXXXXX" id="XXXXXXXXXXXXXXX" value="[channeldrilldown2]">

<input type="hidden" name="XXXXXXXXXXXXXXX" id="XXXXXXXXXXXXXXX" value="[channeldrilldown3]">

<input type="hidden" name="XXXXXXXXXXXXXXX" id="XXXXXXXXXXXXXXX" value="[landingpage]">

<input type="hidden" name="XXXXXXXXXXXXXXX" id="XXXXXXXXXXXXXXX" value="[landingpagegroup]">
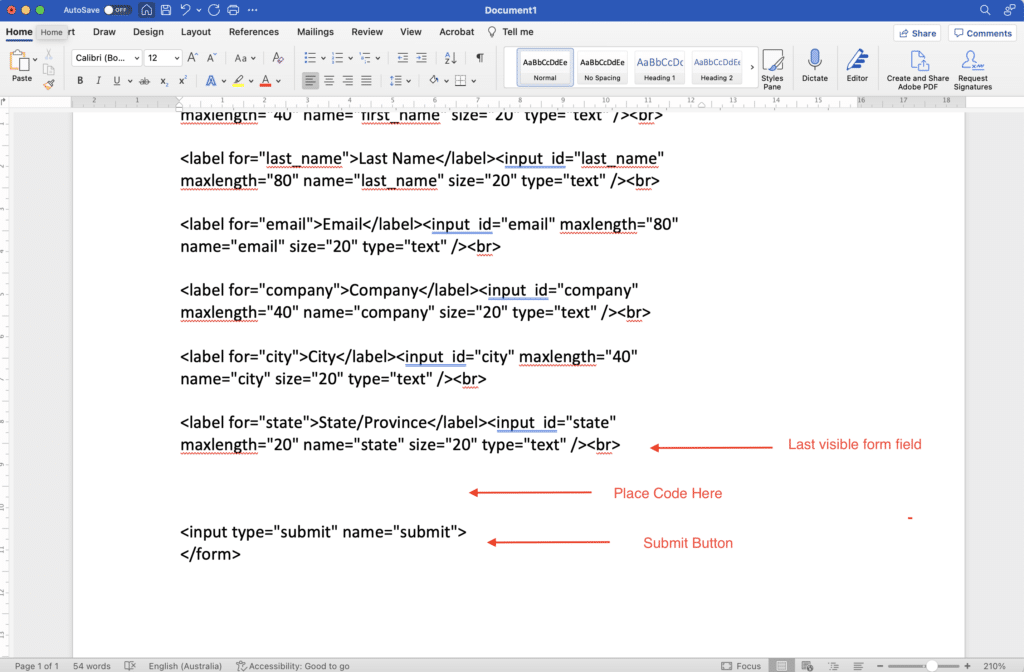
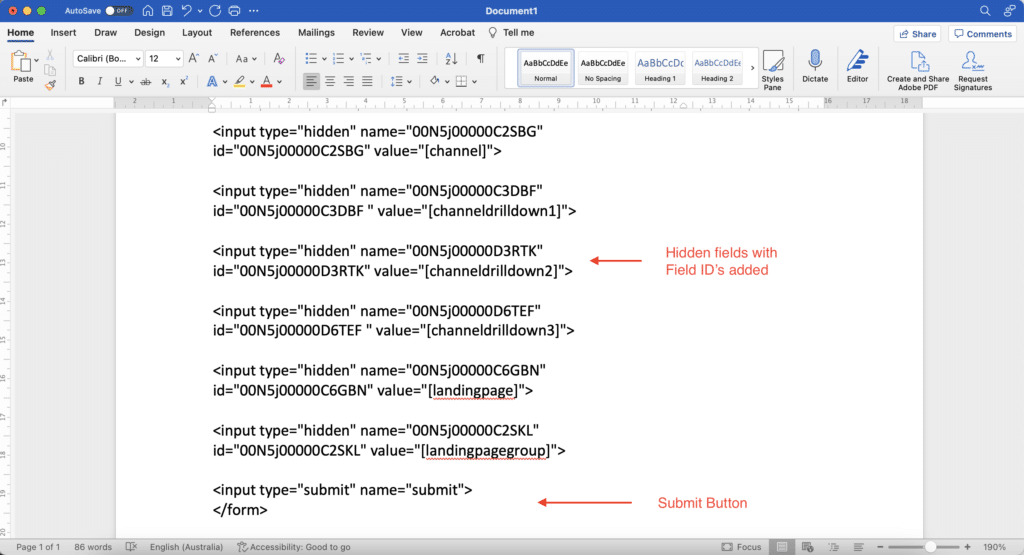
You should paste the above code below the last field you want visible on your form but above the Submit button.
FInally, you’ll need to replace the variables (I.e. the XXXXXXXXXXX) in the form code you just pasted in with the real ID numbers of the customs field you copied before.
Ultimately, you’d want your code to look something like this:
Step 4: Paste the edited code into your website
Once you’ve finished making edits to the Web to Lead form code, you can copy it out of the text editor where you made the changes and paste in onto your website.
We know that making changes to code can be overwhelming, so if you need some help we would be happy to jump on a video call and go through it with you. Feel free to book a time that works for you here.
Can't find the answer you need? Contact us!
Our team are available to answer any questions you have
