Help Center
Add hidden fields to Zoho Forms
Attributer is a little bit of code you add to your website. It tracks where your visitors are coming from (Paid Search, Paid Social, Organic Search, etc) and writes the data into hidden fields you add to your forms which is then captured by Zoho Forms and can be sent to your CRM and other tools.
In order for it to work, you need to add a series of hidden fields to your Zoho Forms. Here’s how to do it:
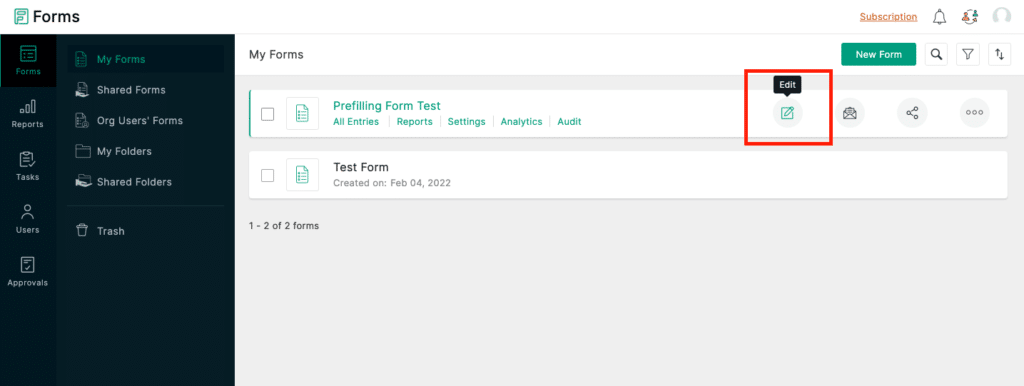
Step 1: Open the form you want Attributer to work with
In your Zoho Forms admin panel, locate the form you want Attributer to work with and click the ‘Edit’ button.
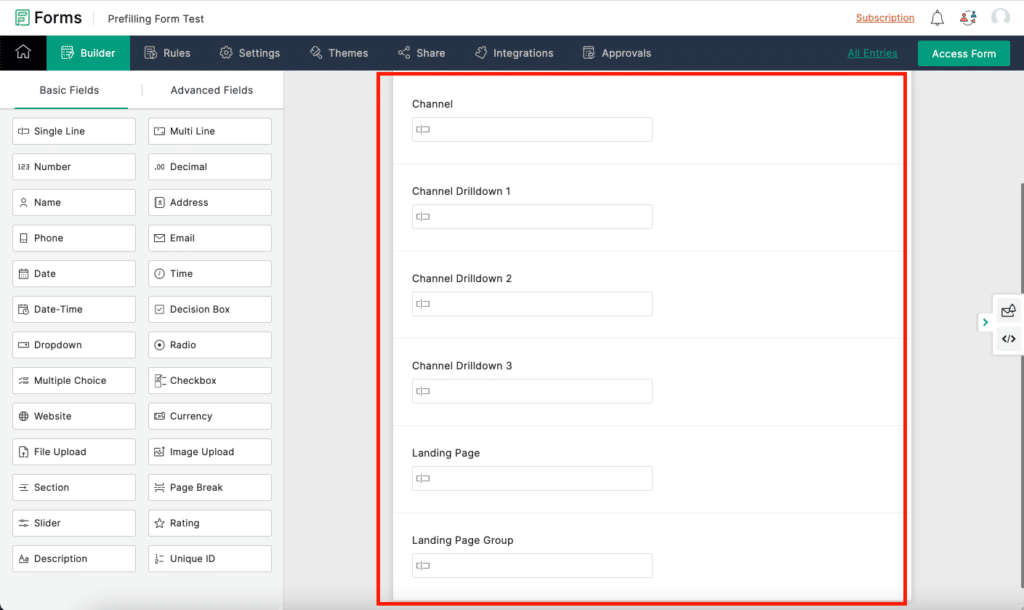
Step 2: Add 6x ‘Single Line’ fields to the form
Now that the form builder is open, drag and drop six ‘Single line’ fields into your form. You can place these fields wherever you want in the form, but we recommend placing them at the end after the last field your users will actually complete.
You can find the ‘Single Line’ field at the top of the left-hand panel.
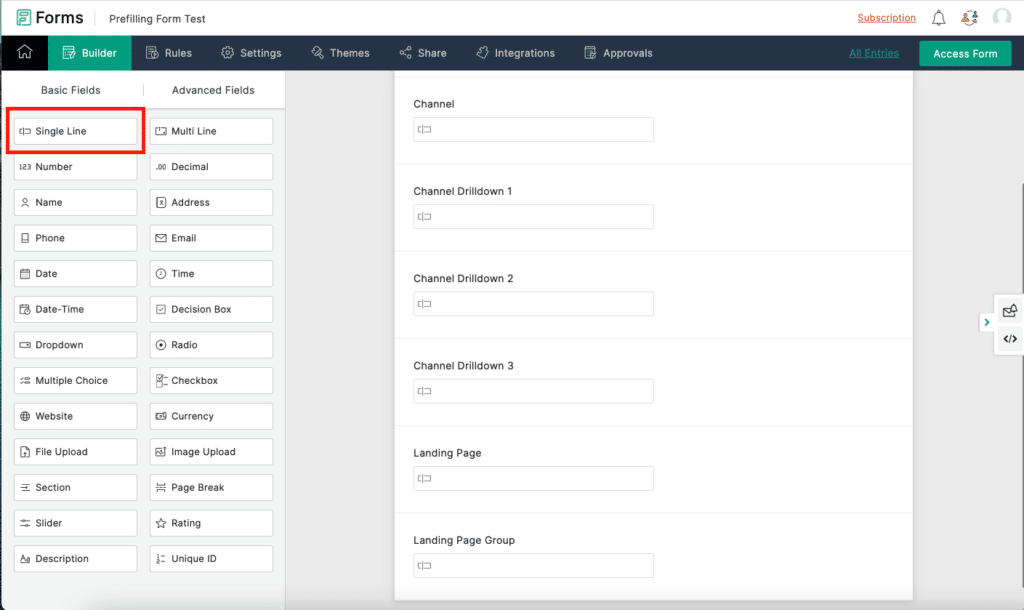
You can actually name these fields whatever you want, but we would strongly recommend something like:
- Channel
- Channel Drilldown 1
- Channel Drilldown 2
- Channel Drilldown 3
- Landing Page
- Landing Page Group
Your form should now have 6 additional fields similar to the screenshot below:
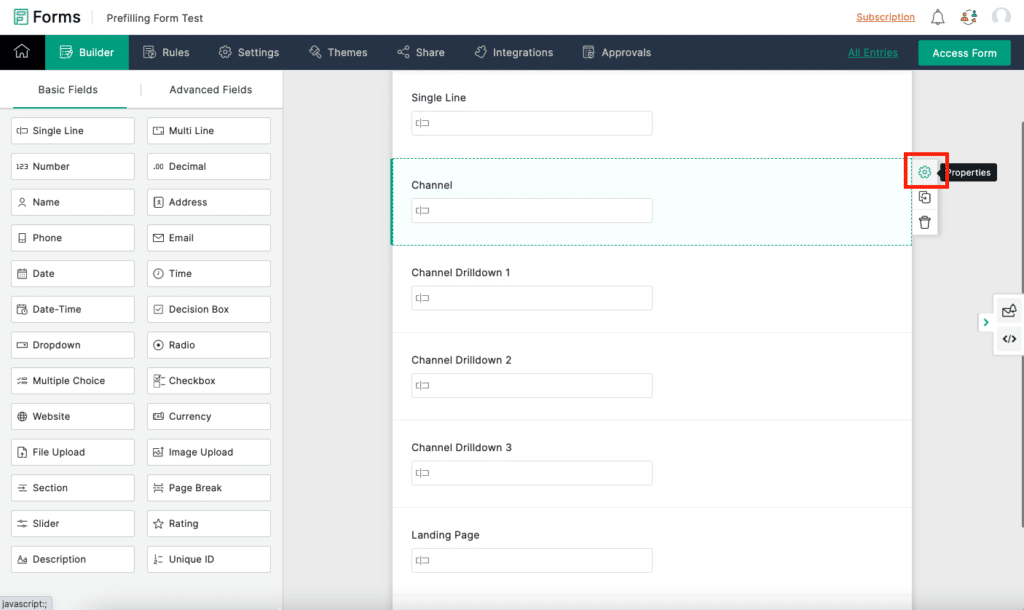
Step 3: Configure the fields to be ‘Hidden’
Next, you need to make sure all of these fields are marked as hidden. This will ensure that the fields are present on your form (so that Attributer can write data to them) but they not visible to your end users.
To make a field hidden, hover over the field and then select the ‘Properties’ icon that appears.
A properties panel will then slide in on the right side of the screen. Scroll down to the section named ‘Visibility’ and then select the checkbox next to the ‘Hide Field’ option.

Finally, click ‘Save’ to save your changes to this field. Repeat this for all 6 fields.
Step 4: Configure field aliases
Field Aliases are a function of Zoho Forms that allow you to essentially set alternative names for your fields, and you can then use these alternative names to pass information into the fields.
To configure field aliases, navigate to the ‘Settings’ section of the form builder and then select the ‘Field Aliases’ option from the left-hand menu.
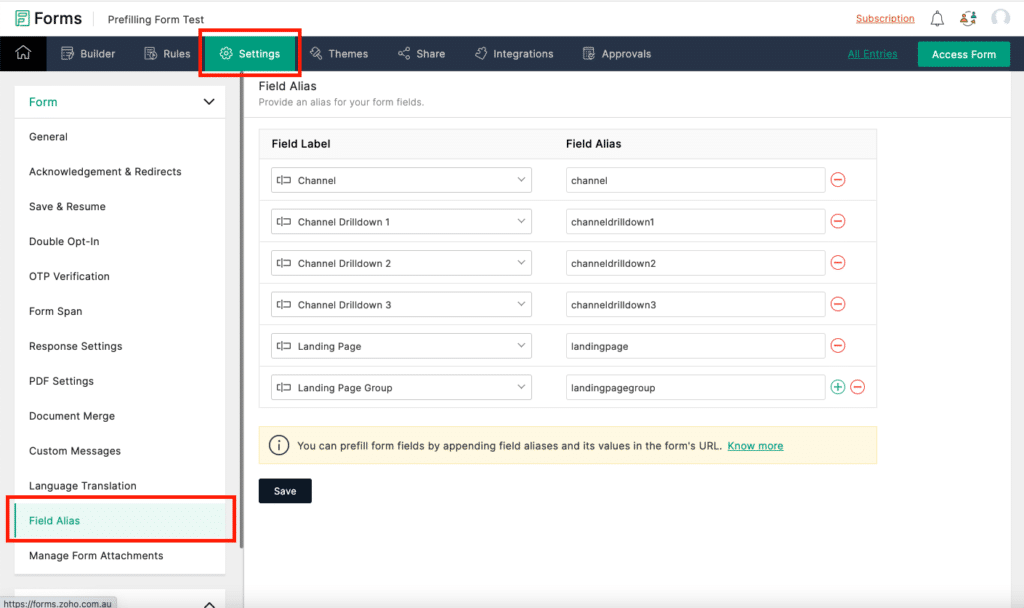
Once in the Field Aliases section, you then need to assign a specific alias to each of the fields in your form. To do this, you select the field you want to alias from the left hand side and then type the alias into the field on the right hand side.
Assuming you have used the field labels we recommended in Step 2 (I.e. Channel, Channel Drilldown 1, Channel Drilldown 2, etc) then you would want to alias the fields as follows:
| Field Label | Alias |
| Channel | channel |
| Channel Drilldown 1 | channeldrilldown1 |
| Channel Drilldown 2 | channeldrilldown2 |
| Channel Drilldown 3 | channeldrilldown3 |
| Landing Page | landingpage |
| Landing Page Group | landingpagegroup |
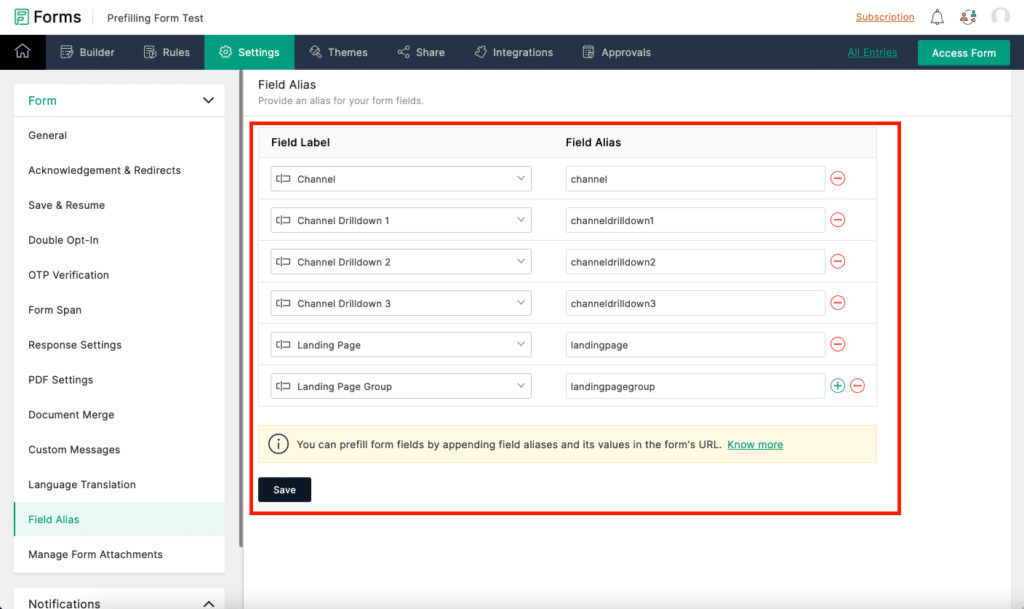
Ultimately, you will want it to look something like this:
Step 5: Copy and tweak the embed code
Now that you have added the hidden fields and setup the aliases, it’s now time to embed the form on your website.
To do this, select the ‘Share’ menu item at the top of the Form Builder and then select the ‘Embed’ option from the left-hand menu. Finally, select the ‘iFrame’ option for embedding your form.
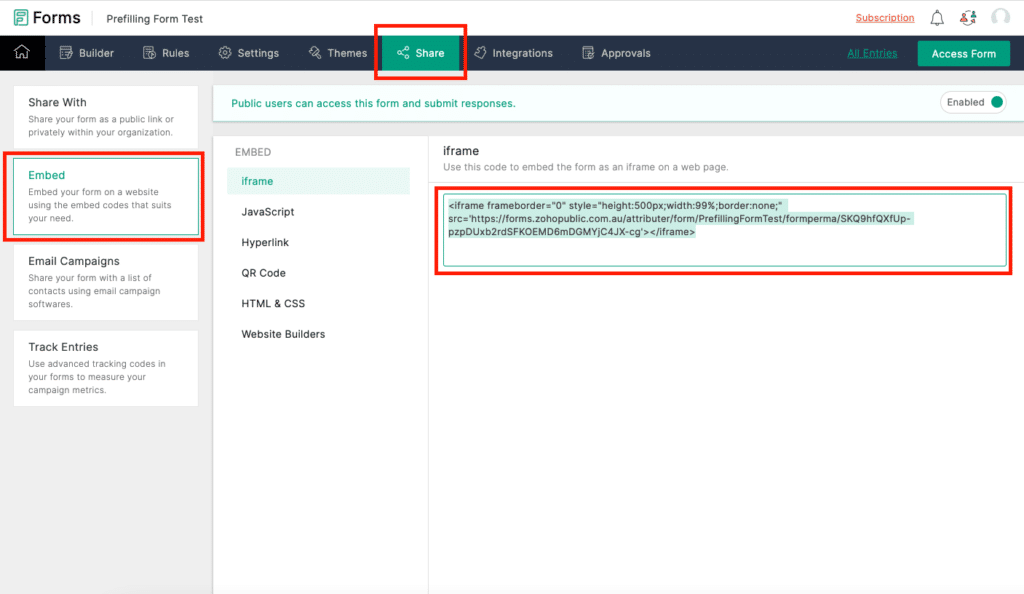
Next, copy the code from the box (the bit of code that starts with <iframe frameborder=”0″…..) and paste it into any sort of word editing tool (I.e. Microsoft Word, Google Drives, the Notes app on your computer, etc). Anywhere where you can edit the text of the code.
Now you just need to make a tiny tweak to the code. In between the words ‘iframe’ and ‘frameborder’ you want to add the text ‘data-attributer-iframe’
So if your code previously looked like this:
<iframe frameborder="0" style="height:500px;width:99%;border:none;" src='https://forms.zohopublic.com.au/attributer/form/TestForm/formperma/xnVoKgCen3Pl4jc6qp3Dz1y4heybIU7pditAiIX4RDg'></iframe>You would want to change it so that it looked like this:
<iframe data-attributer-iframe frameborder="0" style="height:500px;width:99%;border:none;" src='https://forms.zohopublic.com.au/attributer/form/TestForm/formperma/xnVoKgCen3Pl4jc6qp3Dz1y4heybIU7pditAiIX4RDg'></iframe>What you are essentially doing here is giving the iFrame a name (you are naming it ‘data-attributer-iframe’) which Attributer can then look for and write the data into.
The reason you need to do this is that an iFrame is essentially a window that shows another page on your website. So when you insert the form via an iFrame you are not actually adding the form to your website, but instead you are adding a window to your website and the form displays inside it.
So you need to give this iFrame a specific name so that Attributer can look for it and know how to write the data to the form inside it.
Step 6: Add the modified embed code to your website
Now that you have modified the embed code and given the iFrame a name, you can paste it onto your website where you want your form to be.
A final note
We understand editing code can be a bit scary, so if you need help then we are happy to jump on a video call with you and walk you through it. Feel free to contact us here.
Can't find the answer you need? Contact us!
Our team are available to answer any questions you have
