Help Center
Customising Channel names and logic
Attributer utilizes a very well-tested set of rules to determine where a visitor has come from and categorize them into channels.
Unfortunately, it isn’t possible to customize the names of the Channels that Attributer uses, nor is it possible to add your own channels or change the logic we use to categorize visitors into the different channels.
But there are ways to achieve the same things in your CRM or in tools like Zapier.
In this article, we’ll explain why it isn’t possible to customize the Channel’s Attributer uses and present some alternative options for creating your own customized attribution system.
Why it isn’t possible to customize Attributer’s Channels
We do occasionally get asked if it’s possible to customize the Channel’s Attributer uses and to be honest, this was part of our vision for the product in the early days.
However, as time went on we realized this would very likely result in customers getting incorrect attribution data for the following reasons:
- The logic is complicated – There was a LOT of thought that went into how the rules worked and the order in which they fire to ensure they took into account common UTM parameters people use and that they don’t conflict with each other. This work was done by people with over 15 years of experience designing and using analytics systems. If we were to let customers change these rules, there’s a very good chance something would go wrong and you would end up getting incorrect data.
- We can’t test it – Most browsers launch a new version every week and most operating systems (iOS, Android, Mac OS, Windows, etc) launch a new version every 1-2 months. To help ensure you’re always getting accurate data, we run over 1,500 tests on Attributer every week and launch a new version of the code 1-2x per month. If you were to change the logic Attributer used to categorize visitors, we couldn’t test it and there’s a chance you’d end up getting incorrect attribution data.
The moral of the story is there’s a reasonable chance that if you were to change the rules Attributer uses you would end up getting inaccurate data, and we felt the best way to ensure our customers get the most accurate attribution data on where leads are coming from is to not allow customers to create their own attribution rules.
Alternative options
That being said, we understand some of our customers want to see data attribution data in specific ways. For instance, you might want to see all organic traffic as one Channel rather than having it broken out into Organic Search, Direct, Referral, etc.
Similarly, if a person’s first landing page is a specific page on your site that they can only get to from a specific channel (I.e. an affiliate campaign), you may want to categorise them as into a specific Channel regardless of what UTM parameters they arrived with.
The good news is that it is possible to do this, but instead of changing the rules in Attributer you can use functionality in your CRM (or in tools like Zapier) to change the data as it comes in.
Using the rules engine in your CRM
Most CRM’s have some sort of rules engine that allows you to create ‘if this then that’ style rules that run when a new lead comes in (in Salesforce it’s called the Process Builder, while in Hubspot it’s called Workflows).
The user interface will be different depending on which CRM you use so it’s difficult for us to provide exact instructions, but generally speaking what you want to do is trigger the rule to run when a new lead comes in.
You would then set up conditional logic to only apply the rules to leads that meet certain criteria (I.e. have a specific landing page, or a specific combination of values in the Channel and Channel Drilldown 1 fields).
Finally, you would then write the logic to apply when the condition is met (I.e. change Channel to ‘Affiliates’).
The below screenshot shows an example of how a workflow in Hubspot might look:
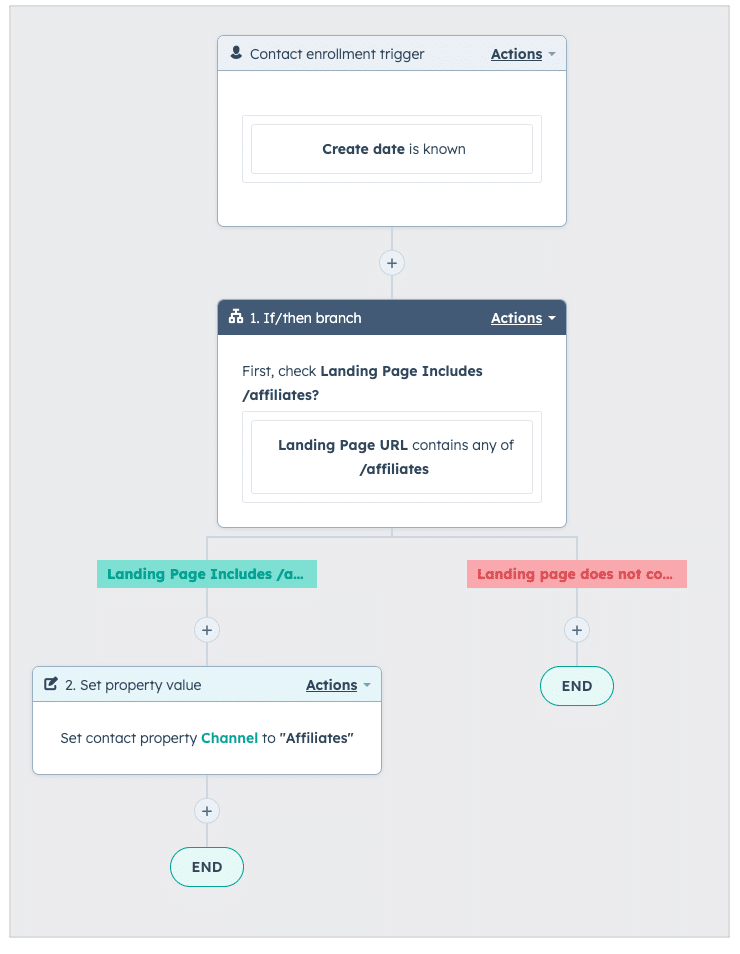
In the example above we can see that the rule triggers when a new lead is created, then checks to see if the landing page contains /affiliates. If it does, then it updates the Channel to ‘Affiliates’
Using integration tools like Zapier
Dedicated integration tools like Zapier are usually used to send data from one tool to another (I.e. When a new submission is made in Gravity Forms, create a new lead in Hubspot).
However, Zapier has a whole bunch of data formatting options that allow you to modify the data before it reaches the end destination.
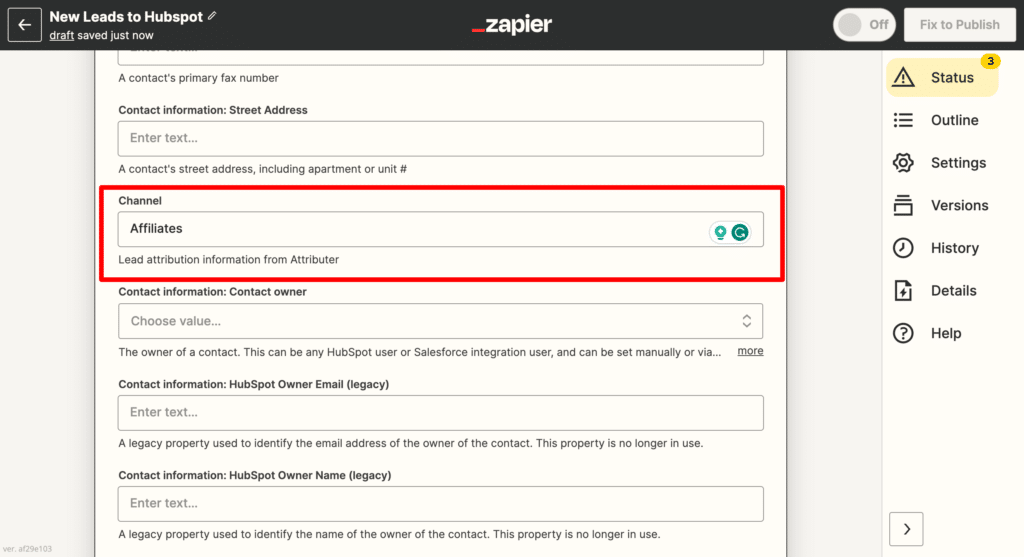
Continuing the example above, you could add a Path to your Zap that does different things depending on whether the landing page contains /affiliates.
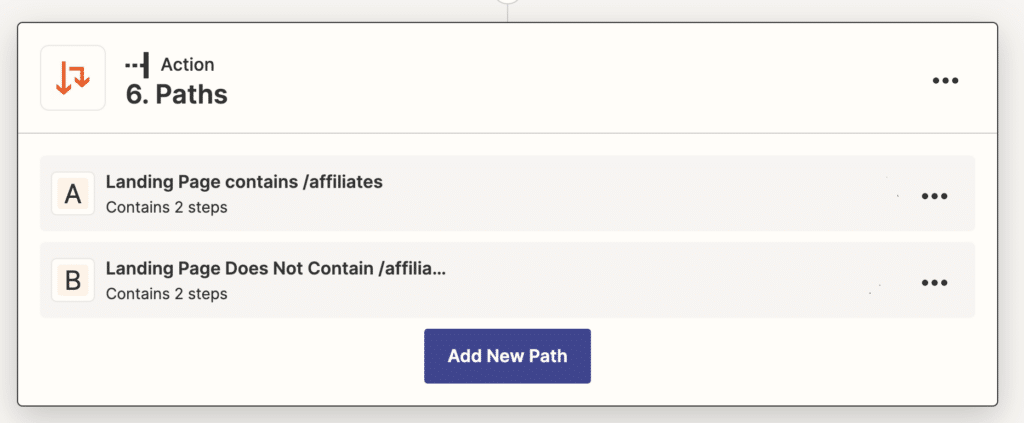
Then within the ‘Landing Page contains /affiliates path’, you would set up an action that would pass through the word ‘Affiliates’ to the Channel field in your CRM (instead of just passing through whatever data Attributer wrote into the Channel field on your form).
The above examples we have provided are quite simple, but you can get quite advanced with these rules and essentially create your own customised attribution system by writing custom rules that change the values that ultimately get sent to your CRM with every new lead.
If you’re interested in learning more, we wrote an article on our blog which outlines 3 different ways you can transform the data (complete with real world examples) using rules.
Can't find the answer you need? Contact us!
Our team are available to answer any questions you have
