Help Center
Setup the Attributer Webflow App
Attributer tracks where your website visitors are coming from (i.e. Paid Search, Organic Search, Organic Social, etc.) and passes that data through with each submission of your Webflow forms.
The Attributer Webflow App makes it easy to get set up. It installs the Attributer tracking script and adds hidden fields to your forms automatically.
How to install the Attributer Webflow App
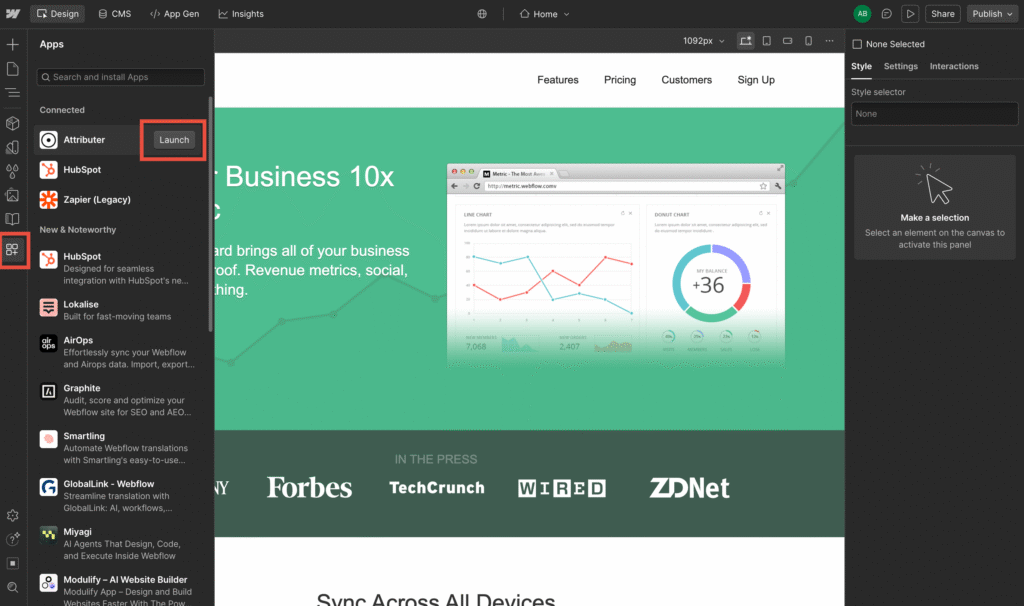
Step 1: Install the Attributer Webflow App
If you haven’t already, install the Attributer app from the Webflow Marketplace.
Once installed, open your site in the Webflow Designer and launch the Attributer app from the Apps panel.
Step 2: Connect to Webflow
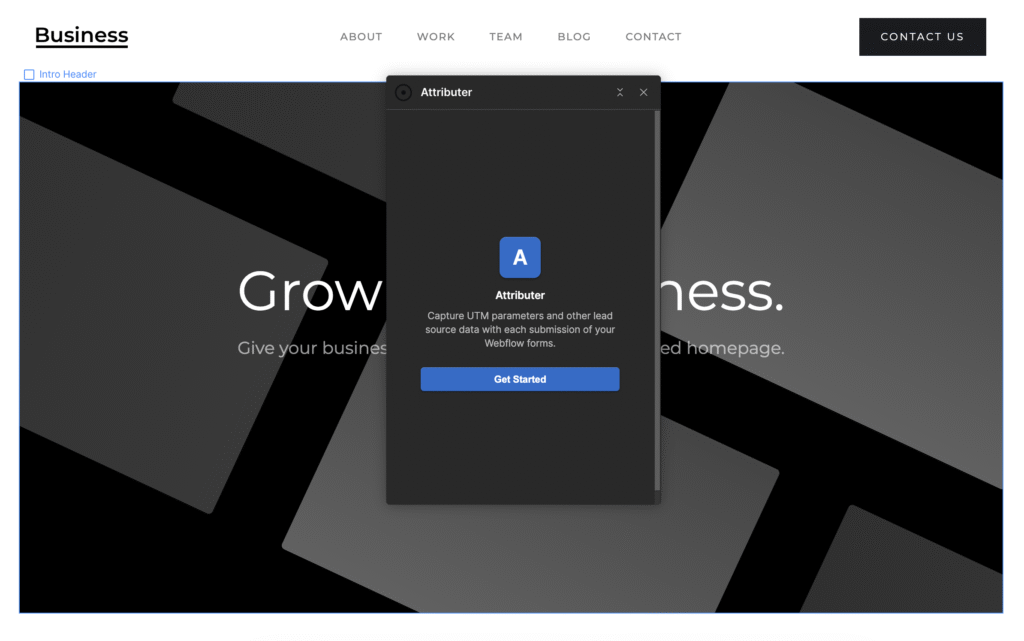
The first time you open the app, you’ll see a Welcome screen that looks a bit like this. Click Get Started to continue the setup process.
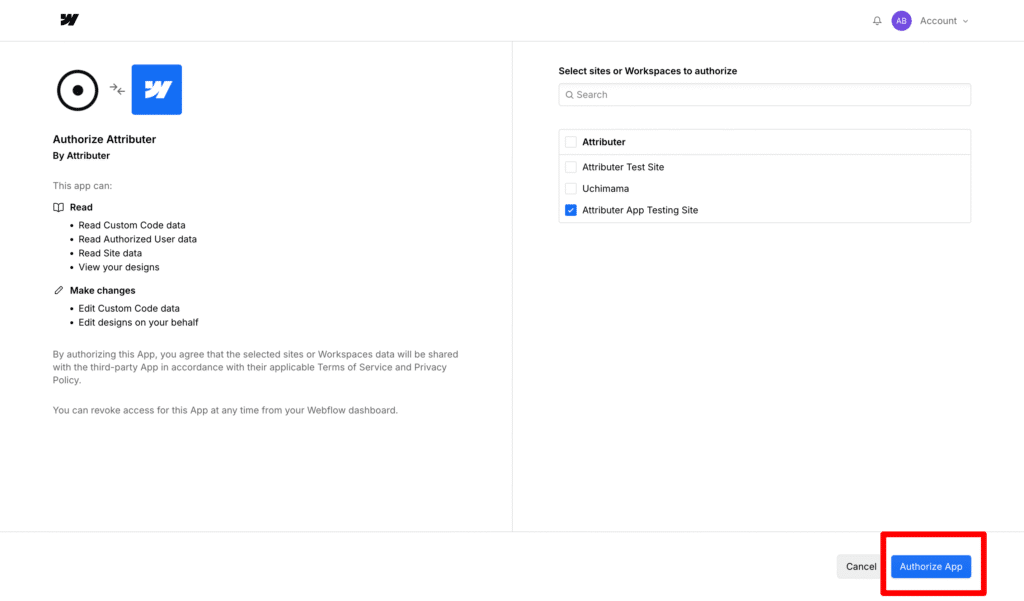
On the next screen, you will see a button that says Connect to Webflow. Select that button and a new browser tab will open asking you to authorize Attributer to access your site. Click Authorize to grant permission.
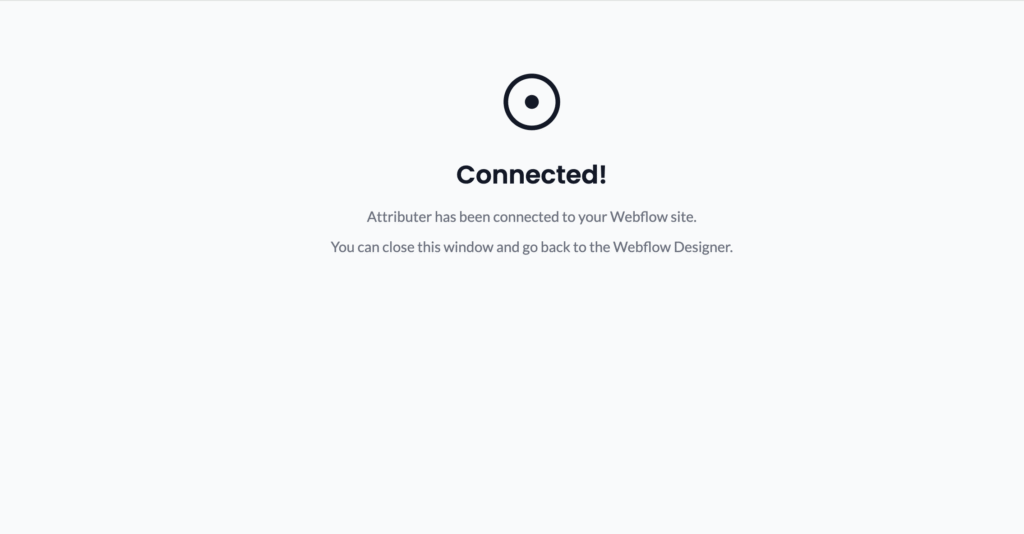
Once you see the “Connected!” confirmation page, you can close that tab and go back to the Webflow Designer.
At this point, the Attributer Webflow app will be actively checking for the authorisation to be completed and will reload once it has been. It checks every 3 seconds, so it should happen pretty quickly.
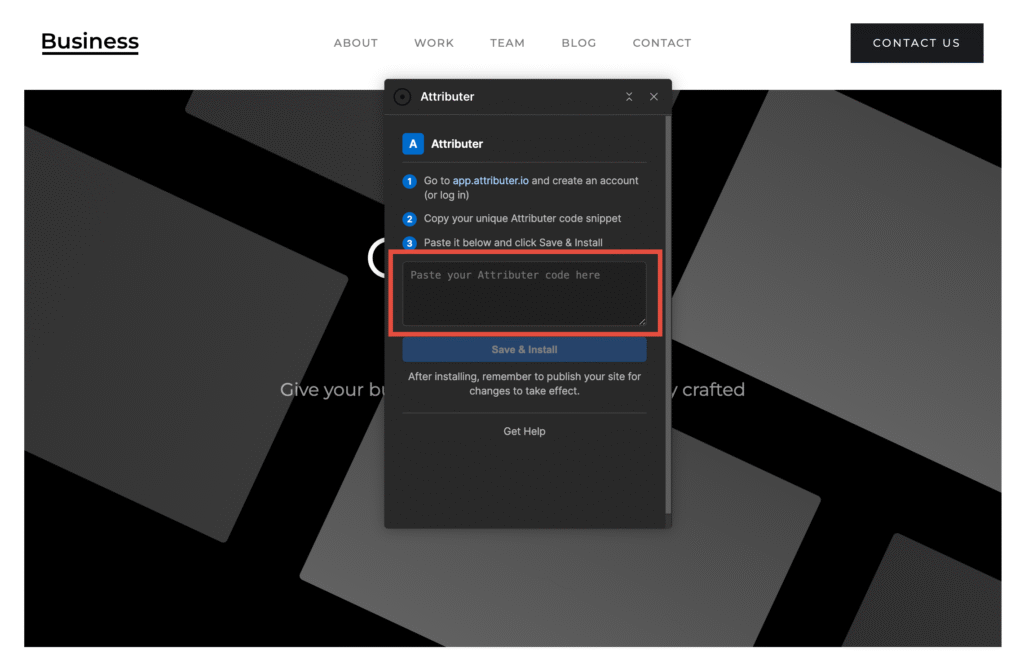
Step 3: Add the code from your Attributer account
If you haven’t already, head on over to https://app.attributer.io/ and sign up for a 14-day free trial. Once inside your account, copy the code you get given on the Getting Started page:
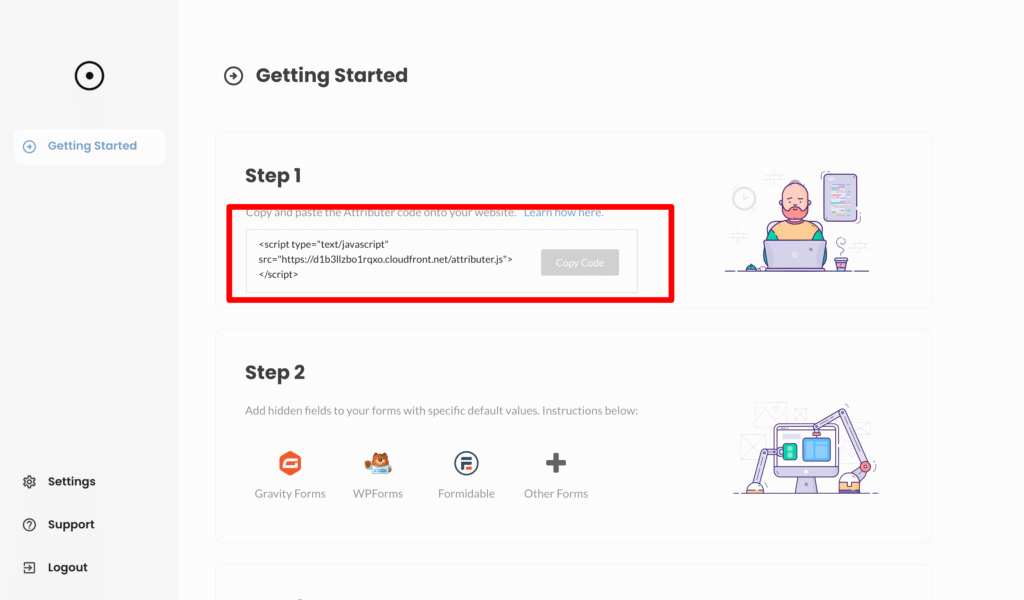
Then paste it into the code box inside the Attributer Webflow app.
Finally, click the Save & Install button. You should see a confirmation message that looks a bit like this:
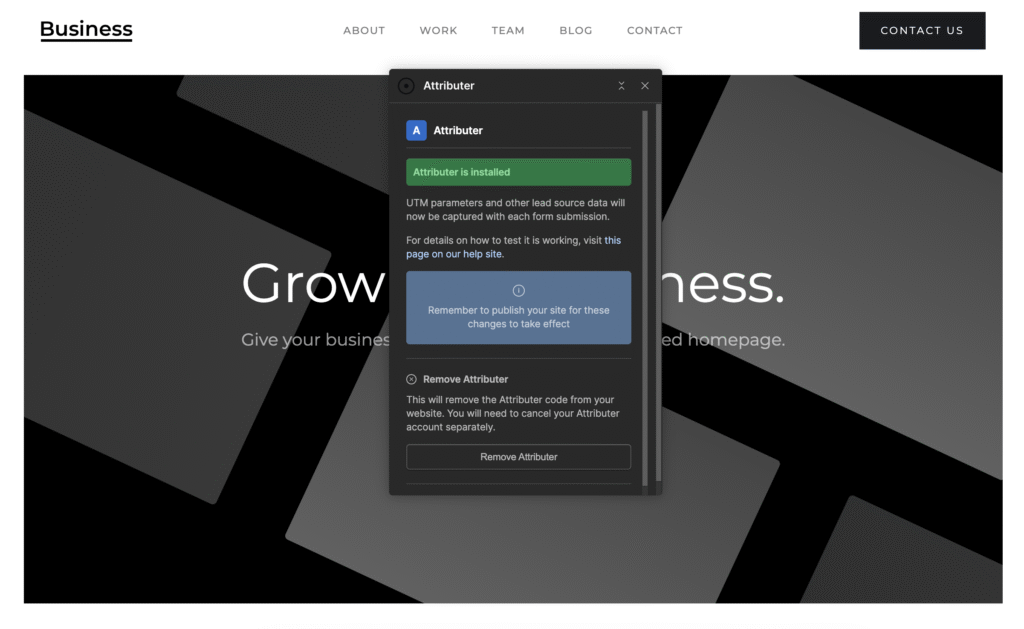
This means that the Attributer Webflow App has been successfully installed and configured, and that it has loaded the Attributer code on your site and added the hidden fields to your forms.
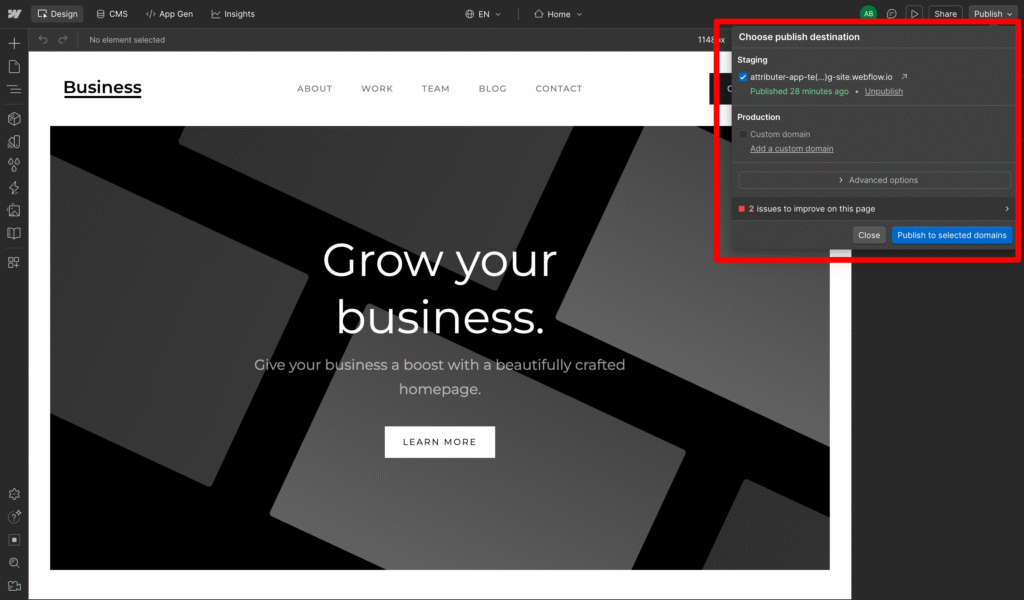
Step 4: Publish your site
The code that the Attributer Webflow App has added to your site only goes live when you publish your site, so make sure to publish it to your chosen domains.
Step 3: Test it works
Finally, navigate to the page your form is on. Complete the form and submit it.
If it’s working correctly, you should see a form submission in Project Settings > Forms that looks something like this:

As you can see, the Channel & Landing Page data captured by Attributer is contained in the ‘attributer-channel’ and ‘attributer-landingpage’ fields.
You can now send that data over to your CRM, however you normally would (i.e., via Zapier, CSV downloads, etc).
The Attributer information will also be sent with the standard ‘New form submission’ emails that Webflow sends.

How to remove the Attributer Webflow App
Step 1: Open the app inside the Webflow Editor
Open your website in the Webflow Editor, select the Apps & Integrations icon from the left-hand menu and then select the ‘Launch’ button on the Attributer app listing.
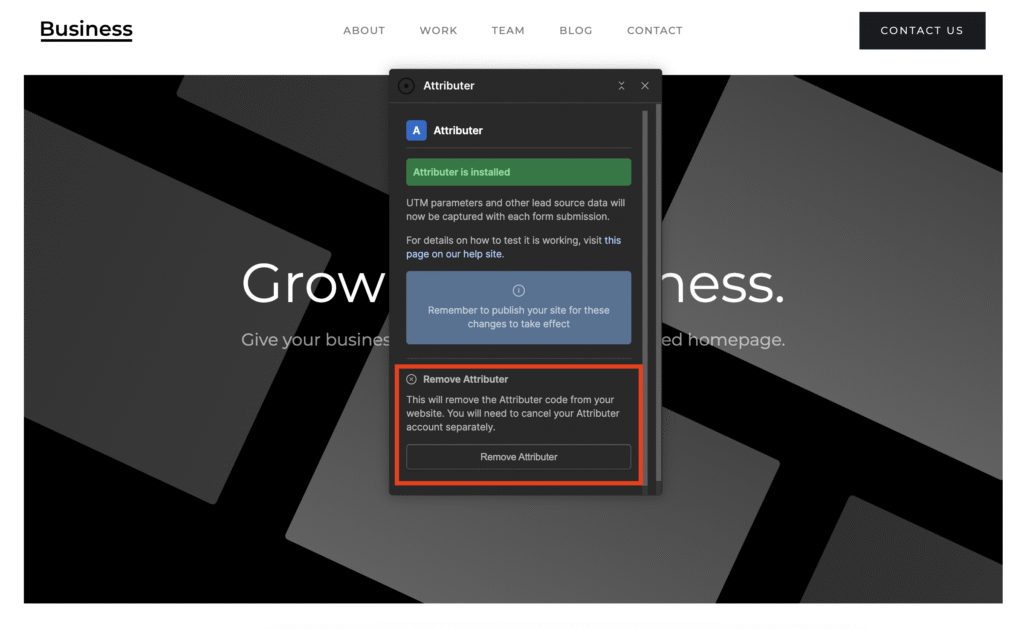
Step 2: Remove the Attributer code from your website
Once the app opens, you will land on the app’s main page showing the Attributer is installed message’. To remove the Attributer code from your website, select the ‘Remove Attributer’ button. This will remove the Attributer code from your website.
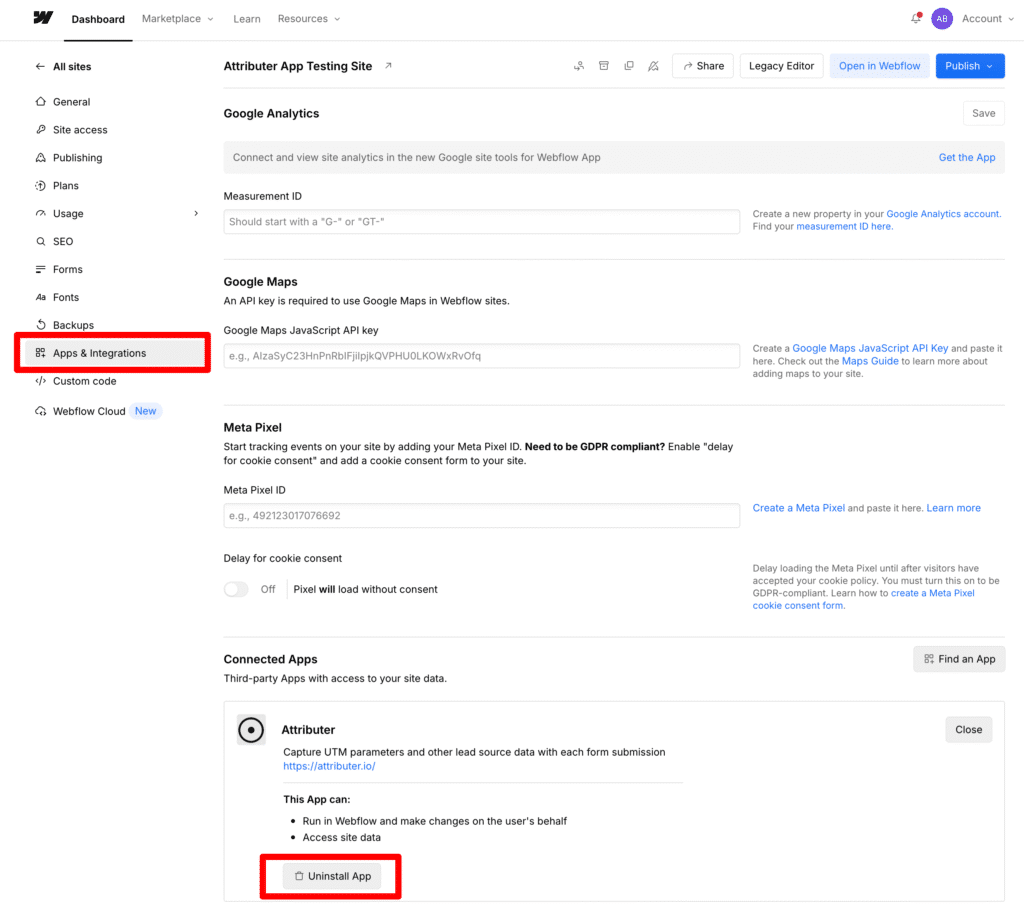
Step 3: Uninstall the Attributer Webflow App
If you want to completely uninstall the Attributer Webflow App, navigate to your Site Settings, select the ‘Apps & Integrations’ option from the menu, and then select the Uninstall App button.
Step 3: Cancel your Attributer subscription
Compelting the above steps will remove the Attributer code from your site and uninstall the Attributer Webflow App. It will not cancel your Attributer subscription.
To do that, you need to log in to your Attributer account, select the ‘Settings’ option from the left-hand menu, and then select the ‘Cancel’ tab at the top.
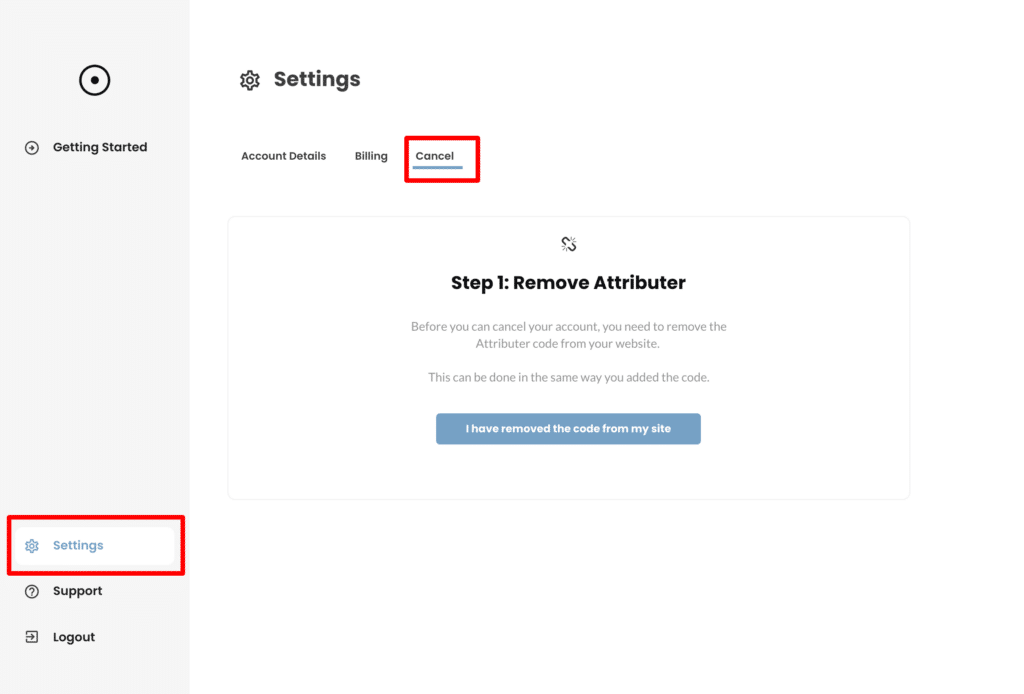
Follow the prompts to complete your cancellation request.
Frequently asked questions
What data gets stored in the Channel & Channel Drilldown fields?
Attributer stores different information in the Channel and Channel Drilldown fields depending on what channel the visitor actually arrives from.
For instance, if the visitor arrives from Paid Search then it uses the data in the UTM parameters (I.e. utm_source, utm_campaign, etc) to populate the drilldown fields. But if a user arrives from Organic Search, it stores the name of the search engine (I.e. Google), the URL of the search engine (I.e. www.google.co.uk) and the keyword (where available).
You can see the full documentation of what data Attributer stores here.
I have another question. Can I speak with someone?
Absolutely! We would love to answer any questions you might have and you can contact us here.
Can't find the answer you need? Contact us!
Our team are available to answer any questions you have
