Help Center
Setting up Attributer with Calendly
Calendly is a popular meeting scheduling tool that you can embed on your website to allow visitors to select a time to meet with a member of your team.
Attributer can work with Calendly to pass through marketing attribution data on each lead that books a time with your team.
To set it up, follow the instructions below:
1. Familiarise yourself with how Attributer passes data to Calendly
With most standard form tools, Attributer requires you to add a series of hidden fields to your forms that Attributer will ultimately write the marketing attribution into.
Calendly on the other hand does not have the ability to add hidden fields. Instead, they have pre-built fields for all the 5 UTM parameters (UTM medium, source, campaign, term & content) that are already built into the forms in your Calendly widget.
As a result, Attributer uses these prebuilt fields to write the attribution information in. We map our Channel fields to Calendly’s UTM fields as follows:
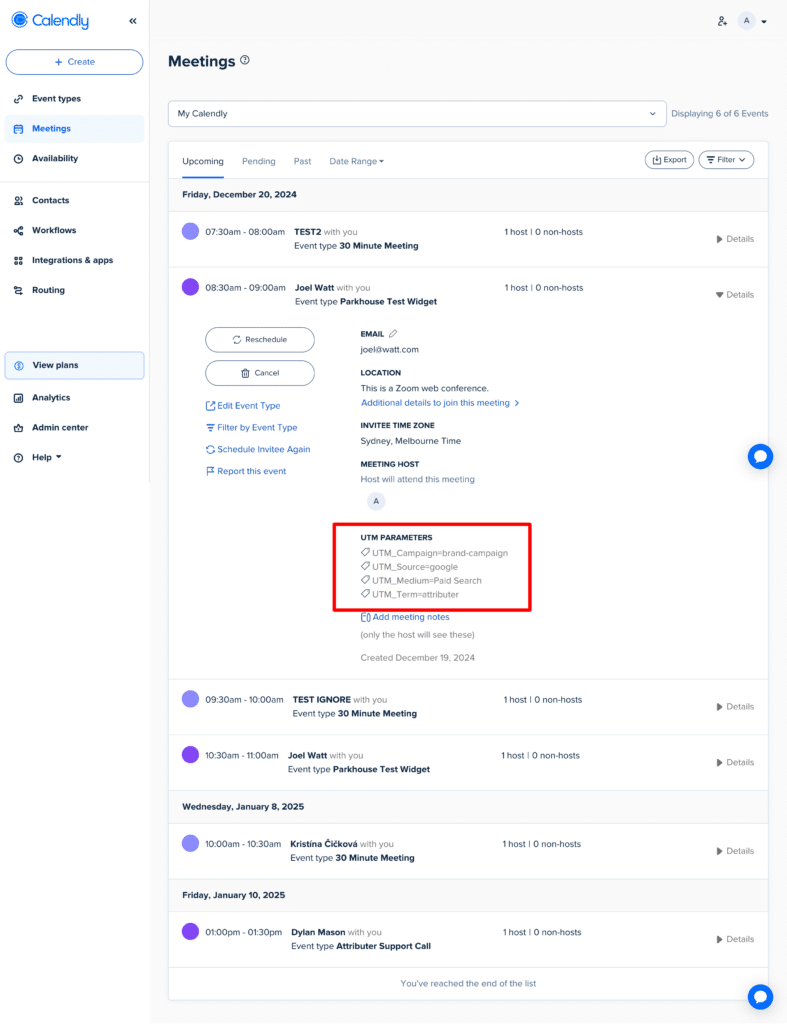
- ‘UTM Medium’ in Calendly is populated by Attributer’s ‘Channel’ field
- ‘UTM Source’ in Calendly is populated by Attributer’s ‘Channel Drilldown 1’ field
- ‘UTM Campaign’ in Calendly is populated by Attributer’s ‘Channel Drilldown 2’ field
- ‘UTM Term’ in Calendly is populated by Attributer’s ‘Channel Drilldown 3’ field
Given that Attributer captures the UTM source in Channel Drilldown 1, the UTM Campaign in Channel Drilldown 2 and the UTM Term in Channel Drilldown 3, this ultimately means that the UTM parameters you use behind your ads are mapped into the correct fields in Calendly.
The only slight oddity will be if someone comes from an organic channel like Organic Search, in which case ‘Organic Search’ would be written into Calendly’s UTM_Medium field (and it’s not technically a UTM_Medium because you cannot put UTM parameters behind organic search results).
2. Get your Calendly URL
The second step in setting up Attributer with Calendly is to login to your account and get the URL of the Calendly booking widget you want Attributer to work with.
This differs depending on whether you are embedding a single event, your personal landing page, or a routing form.
Single Event Embed
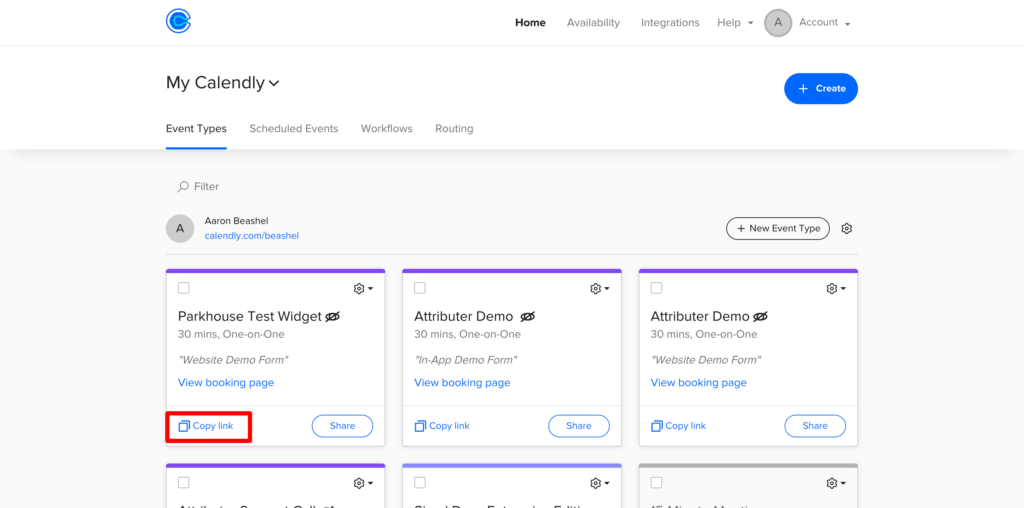
If you are embedding a single event type on your website, simply click the ‘Copy Link’ button on the booking widget to copy your booking link.
Personal Landing Page
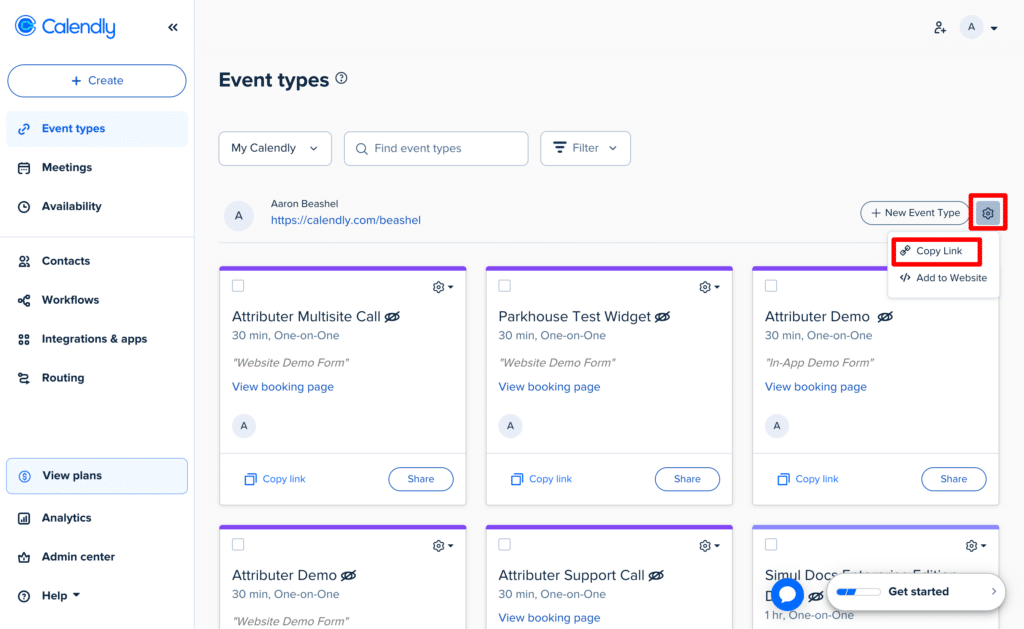
If you are embedding your personal landing page on your website (the one that shows multiple event types), then you can copy your link by clicking the cog icon in the top-right and then selecting the Copy Link button.
Routing Form
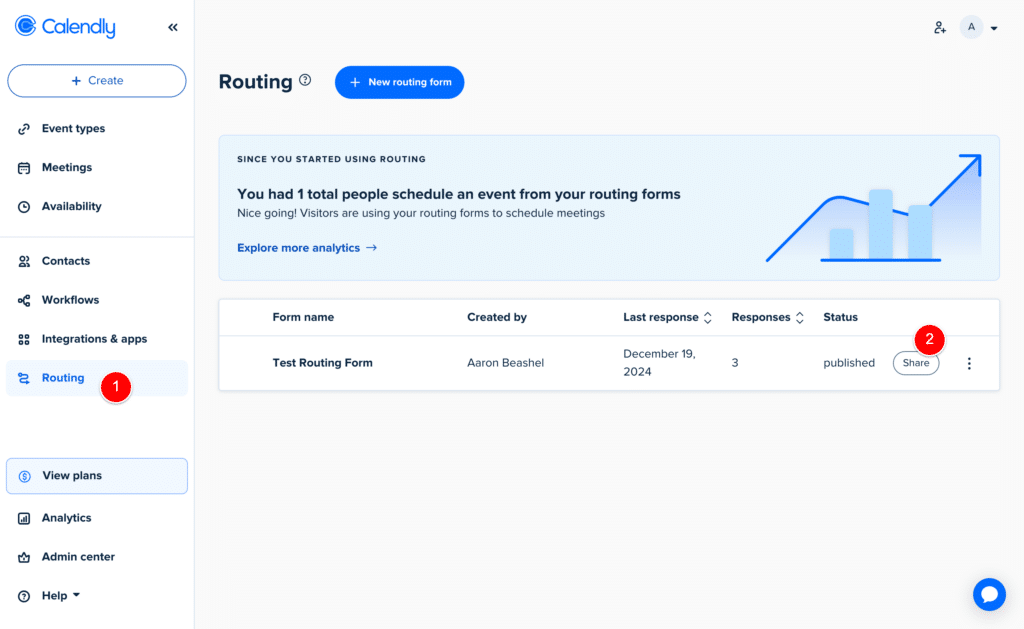
If you are using a Routing Form to route leads to different booking calendars based on answers to their questions, you can copy the link by navigating to the Routing section and clicking the Share button on the Routing Form you want Attributer to work with.
3. Generate a custom embed code
Enter your Calendly URL into the box below to generate a custom embed code. This code is a variation of the standard Calendly embed code that tells it to fill Calendly’s prebuilt UTM fields with data provided by Attributer.
4. Paste the custom embed code on your site
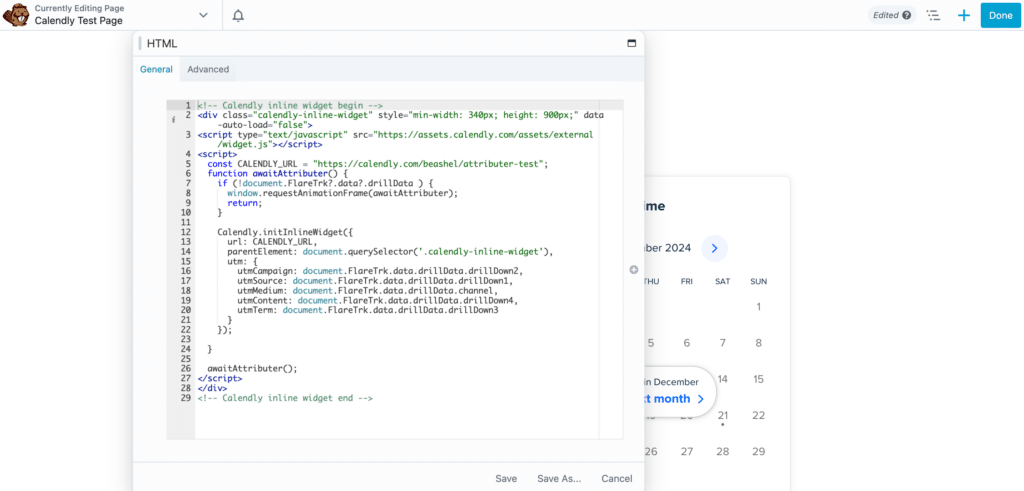
Now that you’ve got your custom embed code, the next step is to add it to your site wherever you want the Calendly embed widget to appear. How you do this will depend on what website builder you are using, but you’ll need to paste the code into the page somehow.
It should look something like this (depending on what website builder you use):
4. Test it works
That’s it! You’ve set everything up!
The final step is to test it works. You can do this by opening a new incognito window, navigating to the page where the Calendly booking widget is, and completing it.
You will then be able to see the data on the Meeting in your Calendly account:
You can read more about how to properly test Attributer is working here (the key is to make sure you perform your tests in a new incognito window each time)
Can't find the answer you need? Contact us!
Our team are available to answer any questions you have

