Help Center
Add hidden fields to 123FormBuilder
Attributer is a little bit of code you add to your website. It tracks where your visitors are coming from (I.e. Paid Search, Paid Social, Organic Search, etc) and writes the data into hidden fields you add to your forms. This data is then captured by 123FormBuilder and can be sent to your CRM and other tools.
In order for it to work, you need to add a series of hidden fields to your 123FormBuilder forms. Here’s how to do it:
Step 1: Open the form you want Attributer to work with
Log in to your 123FormBuilder account and select the form you want Attributer to work with to open it in the editor.

Step 2: Add 6x Short Answer fields to the form
To add a Short Answer field to the form, simply drag and drop the ‘Short Answer’ field type from the left-hand menu into your form.

We recommend adding the fields below the other fields on your form that you want your visitors to complete.
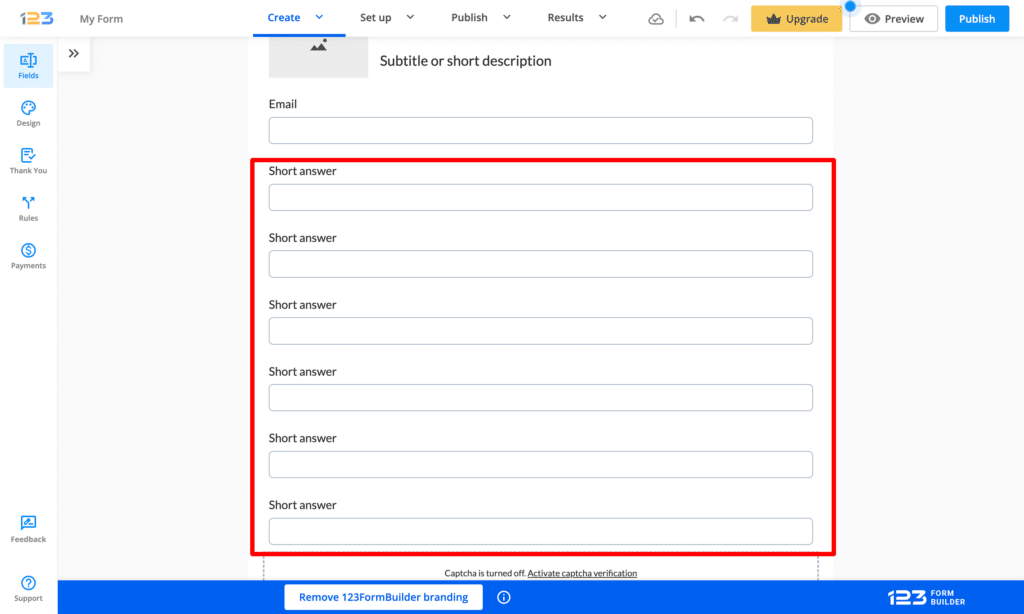
To collect all the information that Attributer provides, you will need to drag and drop 6x hidden fields into your form. It should ultimately look a bit like this:
Step 3: Configure the fields
Next, you need to configure each of the 6 fields you just added to your form.
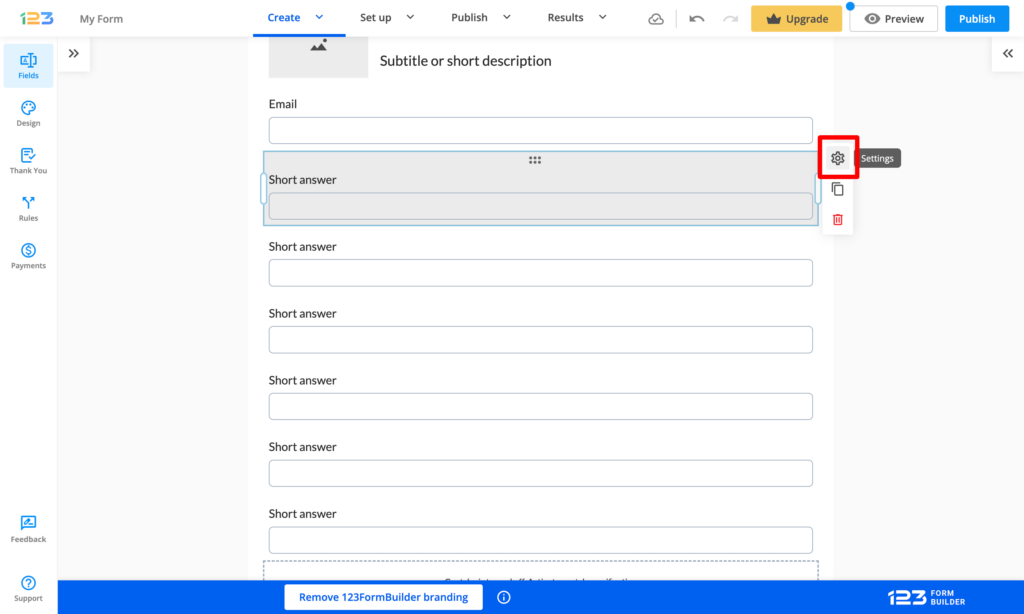
To configure a field, simply click on it and then select the cog icon that appears on the right side.
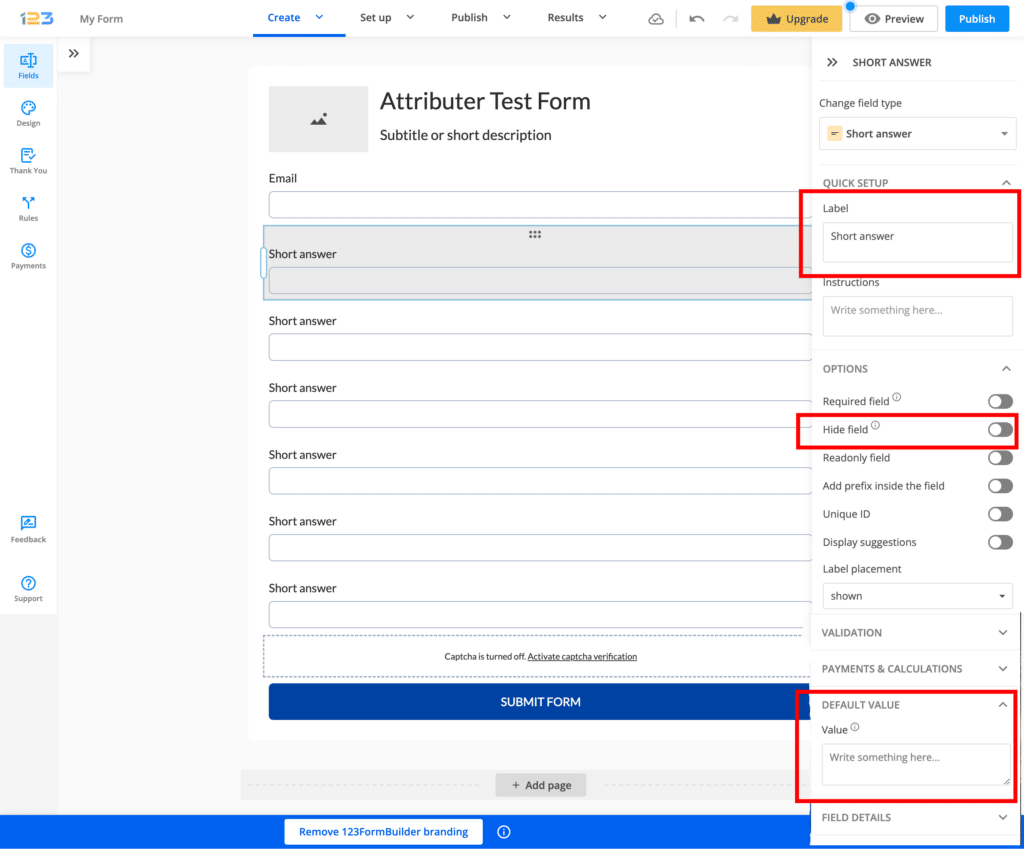
Once clicked, the field settings panel will appear. You will need to configure the Field Label and Default Value fields, as well as toggle the Hide Field option. See the screenshot of these options below:
You will need to configure each of the 6 fields as follows:
Field #1
- Field Label = Channel
- Hide field = Toggle this switch on
- Default Value = [channel]
Hidden Field #2
- Field Label = Channel Drilldown 1
- Hide field = Toggle this switch on
- Default Value = [channeldrilldown1]
Hidden Field #3
- Field Label = Channel Drilldown 2
- Hide field = Toggle this switch on
- Default Value = [channeldrilldown2]
Hidden Field #4
- Field Label = Channel Drilldown 3
- Hide field = Toggle this switch on
- Default Value = [channeldrilldown3]
Hidden Field #5
- Field Label = Landing Page
- Hide field = Toggle this switch on
- Default Value = [landingpage]
Hidden Field #6
- Field Label = Landing Page Group
- Hide field = Toggle this switch on
- Default Value = [landingpagegroup]
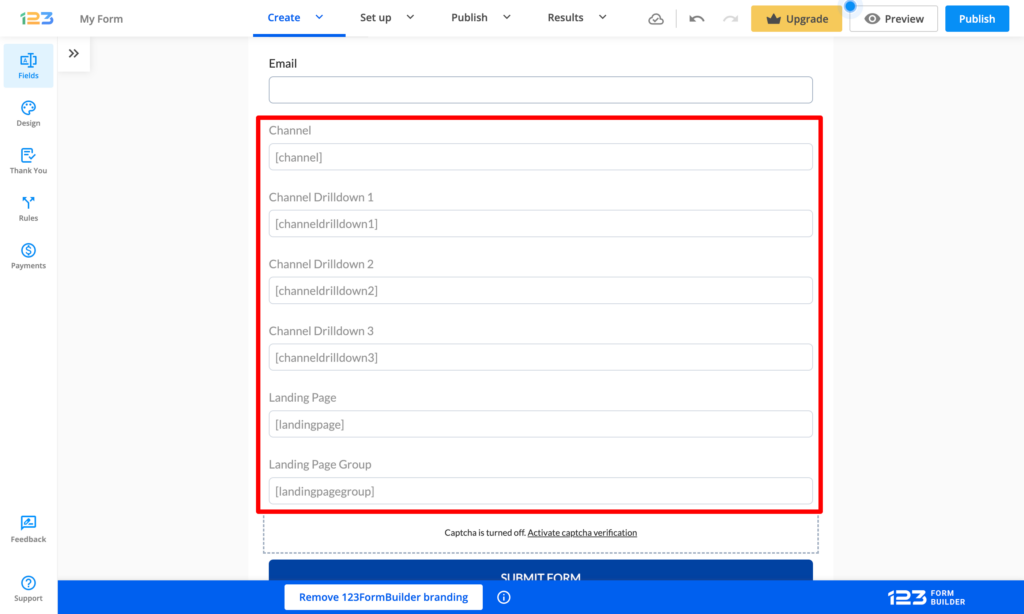
You should then have a form that looks a bit like this:
Step 4: Add some additional code to your form
Next, you need to add some additional code to your form
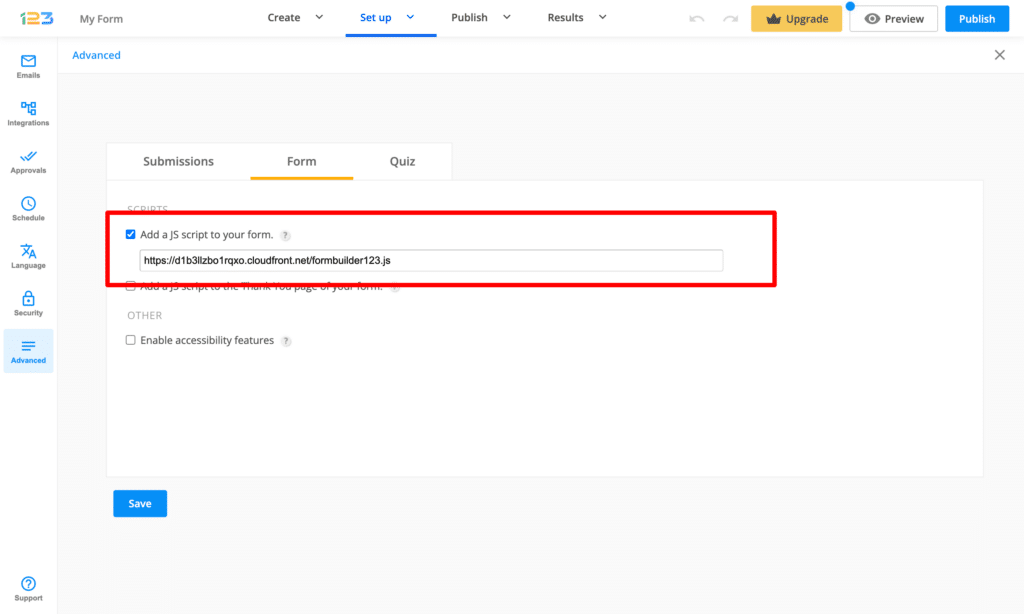
To do this, navigate to the Set Up tab, select the Advanced option from the left-hand menu, and then select the Form tab.

Then, in the ‘Add a JS script to your form’ option, enter the following URL:
https://d1b3llzbo1rqxo.cloudfront.net/formbuilder123.jsIt should ultimately look a bit like this:
Step 5: Embed the form on your site
Next, you need to embed the form on your website where you want it to show, and then add some additional code below it.
To do this, navigate to the Publish tab, select the Embed Form option from the left-hand menu, and then copy the code.
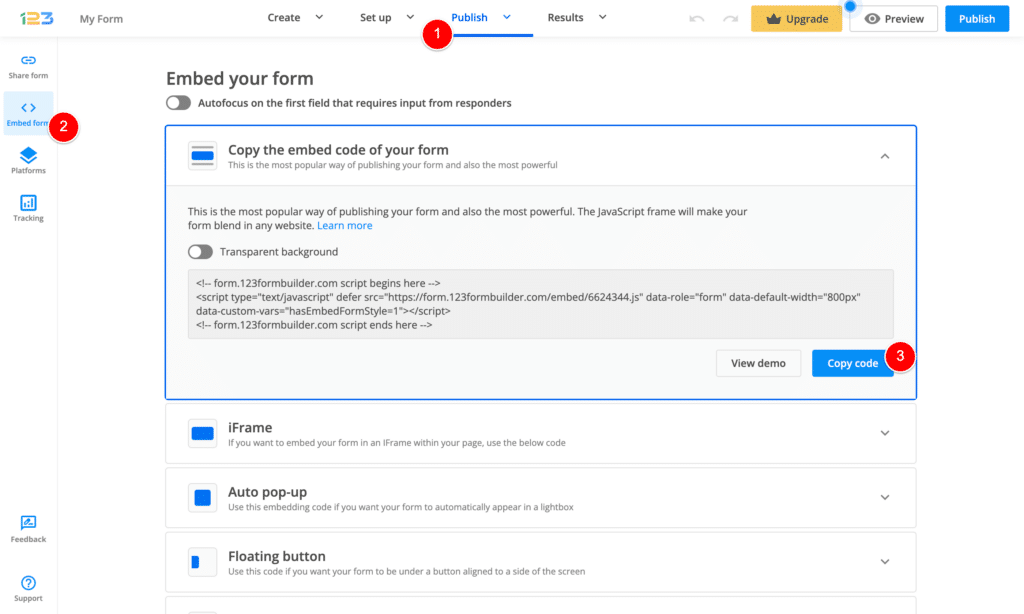
Note: Currently, Attributer only works with the Javascript embed option (the one shown in the screenshot above). It does not currently work with the iFrame method or any of the others.
Step 6: Add some additional code below the embed code
Finally, you need to add some additional code directly beneath the embed code you added in Step 5.
The code you need to add is:
<script>
function fill_form() {
    const el = document.querySelector("iframe[src^='https://form.123formbuilder.com/']");
    if (!el) {
        return window.requestAnimationFrame(fill_form);
    }
    el.setAttribute("data-attributer-iframe", "true");
}

fill_form();
</script>
It should ultimately look a bit like this:
Step 7: Test it works
That’s it! You’ve set everything up!
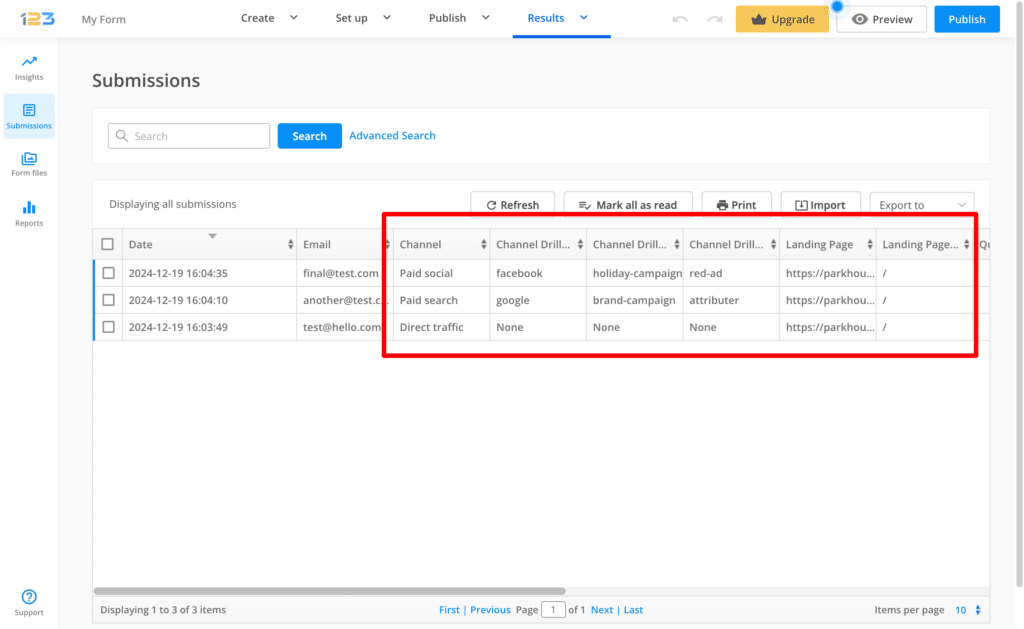
The final step is to test it works. You can do this by navigating to the page where the form is in a new incognito window and completing the form.
You should then see the data in your form submissions like in the screenshot below:
You can read more about how to properly test Attributer is working here (the key is to make sure you perform your tests in a new incognito window each time)
Can't find the answer you need? Contact us!
Our team are available to answer any questions you have
