Help Center
Add Attributer code to your Wix website
Wix is a popular website-building tool that makes it easy for anyone to create a simple marketing website for your business.
To install Attributer on your Wix website, follow the instructions below:
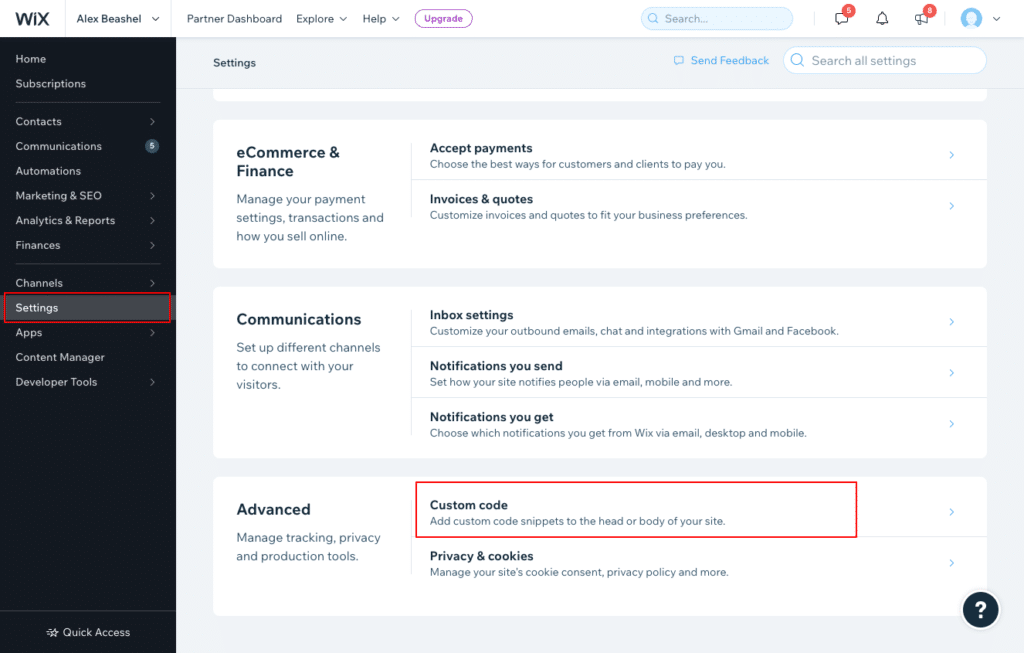
Step 1: Navigate to the ‘Custom Code’ section of the Settings
From the Dashboard of your Wix account, select ‘Settings’ from the left-hand menu and then select ‘Custom Code’ under the Advanced section.
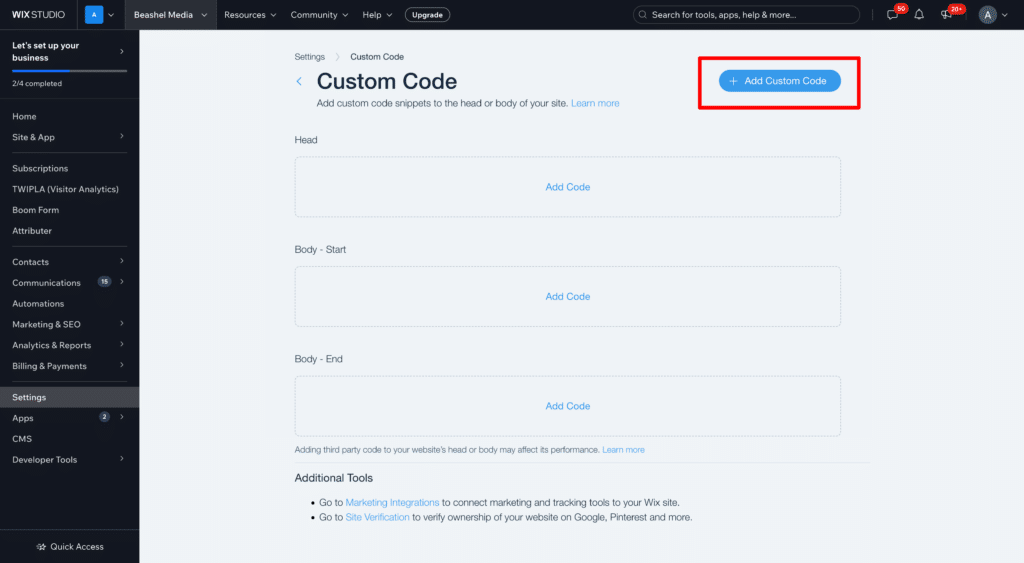
Step 2: Add the Attributer code
Once you’re in the Custom Code section of Wix settings, select the ‘Add Custom Code’ button in the top right.
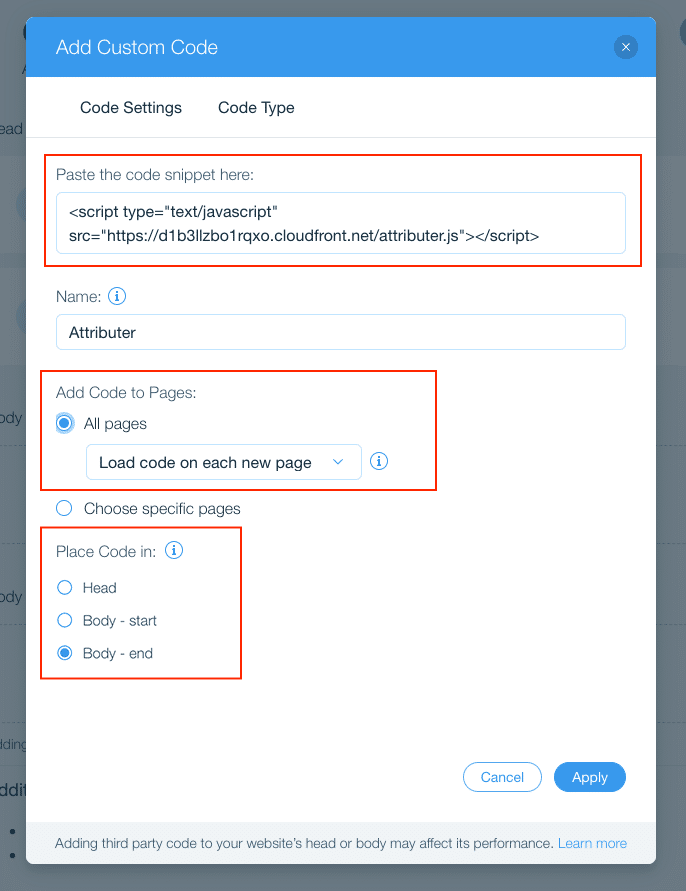
In the dialog box that appears, paste the code from your Attributer account into the box labeled ‘Paste the code snippet here’ and then complete the other fields as per the settings shown in the screenshot below.
Step 3: Set the Code Type to ‘Essential’
Navigate to the Code Type tab in the Add Custom Code popup and make sure that ‘Essential’ is selected.
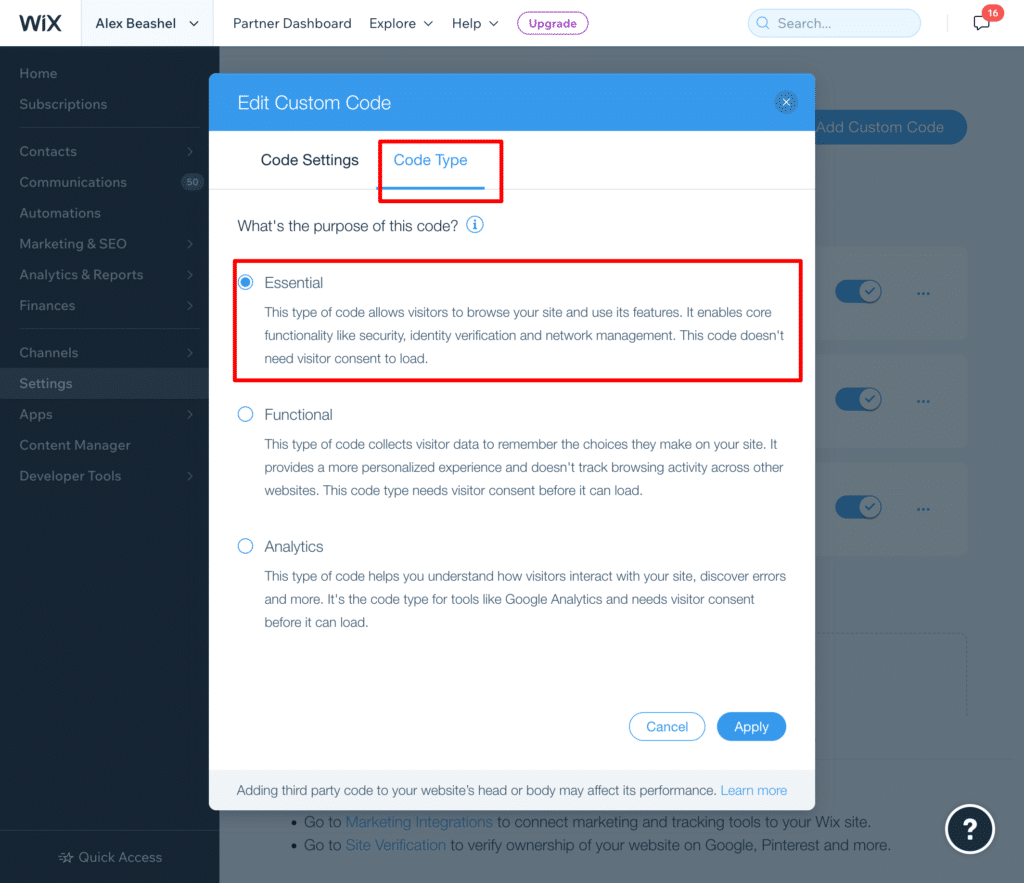
By setting it as Essential, the Attributer code will be loaded on every page for every visitor, and will therefore be able to pass through data for every lead.
If you don’t set it as Essential, it won’t load for everyone and you’ll end up only getting attribution information for some of your leads.
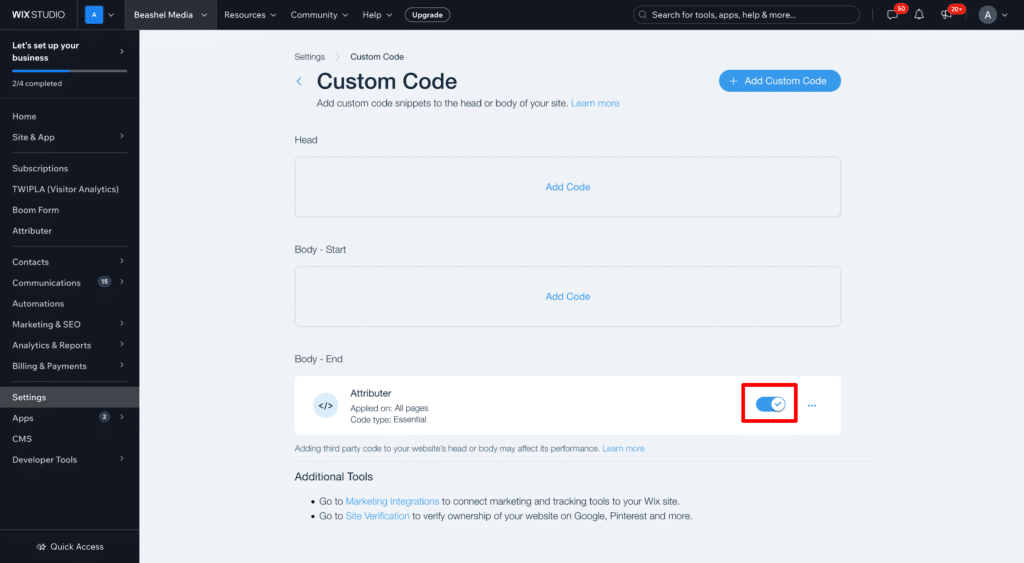
Step 5: Ensure the Attributer code is enabled
Once you’ve successfully added the code, you’ll be redirected back to the Custom Code section of Wix settings. On this page, make sure the code is enabled on your site by checking the switch next to Attributer:
That’s it! Everything should be done. To test it’s installed correctly on your site, follow the instructions here.
Can't find the answer you need? Contact us!
Our team are available to answer any questions you have
