Help Center
Add hidden fields to Cal.com
Attributer is a little bit of code you add to your website. It tracks where your visitors are coming from (Paid Search, Paid Social, Organic Search, etc) and writes the data into hidden fields you add to your booking widgets. This data is then captured with each booking and can be sent to your CRM and other tools.
In order for it to work, you need to add a series of hidden fields to your Cal.com booking widgets. In this article, we’ll walk you through how to do this.
Step 1: Open the meeting type you want Attributer to work with
In your Cal.com account, start by selecting the meeting type that you want Attributer to work with.

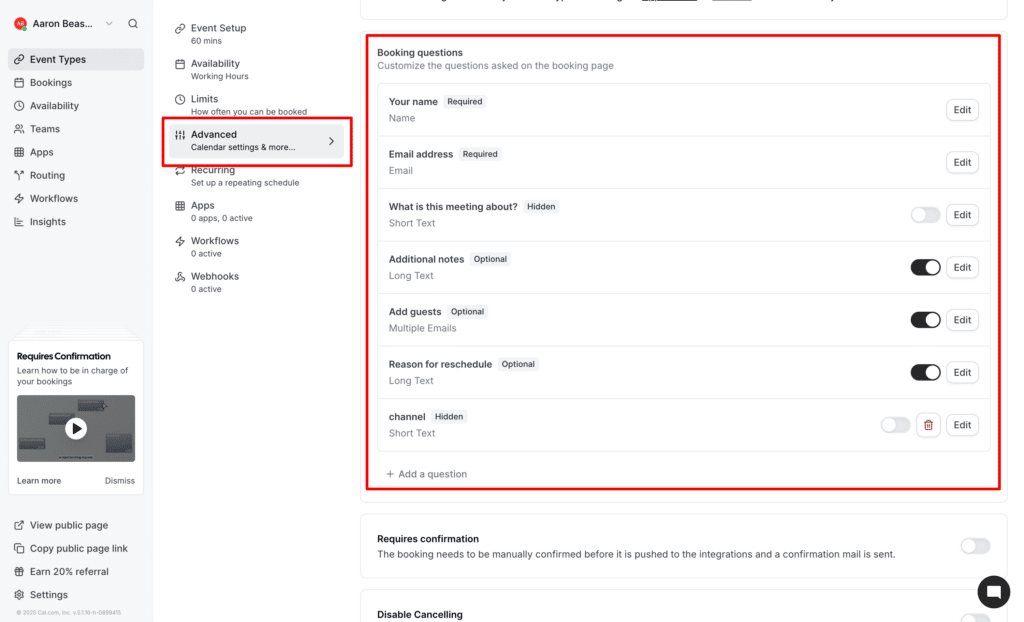
Step 2: Navigate to the Booking Questions section
In the setting section that appears, select the Advanced option from the left-hand menu and then scroll down to the ‘Booking Questions’ section.
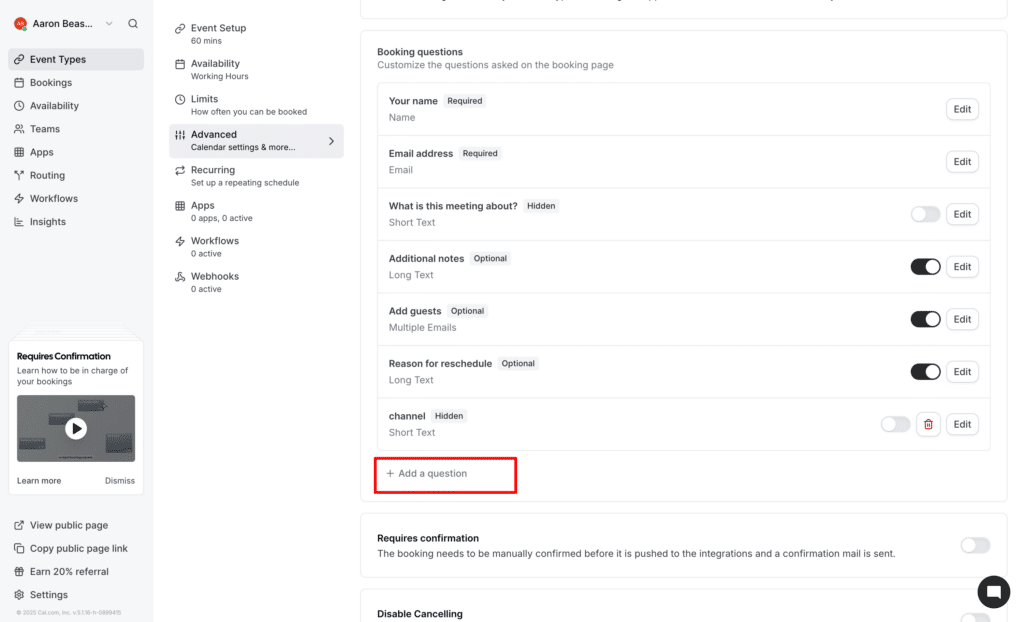
Step 3: Add the first field to your form
Start by selecting the ‘Add a question’ link at the bottom of the Booking Questions box.
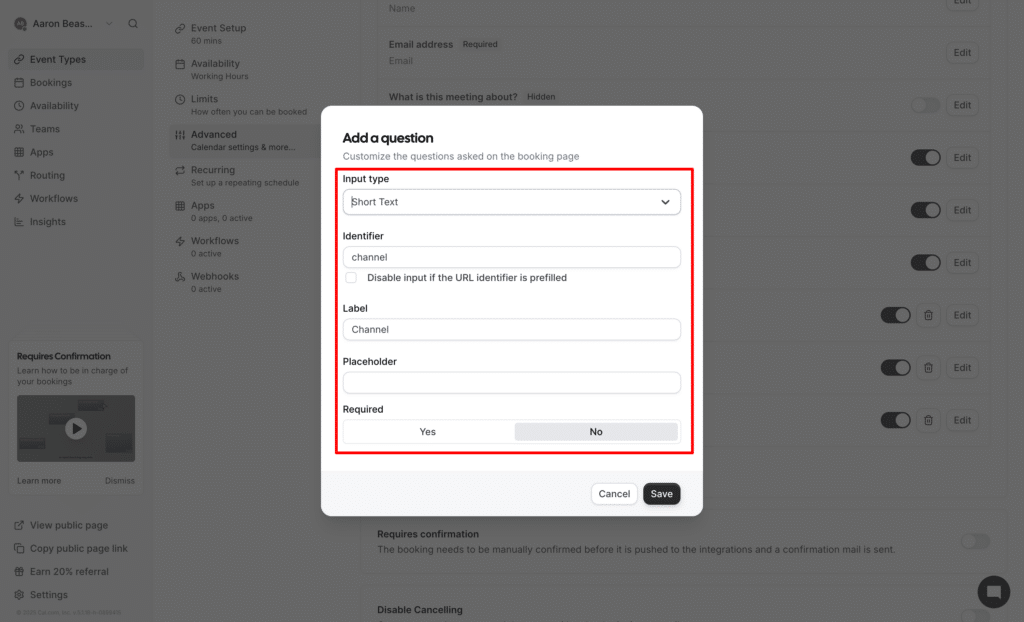
In the popup that appears, enter the following information:
- Input Type = Short Text
- Identifier = channel (all lowercase)
- Label = Channel
- Required = No
It should ultimately look a bit like this:
Step 4: Add the rest of the fields
Now that you have the first one setup correctly, you will now need to add the rest of the required fields. Here’s the configuration for each field:
Field #2
- Input Type = Short Text
- Identifier = drilldown1 (all lowercase)
- Label = Channel Drilldown 1
- Required = No
Field #3
- Input Type = Short Text
- Identifier = drilldown2 (all lowercase)
- Label = Channel Drilldown 2
- Required = No
Field #4
- Input Type = Short Text
- Identifier = drilldown3 (all lowercase)
- Label = Channel Drilldown 3
- Required = No
Field #5
- Input Type = Short Text
- Identifier = landing_page (all lowercase)
- Label = Landing Page
- Required = No
Field #6
- Input Type = Short Text
- Identifier = landing_page_group (all lowercase)
- Label = Landing Page Group
- Required = No
You should then have a form that looks a bit like this:

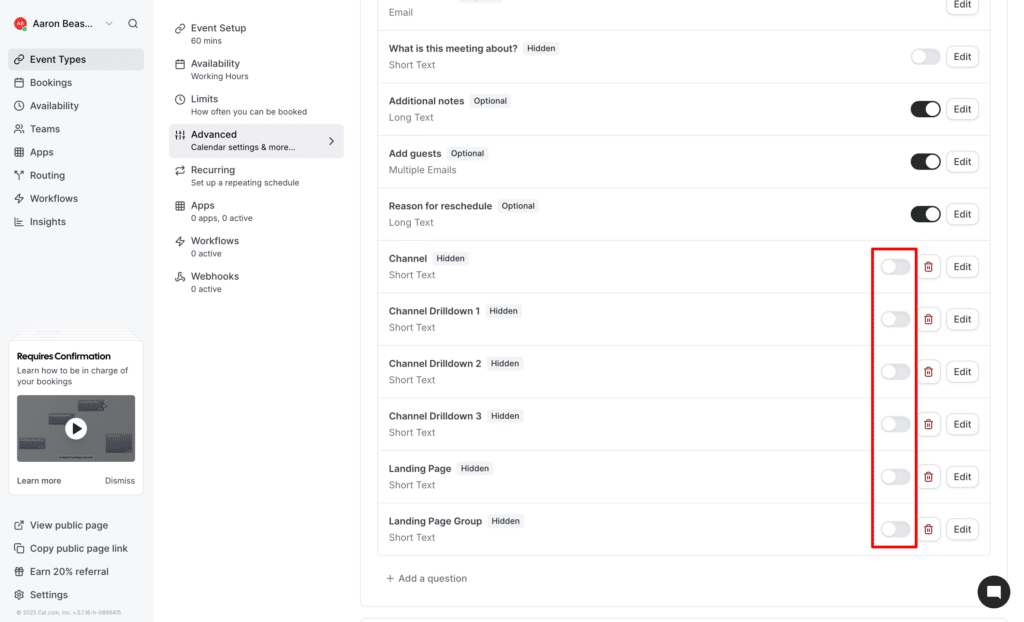
Step 5: Hide all the fields
To ensure these fields don’t actually appear on the booking form, you need to hide them.
To do so, simply switch off the ‘Show on booking page’ toggle. It looks a bit like this:

You need to switch this toggle off for all the Attributer fields you just added. So ultimately, your form should look a bit like this:
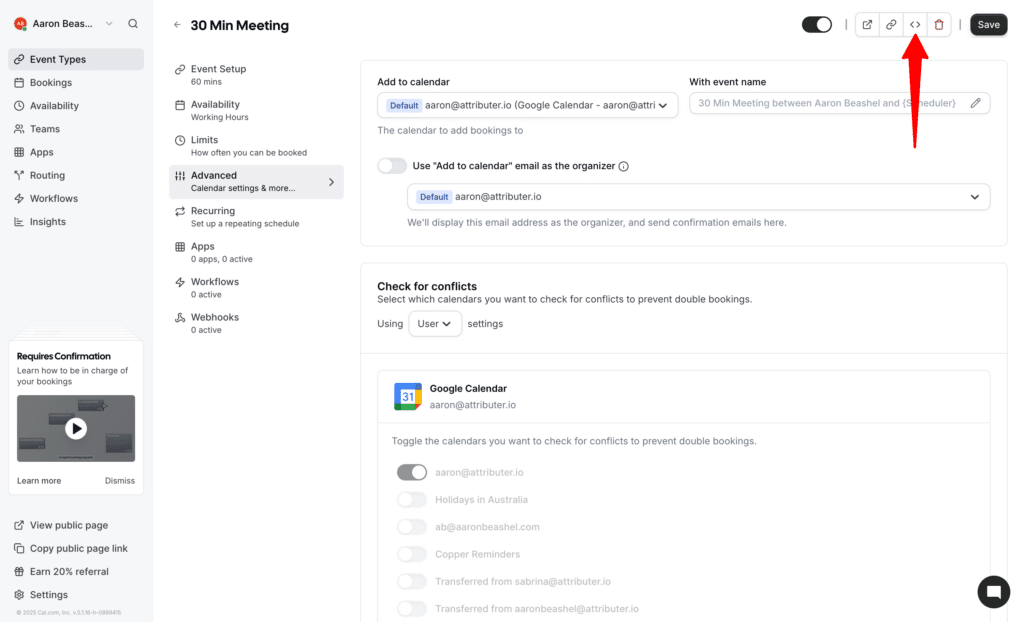
Step 6: Grab the embed code for your booking widget
You then need to copy the embed code for your booking widget. To do this, scroll to the top of the page and select the code button.
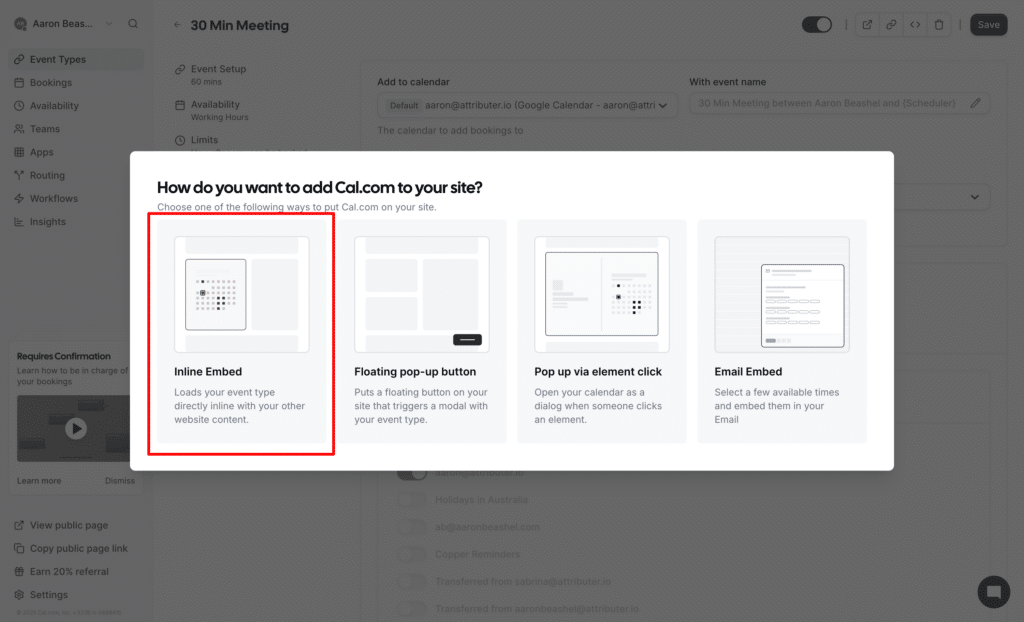
In the popup that appears, select the ‘Inline Embed’ option (Currently, Attributer only supports the Inline Embed option but if you need it to work with others then contact us and we’ll see what we can do).
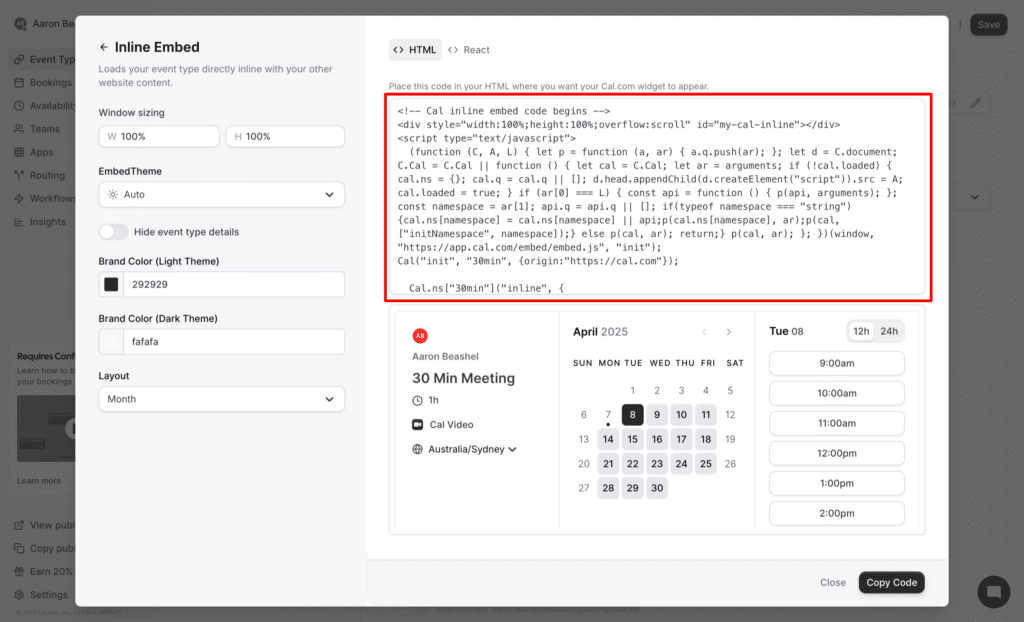
Finally, copy the code that you are given from the final screen in the popup.
Step 7: Modify the embed code
The next step is to add some additional code to the standard embed code you got from Cal.com.
The additional code you need to add (and where you need to add it) can be seen highlighted in bold below:
<!-- Cal inline embed code begins -->
<div style="width:100%;height:100%;overflow:scroll" id="my-cal-inline"></div>
<script type="text/javascript">
  (function (C, A, L) { let p = function (a, ar) { a.q.push(ar); }; let d = C.document; C.Cal = C.Cal || function () { let cal = C.Cal; let ar = arguments; if (!cal.loaded) { cal.ns = {}; cal.q = cal.q || []; d.head.appendChild(d.createElement("script")).src = A; cal.loaded = true; } if (ar[0] === L) { const api = function () { p(api, arguments); }; const namespace = ar[1]; api.q = api.q || []; if(typeof namespace === "string"){cal.ns[namespace] = cal.ns[namespace] || api;p(cal.ns[namespace], ar);p(cal, ["initNamespace", namespace]);} else p(cal, ar); return;} p(cal, ar); }; })(window, "https://app.cal.com/embed/embed.js", "init");
Cal("init", "30min", {origin:"https://cal.com"});

function waitForData() {
    if(!document.FlareTrk?.data?.drillData) {
        window.requestAnimationFrame(waitForData);
        return;
    }

    Cal.ns["30min"]("inline", {
        elementOrSelector:"#my-cal-inline",
        config: {"layout":"month_view"},
        calLink: "attributer/30min",
        config: {
            "channel": document.FlareTrk.data.drillData.channel,
            "drilldown1": document.FlareTrk.data.drillData.drillDown1,
            "drilldown2": document.FlareTrk.data.drillData.drillDown2,
            "drilldown3": document.FlareTrk.data.drillData.drillDown3,
            "drilldown4": document.FlareTrk.data.drillData.drillDown4,
            "gclid": document.FlareTrk.data.gclid,
            "fbclid": document.FlareTrk.data.fbclid,
            "id": document.FlareTrk.data.id,
            "landing_page": document.FlareTrk.data.landing_url,
            "landing_page_group": document.FlareTrk.data.landing_page_group
        }
      });
}
waitForData();

  Cal.ns["30min"]("ui", {"hideEventTypeDetails":false,"layout":"month_view"});
  </script>
  <!-- Cal inline embed code ends -->
If your Embed code looks slightly different to the above, it may be because you have customised some of the embed options (like switching from month view to weekly view, or changing the brand colours). This is not an issue and you can proceed to add the additional code as shown in bold above.
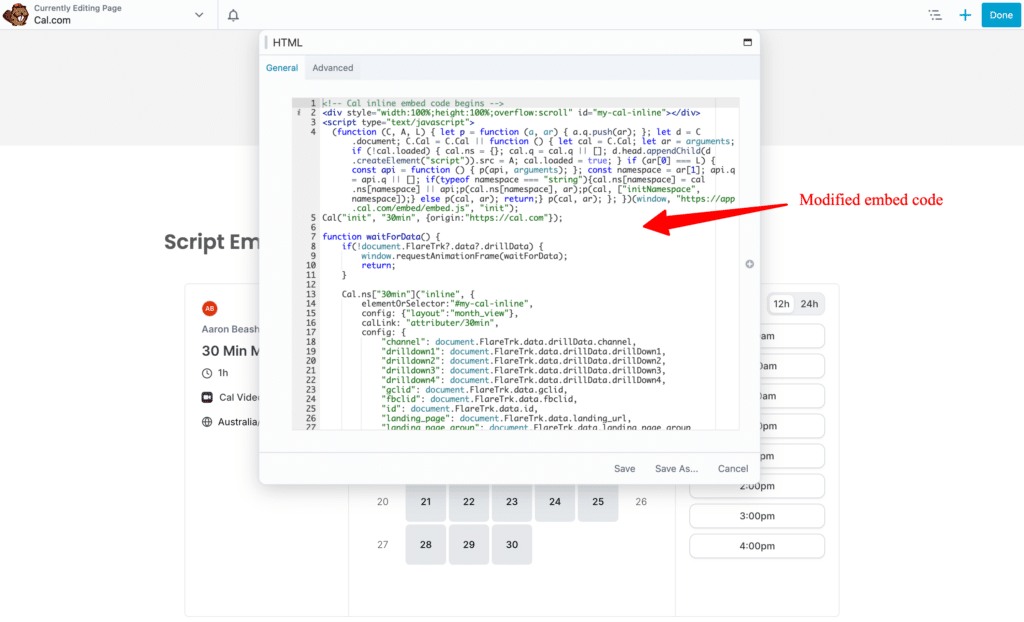
Step 8: Paste the modified embed code into your website
The final step is to place the modified embed code into your website where you want the Cal.com booking widget to appear.
This will look different depending on what website builder you use, but in the screenshot below you can see how we have added to our WordPress site (which uses the Beaver Builder page building plugin).
Step 9: Test it’s working
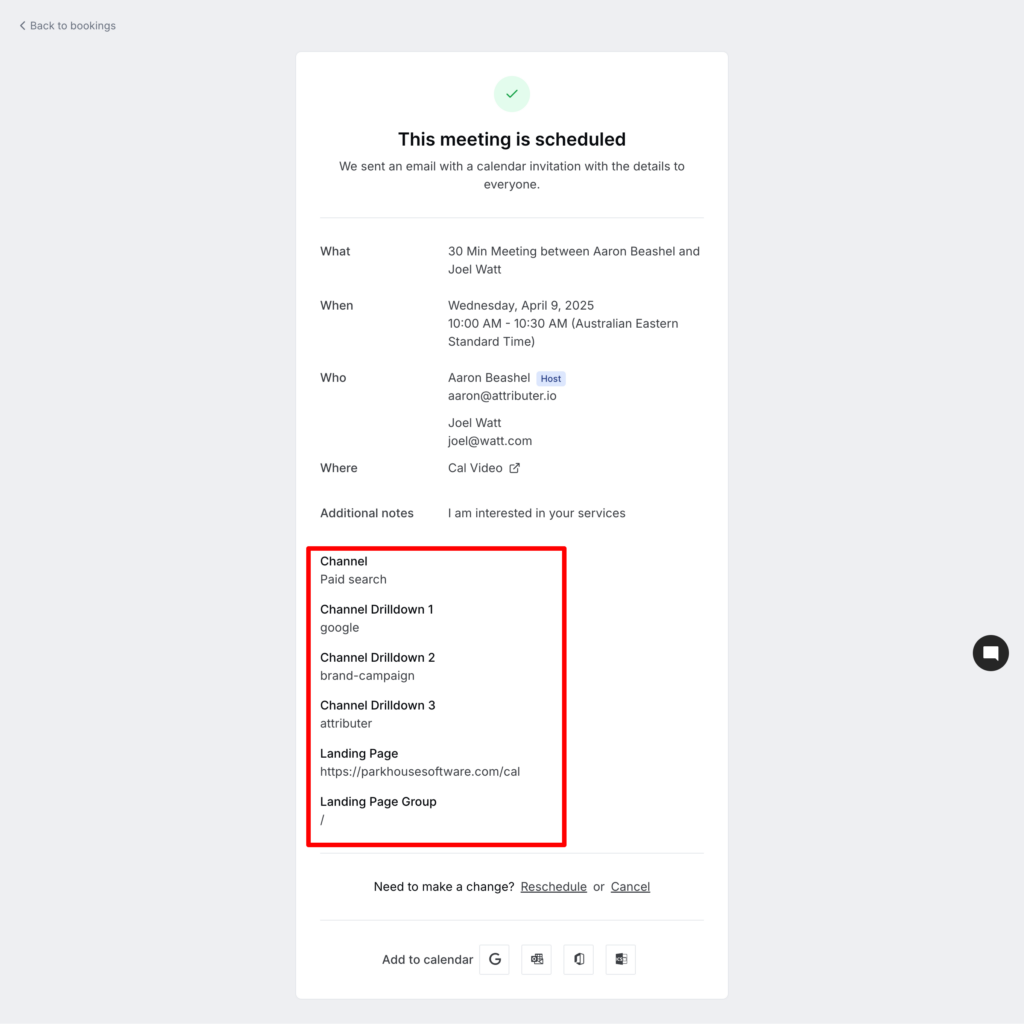
You can now go to your website and complete the form, and the attribution data should appear alongside each booking in your cal.com account (which can be seen by going to Bookings and then selecting the appropriate booking).
For more information on how to properly test Attributer, check out this article.
We understand that editing code can be difficult, so if you are having any issues please feel free to contact our support team. We would be happy to jump on a call and go through the setup process with you if needed.
Can't find the answer you need? Contact us!
Our team are available to answer any questions you have
