Help Center
Add hidden fields to Conversational Fluent Forms
This article shows how to add the hidden fields to conversational forms in Fluent Forms. If you use standard forms, then you can find instructions here.
Attributer is a little bit of code you add to your website. It tracks where your visitors are coming from (Paid Search, Paid Social, Organic Search, etc) and writes the data into hidden fields you add to your forms which is then captured by Fluent Forms and can be sent to your CRM and other tools.
In order for it to work, you need to add a series of hidden fields to your Conversational Fluent Forms. Here’s how to do it:
Step 1: Open the form you want Attributer to work with
In your WordPress admin panel, select the ‘Fluent Forms’ option from the left-hand navigation menu and then click the ‘Edit’ link underneath the form you want Attributer to work with

Step 2: Add 6x hidden fields to the form
The next step is to add 6x hidden fields to your form.
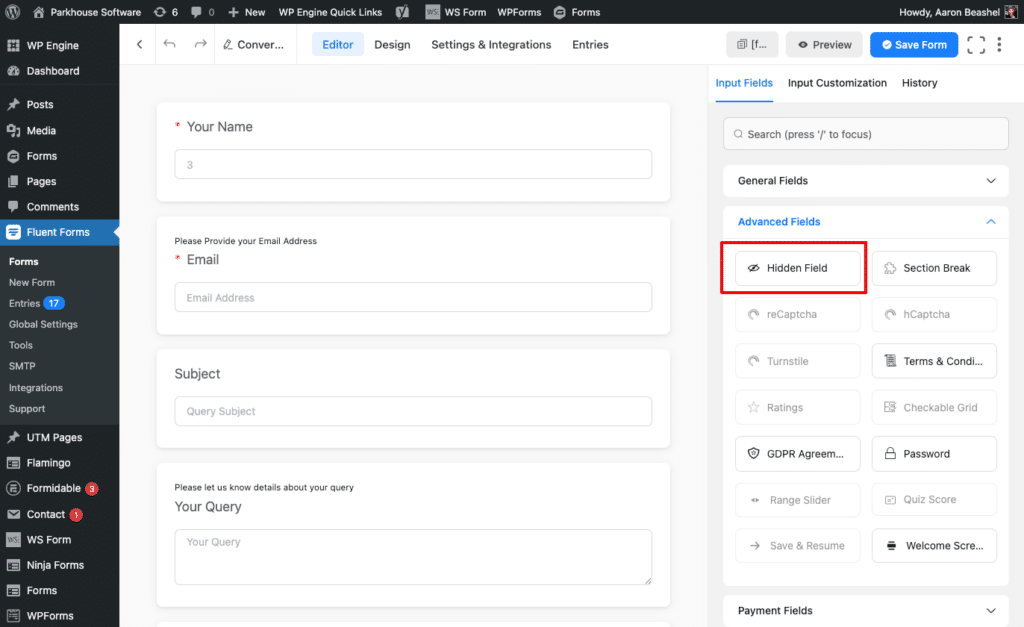
To add a hidden field to the form, simply drag and drop the ‘Hidden Field’ field type from the right-hand menu into your form (it’s under the ‘Advanced Fields’ section).

We recommend adding the hidden fields below the other visible fields on your form that you want your visitors to complete.
Step 3: Configure the hidden fields
Next, you need to configure each of the 6x hidden fields you just added to your form.
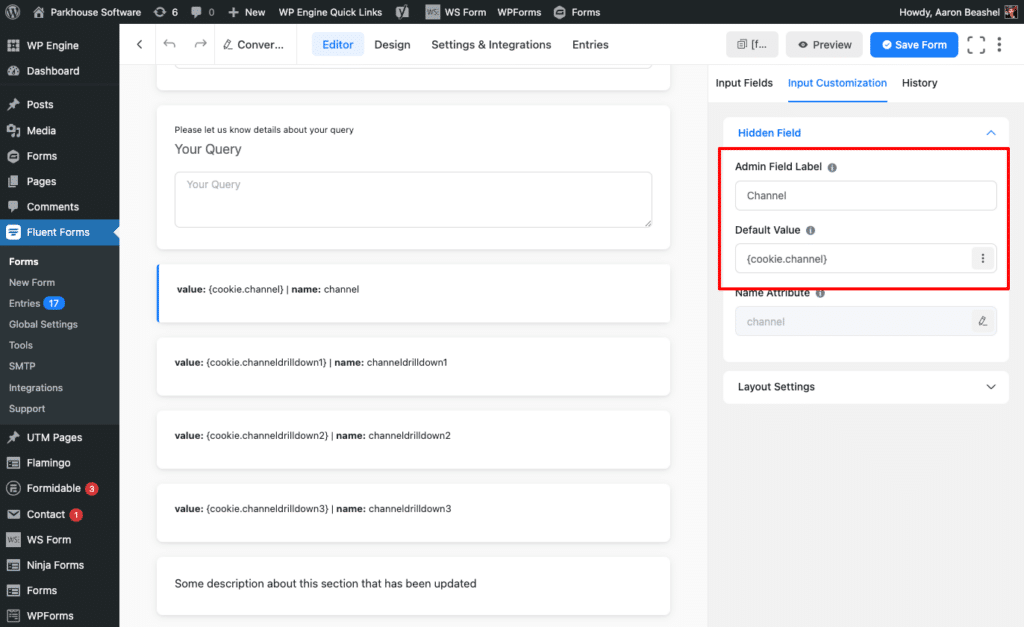
To configure a hidden field, simply click on the field and the options panel will appear on the right-hand side.

For each of the 6x hidden fields, add the following information:
Hidden Field #1
- Field Label = Channel
- Default Value = {cookie.channel}
- Name Attribute = channel
Hidden Field #2
- Field Label = Channel Drilldown 1
- Default Value = {cookie.channeldrilldown1}
- Name Attribute = channeldrilldown1
Hidden Field #3
- Field Label = Channel Drilldown 2
- Default Value = {cookie.channeldrilldown2}
- Name Attribute = channeldrilldown2
Hidden Field #4
- Field Label = Channel Drilldown 3
- Default Value = {cookie.channeldrilldown3}
- Name Attribute = channeldrilldown3
Hidden Field #5
- Field Label = Landing Page
- Default Value = {cookie.landingpage}
- Name Attribute = landingpage
Hidden Field #6
- Field Label = Landing Page Group
- Default Value = {cookie.landingpagegroup}
- Name Attribute = landingpagegroup
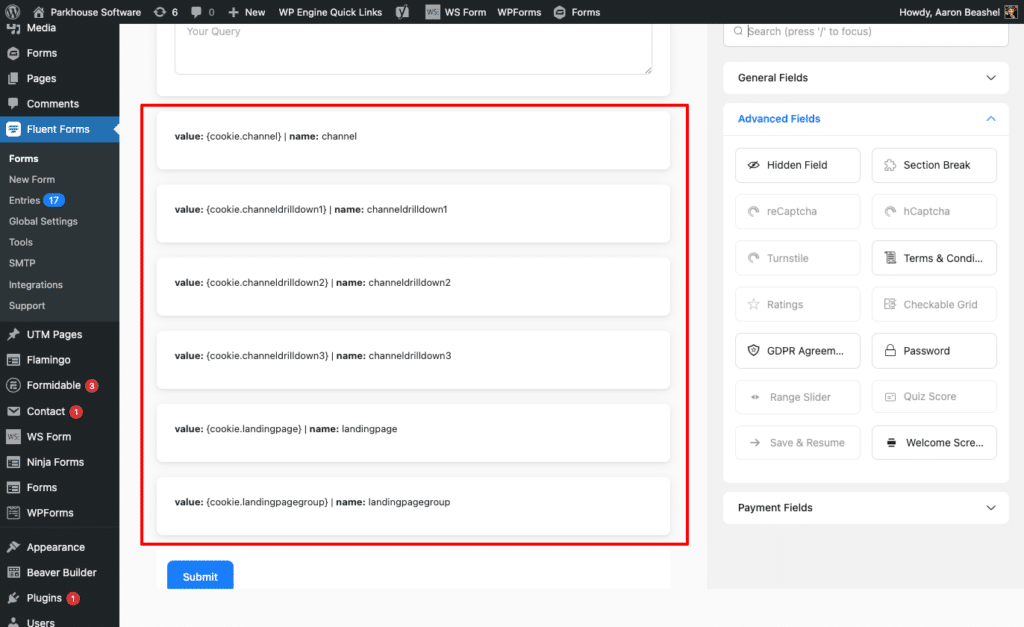
You should then have a form that looks a bit like this:

Step 4: Add some additional code above the embed shortcode
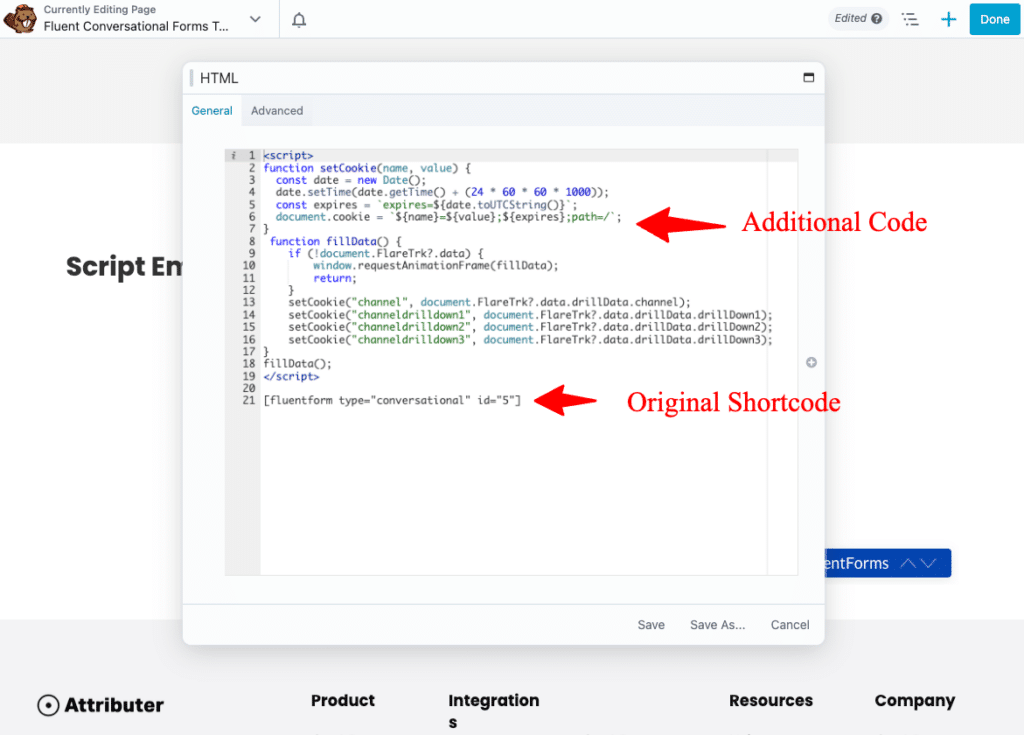
The final step is to add a bit of additional code above where you placed the embed shortcode for the form. The code you need to add can be seen below:
<script>
function setCookie(name, value) {
  const date = new Date();
  date.setTime(date.getTime() + (24 * 60 * 60 * 1000));
  const expires = `expires=${date.toUTCString()}`;
  document.cookie = `${name}=${value};${expires};path=/`;
}
 function fillData() {
    if (!document.FlareTrk?.data) {
        window.requestAnimationFrame(fillData);
        return;
    }
    setCookie("channel", document.FlareTrk?.data.drillData.channel);
    setCookie("channeldrilldown1", document.FlareTrk?.data.drillData.drillDown1);
    setCookie("channeldrilldown2", document.FlareTrk?.data.drillData.drillDown2);
    setCookie("channeldrilldown3", document.FlareTrk?.data.drillData.drillDown3);
}
fillData();
</script>
You need to place this additional code above where you placed the shortcode for the form. See example below:

Step 5: Test it’s working
You can now go to your website and complete the form, and the attribution data should appear alongside each form submission in the Entries section of Fluent Forms.
Can't find the answer you need? Contact us!
Our team are available to answer any questions you have

