Help Center
Add hidden fields to Fillout forms
Attributer is a little bit of code you add to your website. It tracks where your visitors are coming from (I.e. Paid Search, Paid Social, Organic Search, etc) and writes the data into hidden fields you add to your forms. This data is then captured by Fillout Forms and can be sent to your CRM and other tools.
In order for it to work, you need to add a series of hidden fields to your forms. Here’s how to do it:
Step 1: Open the form you want Attributer to work with
In your Fillout Forms dashboard, select the form you want Attributer to work with.

Step 2: Add UTM parameters in the Settings section
Once inside the editor, navigate to the ‘Settings’ section and then select the ‘UTM Parameters’ option for the left-hand menu.
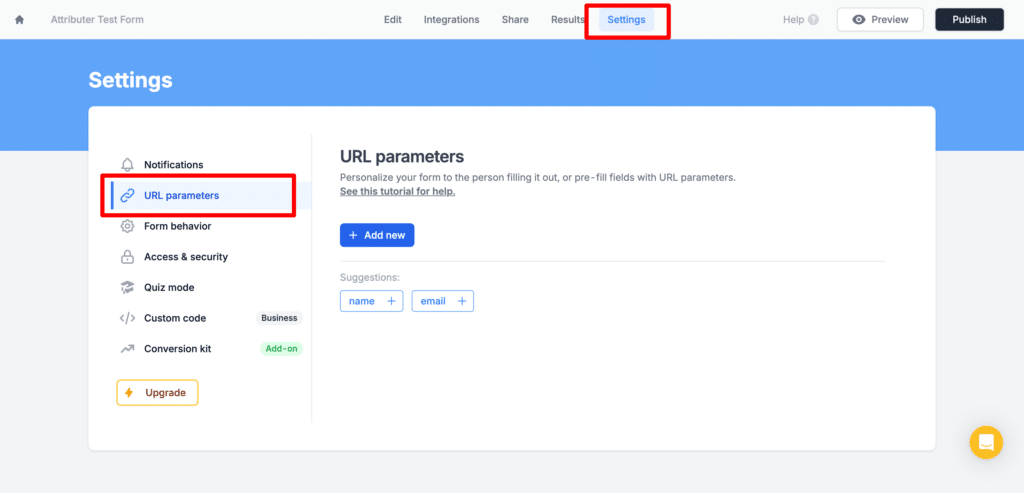
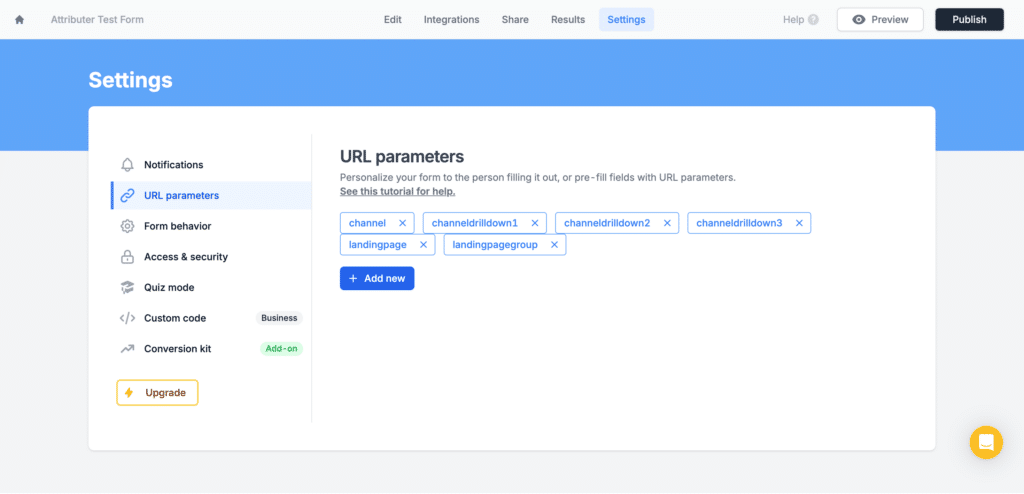
Once in the UTM parameters section, click the ‘Add New’ button to create a new URL parameter. You ultimately to add 6x UTM parameters with the following names:
- channel
- channeldrilldown1
- channeldrilldown2
- channeldrilldown3
- landingpage
- landingpagegroup
These should all be lowercase with no spaces.
It should ultimately end up looking like this:
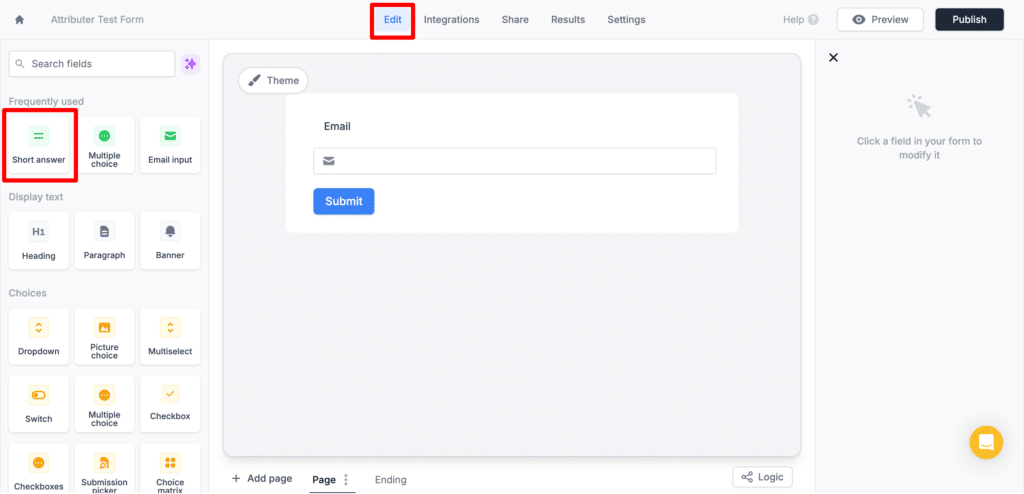
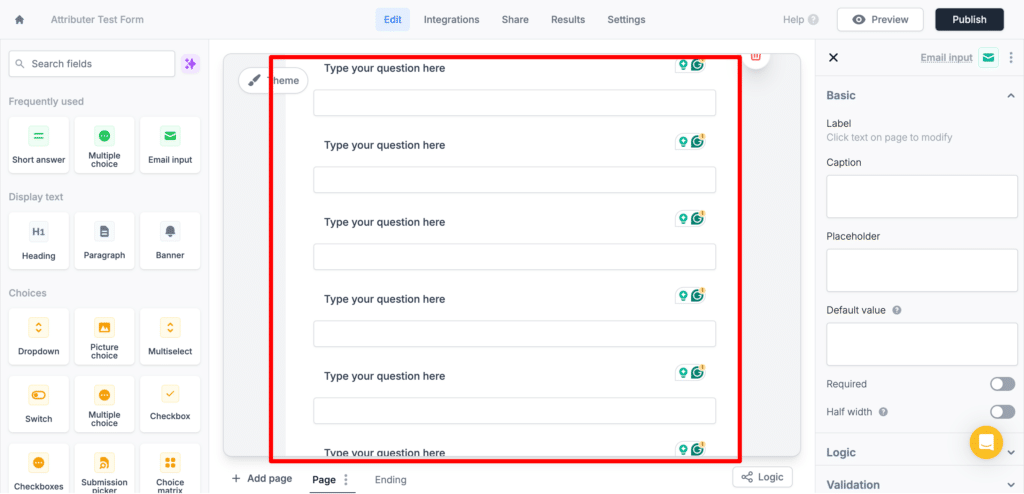
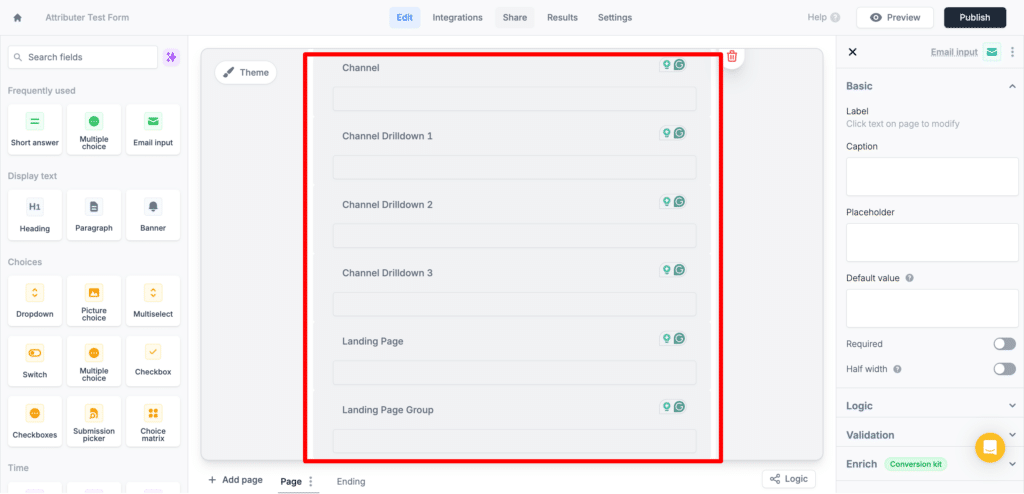
Step 3: Add 6x Short Answer fields to your form
Next, navigate back to the ‘Edit’ section of the form builder and drag and drop 6x ‘Short Answer’ fields into your form.
It should ultimately look a bit like this:
Step 4: Configure the fields
Next, you need to configure each of the 6 hidden fields you just added to your form.
To configure a field, simply click on it and the settings panel will appear on the right-hand side.
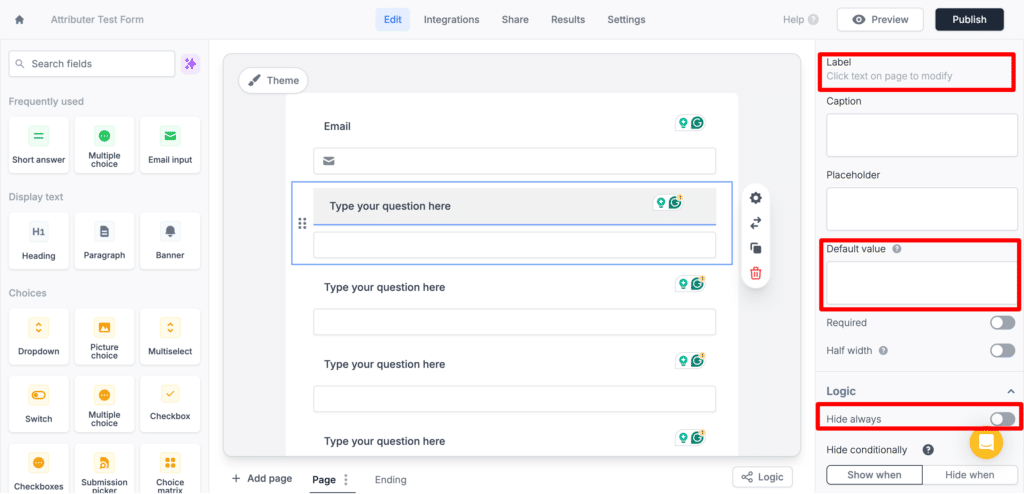
For each of the 6x hidden fields, add the following information:
Hidden Field #1
- Label = Channel
- Default Value = Select the ‘channel’ UTM parameter you created earlier by clicking the blue ‘+’ icon in the field
- Hide Always – Make sure this is switched on
Hidden Field #2
- Label = Channel Drilldown 1
- Default Value = Select the ‘channeldrilldown1’ UTM parameter you created earlier by clicking the blue ‘+’ icon in the field
- Hide Always – Make sure this is switched on
Hidden Field #3
- Label = Channel Drilldown 2
- Default Value = Select the ‘channeldrilldown2’ UTM parameter you created earlier by clicking the blue ‘+’ icon in the field
- Hide Always – Make sure this is switched on
Hidden Field #4
- Label = Channel Drilldown 3
- Default Value = Select the ‘channeldrilldown3’ UTM parameter you created earlier by clicking the blue ‘+’ icon in the field
- Hide Always – Make sure this is switched on
Hidden Field #5
- Label = Landing Page
- Default Value = Select the ‘landingpage’ UTM parameter you created earlier by clicking the blue ‘+’ icon in the field
- Hide Always – Make sure this is switched on
Hidden Field #6
- Label = Landing Page Group
- Default Value = Select the ‘landingpagegroup’ UTM parameter you created earlier by clicking the blue ‘+’ icon in the field
- Hide Always – Make sure this is switched on
You should then have a form that looks a bit like this:
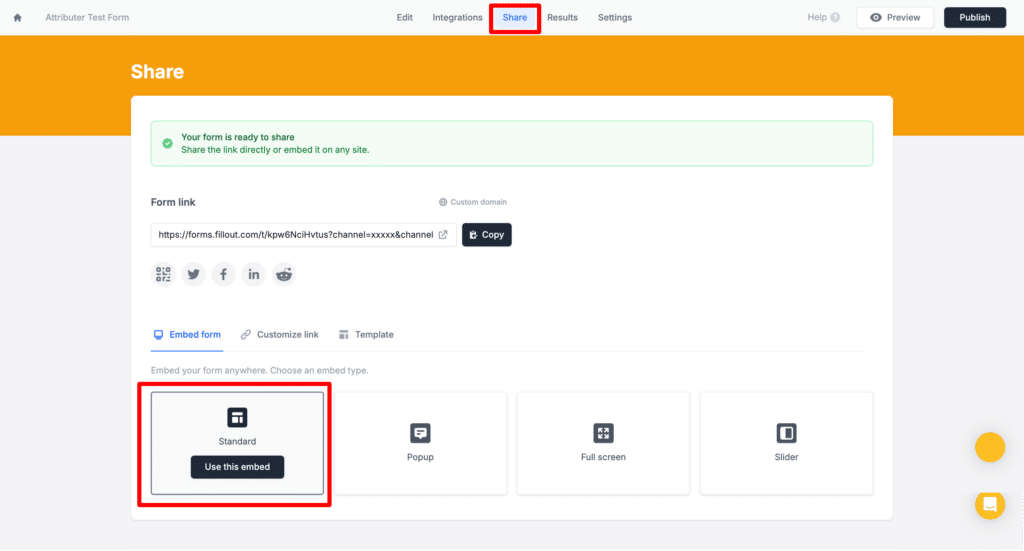
Step 5: Copy the embed code
Next, navigate to the ‘Share’ section of the form builder and click the ‘Use This Embed’ button in the ‘Standard’ box.
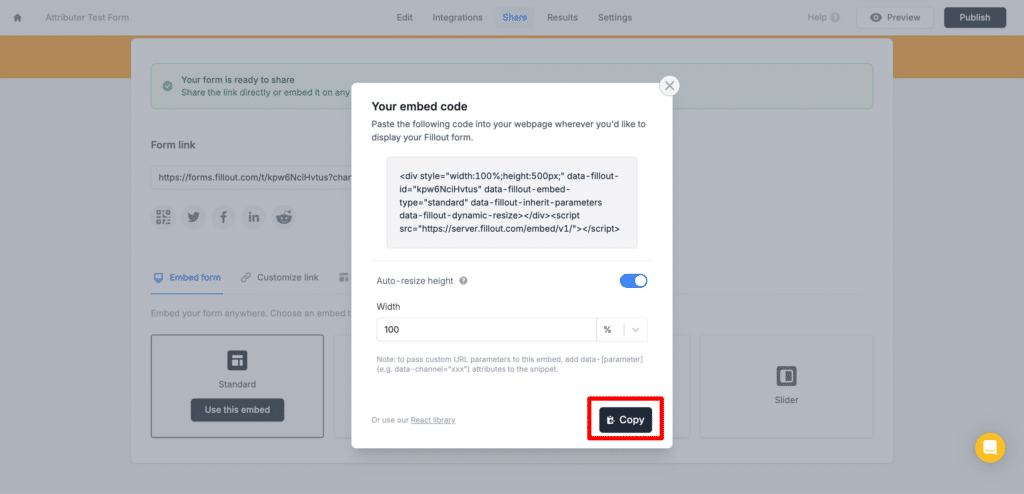
In the popup that appears, click the ‘Copy’ button to copy the embed code to the clipboard.
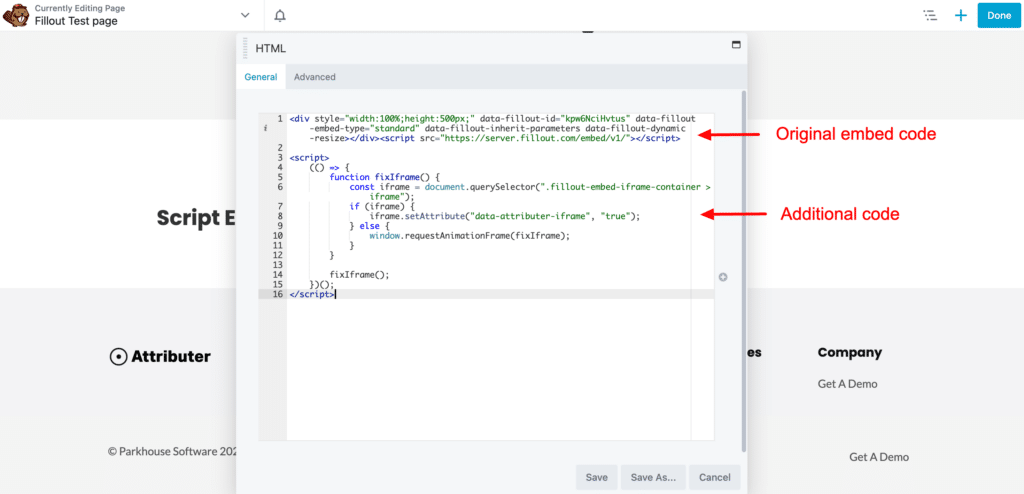
Step 6: Paste the embed code on your site + add some additional code
Finally, paste the embed code on your website where you want the form to display.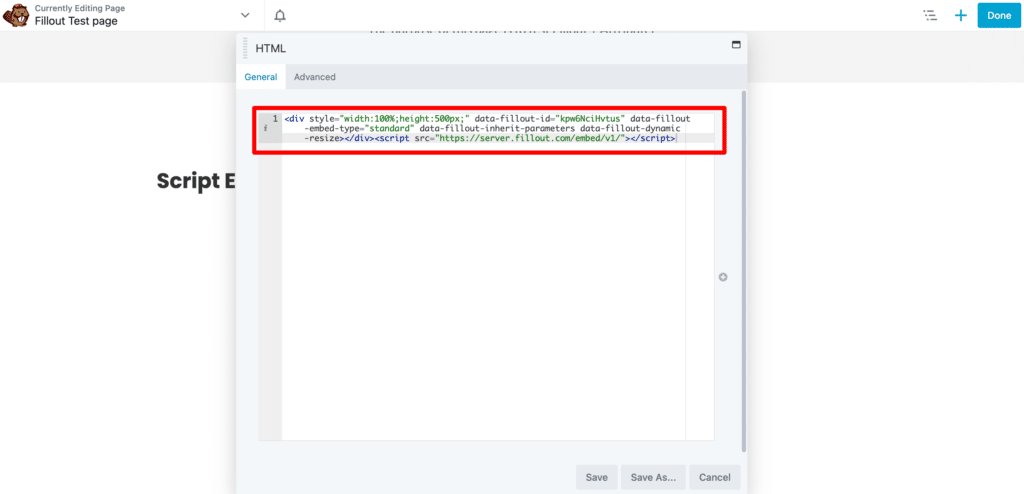
Then directly beneath that, copy and paste this code:
<script>
    (() => {
        function fixIframe() {
            const iframe = document.querySelector(".fillout-embed-iframe-container > iframe");
            if (iframe) {
                iframe.setAttribute("data-attributer-iframe", "true");
            } else {
                window.requestAnimationFrame(fixIframe);
            }
        }

        fixIframe();
    })();
</script>
It should ultimately look a bit like this:
Step 7: Test it works
You have now completed setting up Attributer with your Fillout form.
The final step is to test it works. To do this, follow these instructions.
Can't find the answer you need? Contact us!
Our team are available to answer any questions you have
