Help Center
Add Hidden Fields to Wix Forms
This article shows you how to add the hidden fields to Wix’s Classic form builder . If you use Wix’s ‘New’ form builder then you can find instructions here, or if you use Wix Studio you can find instructions here.
Attributer is a little bit of code you add to your website. It tracks where your visitors are coming from (I.e. Paid Search, Paid Social, Organic Search, etc) and writes the data into hidden fields you add to your forms. This data is then captured alongside each form submission in Wix and can be sent to your CRM and other tools.
In order for it to work, you need to add a series of hidden fields to your Wix forms. Here’s how to do it:
Step 1: Add some additional code to fix a Wix issue
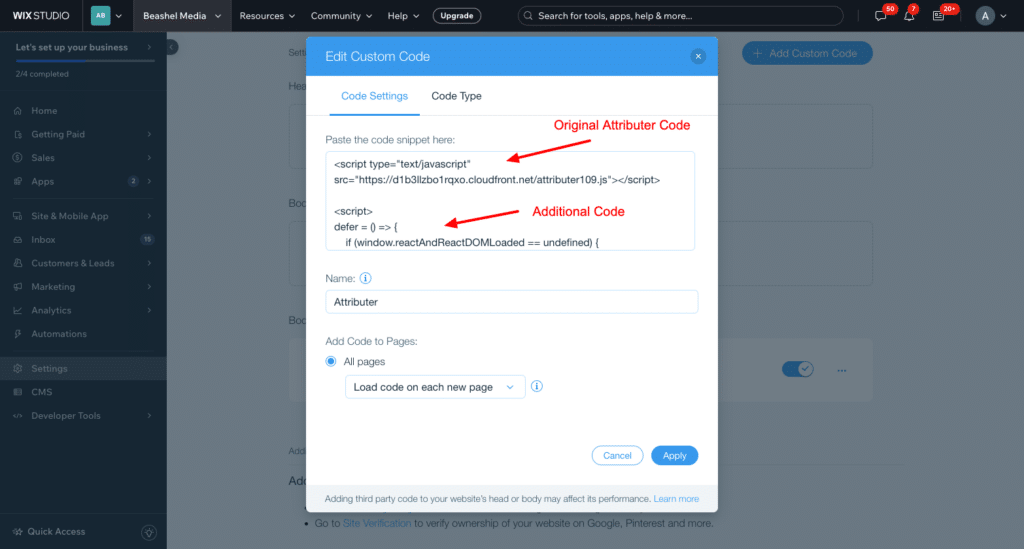
Wix Forms have a bug where Attributer will successfully write the data into the hidden fields but the data will be discarded on submission. This only impacts visitors to your site using Google Chrome browser on Android devices.
We have alerted the team at Wix of this issue and we hope they will fix it soon, but in the meantime you can add this code directly below the Attributer code you added from your account.
<script>

defer = () => {
    if (window.reactAndReactDOMLoaded == undefined) {
        return window.requestAnimationFrame(defer);
    }

    console.log("REACT LOAD");

    reactAndReactDOMLoaded.then(() => {
        window.setTimeout(() => {
            console.log("FORM WATCH");
            document.FlareTrk.watchForm();
        }, 500);
    });
};

defer();
</script>
It should look a bit like this:
Step 2: Add 6x ‘Short Answer Field’ form fields to your form
In your Wix account, open the page that contains your form in the Wix Editor and then select the form on the page. In the options that appear, select the ‘Add New Field’ option.
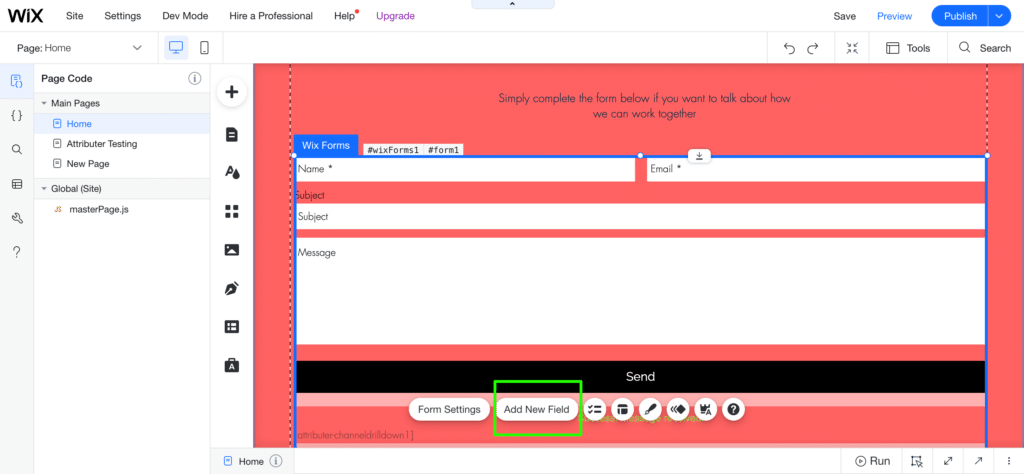
In the popup that appears, select the ‘Basic Fields’ option in the left-hand menu and then click the ‘+’ button next to the ‘Short Answer Field’ to add it to your form.

Select it several more times to add 6x ‘Short Answer Field’ form fields to your form
Step 3: Label the fields
Now that the fields have been added to your form, it’s time to name them so that Attributer knows which fields to write the marketing attribution data to.
To name the fields, simply double click each one and a popup will appear that looks a bit like this:
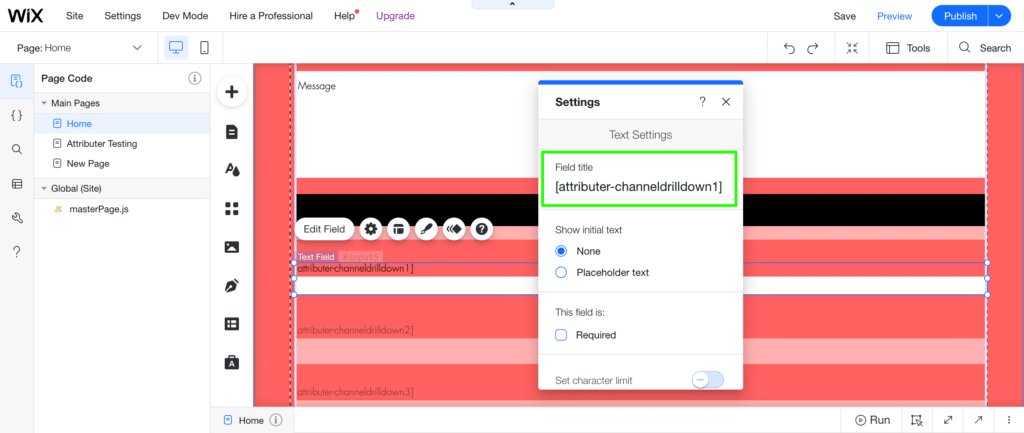
You’ll need to give each of the 6x fields the following titles (including the square brackets):
Field #1
- Field Title = [attributer-channel]
Field #2
- Field Title = [attributer-channeldrilldown1]
Field #3
- Field Title = [attributer-channeldrilldown2]
Field #4
- Field Title = [attributer-channeldrilldown3]
Field #5
- Field Title = [attributer-landingpage]
Field #6
- Field Title = [attributer-landingpagegroup]
Step 4: Hide the fields
Hiding a field means that the field does not show to visitors on your website but is technically still present on your form (and therefore Attributer can write attribution information to it).
To do hide these fields, select ‘Dev mode’ from the top menu bar and then select ‘Turn On Dev Mode’
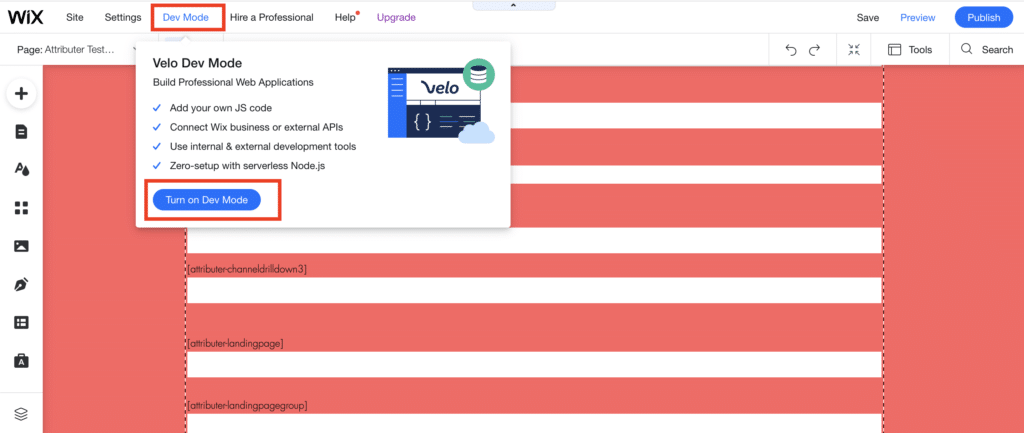
With Dev Mode turned on, select the recently added form fields and then select the ‘Hidden’ option in the Dev Mode panel.
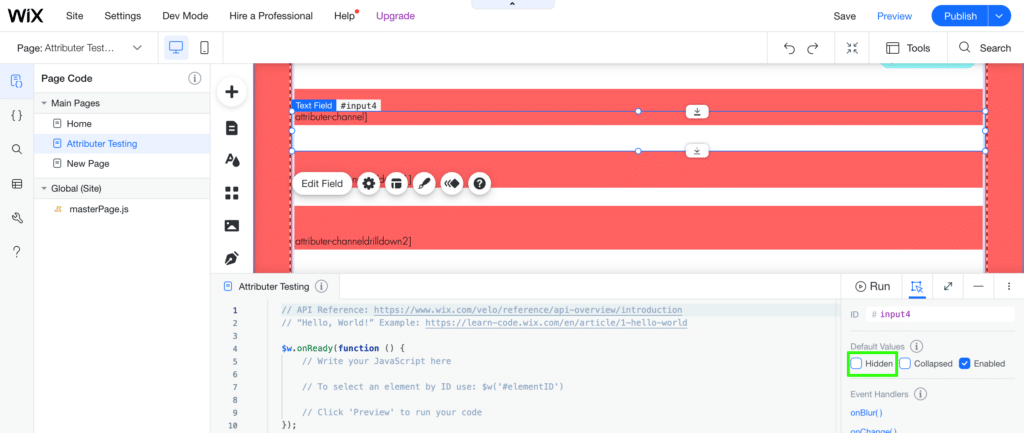
Repeat the above to hide each of the 6x form fields you added for Attributer.
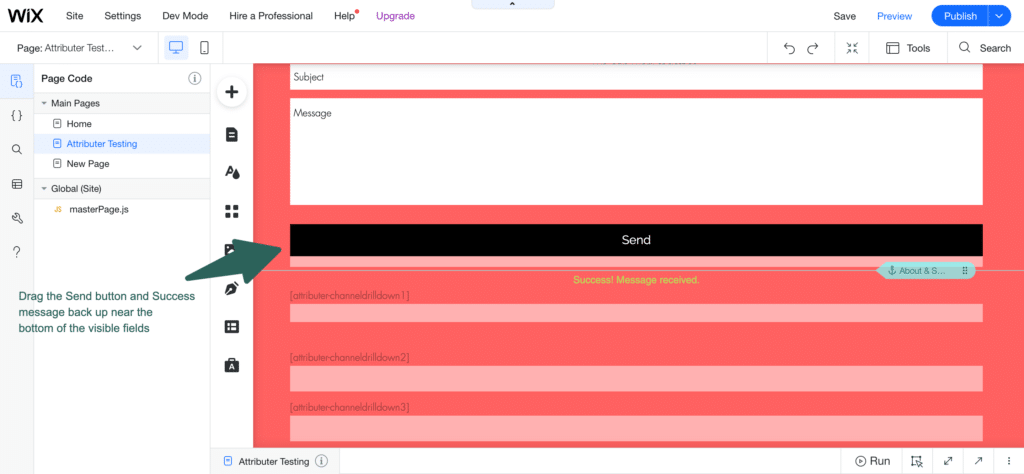
Step 5: Move the submit button (optional)
It may be the case that adding these additional 6x form fields to the bottom of your form has pushed the Send button and associated Success Message considerably down the page. Then when you hide the fields, you’re left with a large space between your form fields and the submit button.
To fix this, simply click and drag the Send Button & Success Message back up over the top of the hidden fields so that they sit in the desired position just below your visible form fields.
Can't find the answer you need? Contact us!
Our team are available to answer any questions you have
