Help Center
Getting Attributer to work with Wix Studio forms
This article shows you how to add hidden fields to forms in Wix Studio. If you use the standard Wix editor, then you can find instructions for adding hidden fields here.
Attributer is a little bit of code you add to your website. It tracks where your visitors are coming from (I.e. Paid Search, Paid Social, Organic Search, etc) and writes the data into hidden fields you add to your forms which is then captured in Hubspot.
Wix Studio, however, doesn’t really have the ability to add hidden fields.
So in this article, well show you how to set it up so that Attributer writes the data into the form submission via the Velo API.
Step 1: Add additional code below the main Attributer code
By now, you should have already added the main Attributer snippet to the ‘Head’ section of your website. If you haven’t already, here are instructions for adding it via the Wix admin area or instructions for adding it via Google Tag Manager.
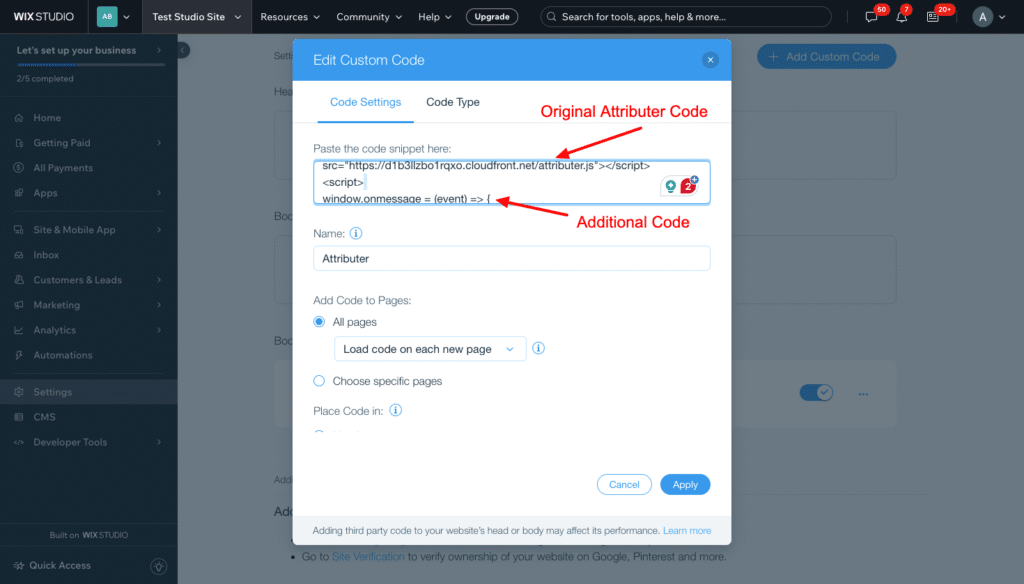
Now what you need to do is add some additional code below the original Attributer code. The code you need to add can be seen below:
<script>
window.onmessage = (event) => {
if (event.data.source != "ATTRIBUTERINTERNAL" || event.data.type != "ping" || !document.FlareTrk?.data) {
return;
}
console.log("External got message, sending data")
event.source.postMessage({ source: "ATTRIBUTER", type: "data", data: document.FlareTrk?.data }, "*");
};
</script>
As mentioned earlier, this additional code snippet needs to be placed below the main Attributer script. It should look a bit like this:
Step 2: Add 6x Short Answer fields to your form and hide them
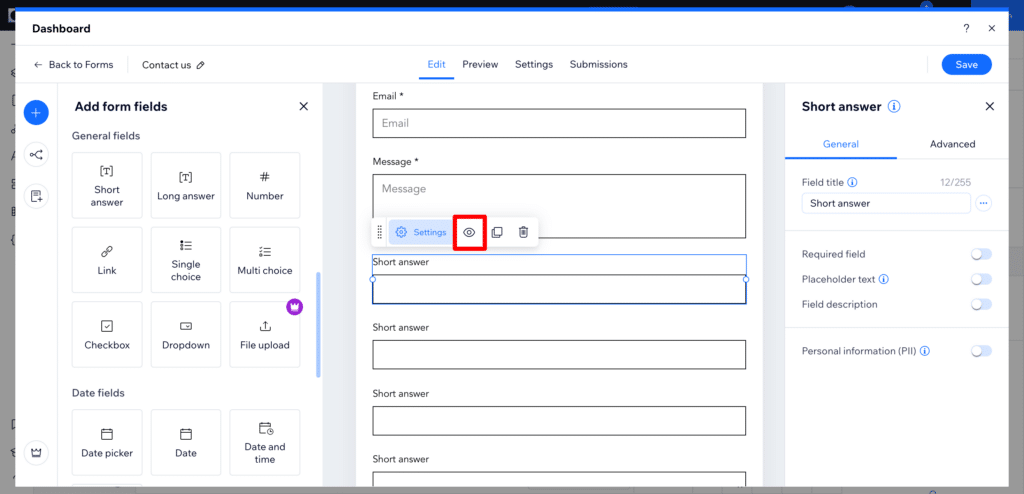
Open the form you want Attributer to work with and drag-and-drop 6x Short Answer fields into the form.

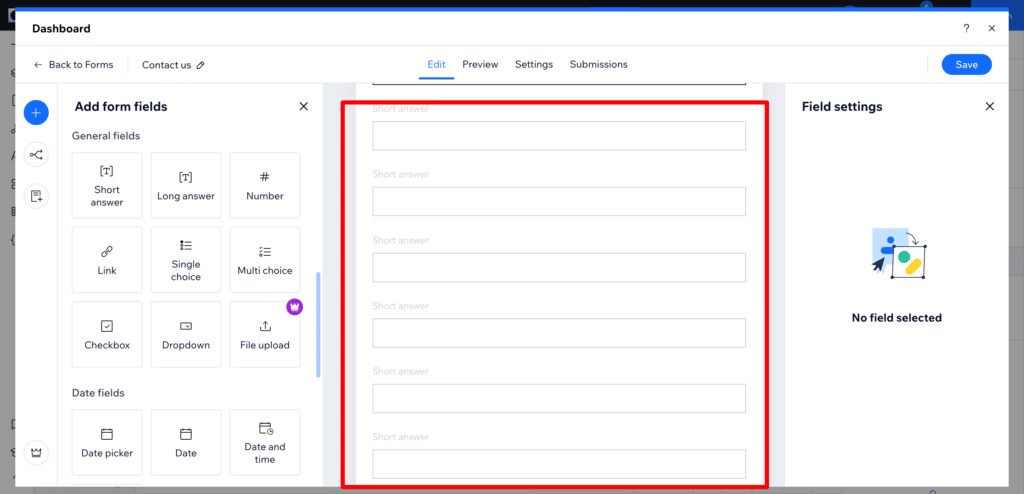
Now, select each form field and click the eye icon to hide them
It should ultimately look a bit like this:
Step 3: Configure the fields
Now, you need to give each field a Title and a Field key. The below video shows how:
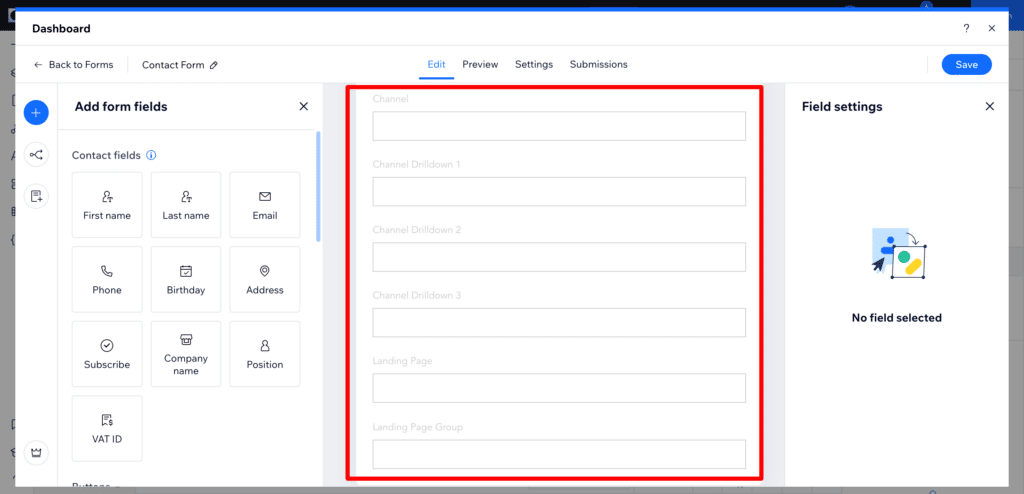
These are the titles and field keys you need to give each form field:
Field #1
- Field Title = Channel
- Field Key = channel
Field #2
- Field Title = Channel Drilldown 1
- Field Key = channel_drilldown_1
Field #3
- Field Title = Channel Drilldown 2
- Field Key = channel_drilldown_2
Field #4
- Field Title = Channel Drilldown 3
- Field Key = channel_drilldown_3
Field #5
- Field Title = Landing Page
- Field Key = landing_page
Field #6
- Field Title = Landing Page Group
- Field Key = landing_page_group
It should ultimately look a bit like this:
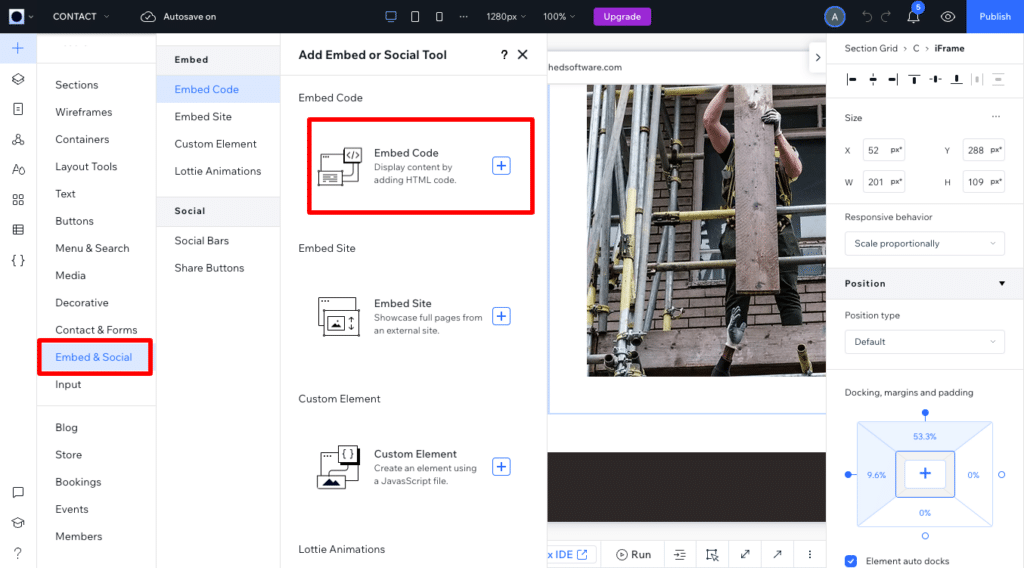
Step 4: Add an Embed block to the page where the form is
Open up the page that contains the form you want Attributer to work with, and drag-and-drop an Embed block into the page near the form.
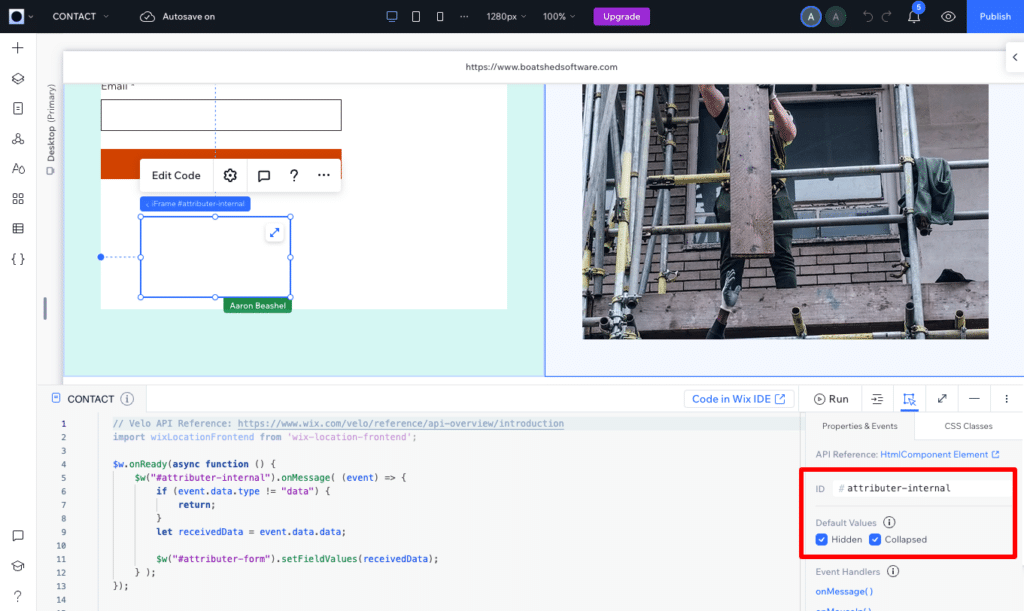
Now, click the embed block and in the properties panel at the bottom, enter the following details:
- ID = attributer-internal
- Hidden = Make sure this checkbox is checked
- Collapse = Make sure this checkbox is checked
It should look a bit like this:
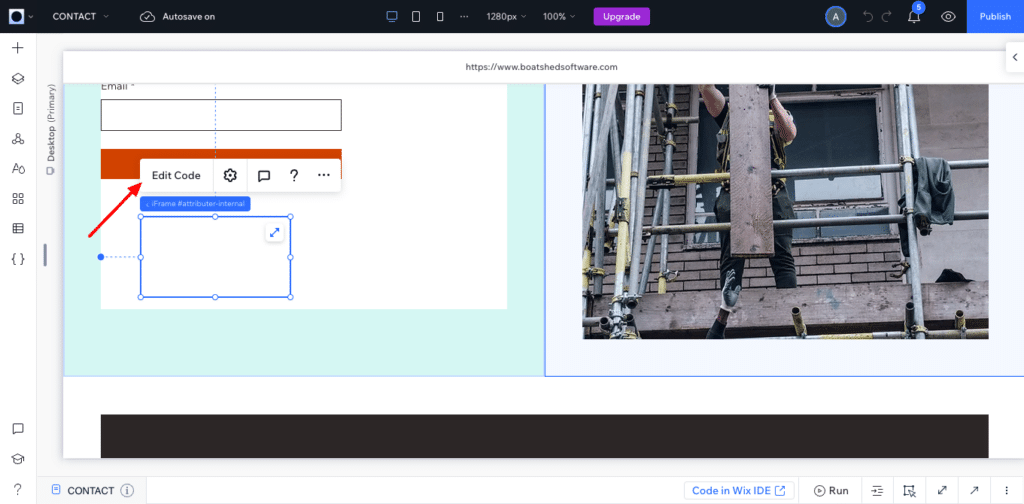
Step 5: Add some code to the Embed block
Now click the ‘Edit Code’ button above the Embed block you just added in Step 2.
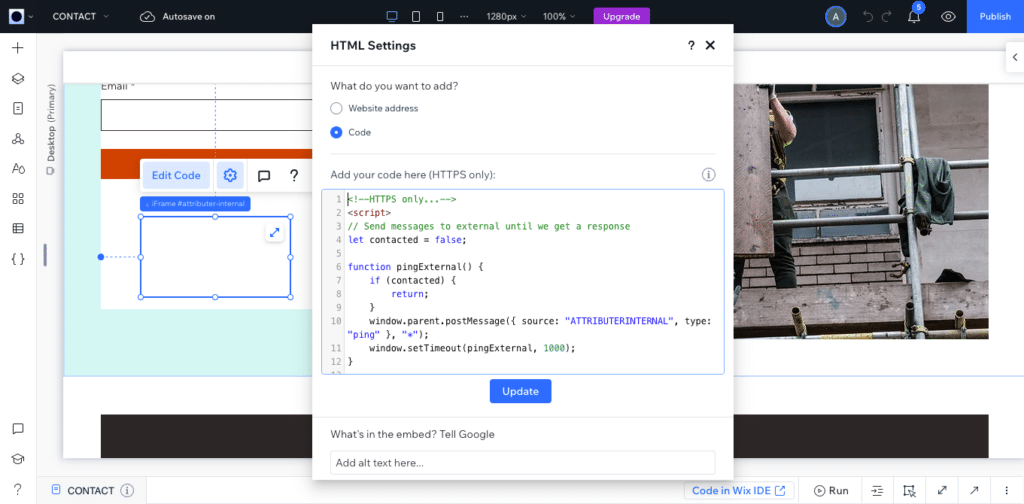
In the code editor that appears, paste the following code:
<!--HTTPS only...-->
<script>
// Send messages to external until we get a response
let contacted = false;

function pingExternal() {
if (contacted) {
return;
}
window.parent.postMessage({ source: "ATTRIBUTERINTERNAL", type: "ping" }, "*");
window.setTimeout(pingExternal, 1000);
}

window.onmessage = (event) => {
if (event.data.source != "ATTRIBUTER") {
return;
}
contacted = true;
const data = event.data.data;
const send_data = {
"channel": data.drillData.channel,
"channel_drilldown_1": data.drillData.drillDown1,
"channel_drilldown_2": data.drillData.drillDown2,
"channel_drilldown_3": data.drillData.drillDown3,
"channel_drilldown_4": data.drillData.drillDown4,

"gclid": data.gclid,
"msclkid": data.msclkid,
"fbclid": data.fbclid,
"id": data.id,

"landing_page": data.landing_url,
"landing_page_group": data.landing_page_group
};
window.parent.postMessage({ source: "ATTRIBUTERINTERNAL", type: "data", data: send_data }, "*");
};

pingExternal();
</script>
It should ultimately look a bit like this:
Step 6: Copy the Form ID
Select the form you want Attributer to work with and, in the properties editor, copy the form ID.
In the screenshot below, you can see the form ID on our page is ‘attributer-form’ (this will likely be different for your form, and if it isn’t set yet, you can set it to anything you want)
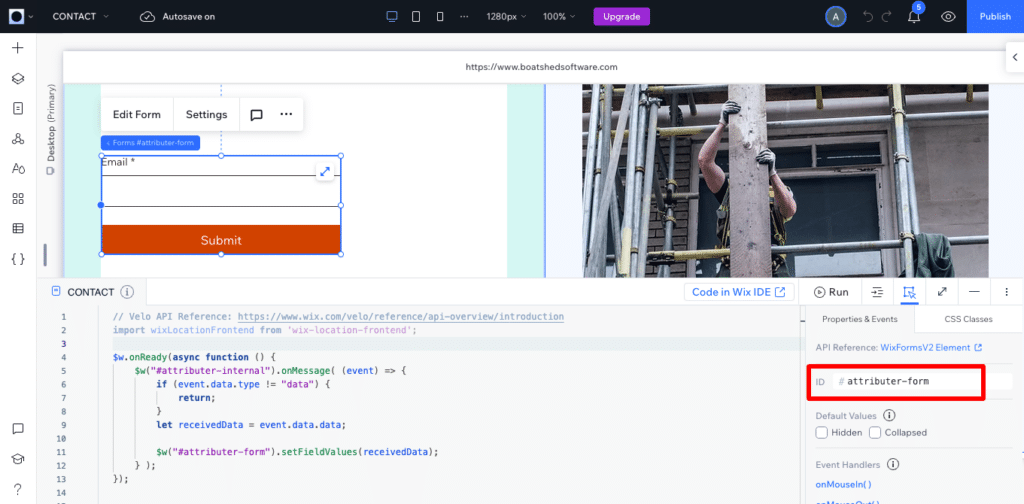
Paste this form ID in a note, Google Doc, etc. so you can use it in Step 5.
Step 7: Generate personalised code
Get the Form ID you copied in Step 4 and enter it into the code generator below:
Once you’ve generated the code, copy it so you can use it in Step 5.
Step 8: Add the personalised code to the page
Finally, paste the code into the page’s code box. It should look a bit like this:
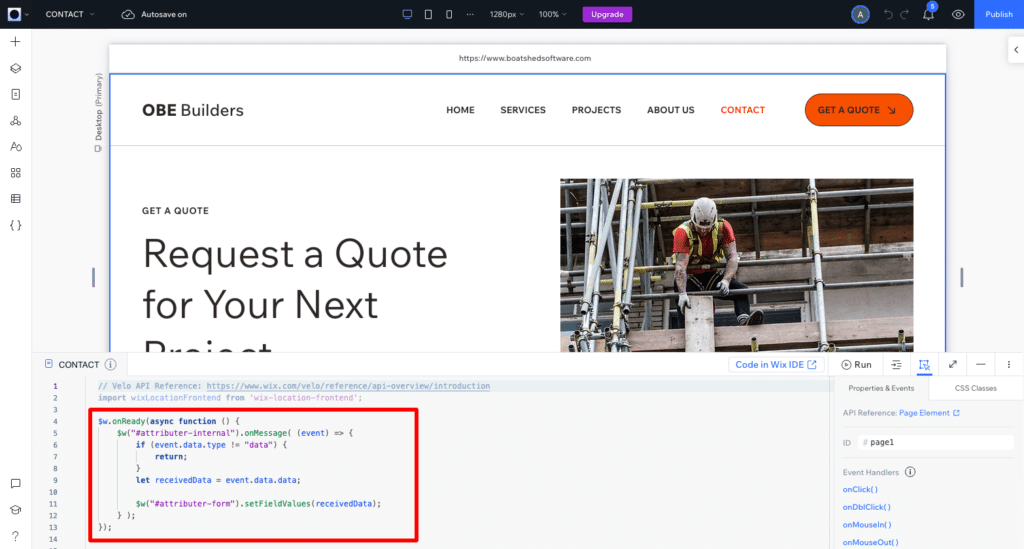
That’s it, your done!
Step 9: Test it’s working
Go to your website and submit the form you just set Attributer up with.
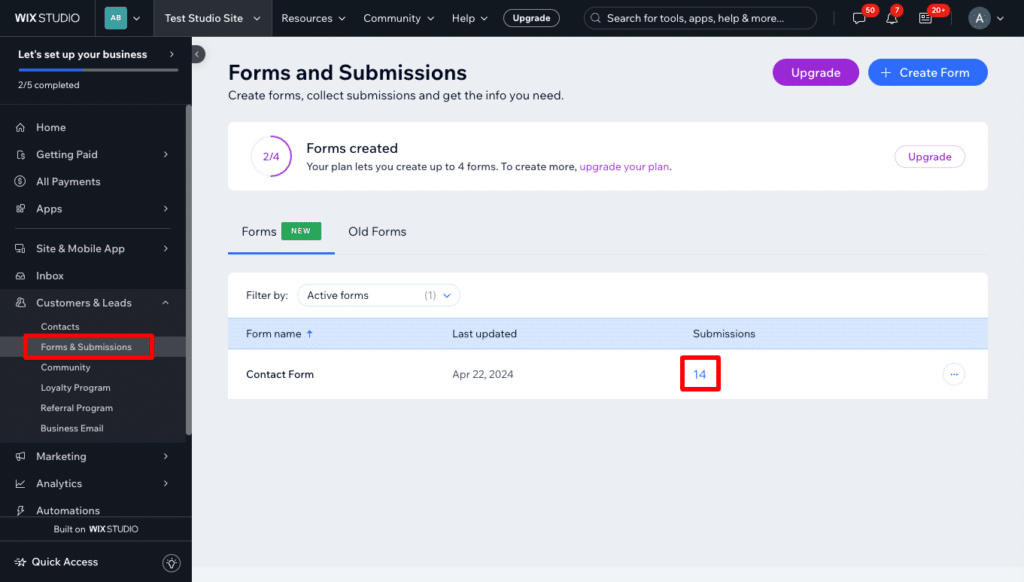
Now go back to your Wix Dashboard, select the ‘Forms and Submissions’ option from the navigation, and click the number of submissions next to the form you want to examine.
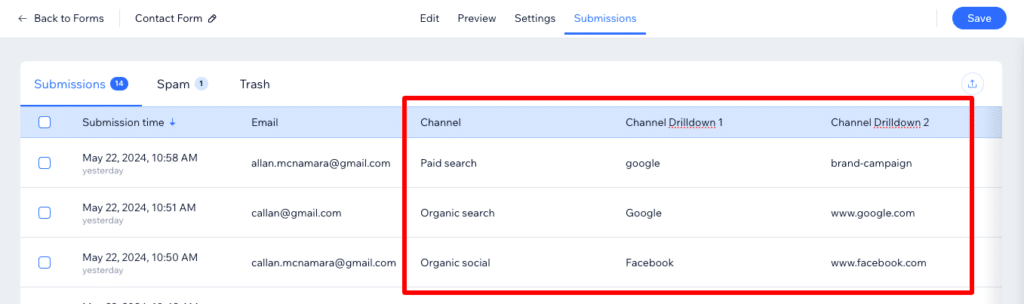
In the table that appears, you should be able to see attribution data coming in with each form submission like below:
If you don’t feel comfortable with any of these steps, including editing code, then we’d be happy to help you with it. Feel free to contact us here or book a call with us here.
Can't find the answer you need? Contact us!
Our team are available to answer any questions you have
