Help Center
Set up Attributer with Crisp
Attributer is a little bit of code you add to your website. It tracks where your visitors are coming from (I.e. Paid Search, Paid Social, Organic Search, etc) and then passes the data into Crisp with each new chat session.
In order for it to work, you need to follow the steps below:
Step 1: Copy the below code
The first step to setting Attributer up with Crispt is to copy the below code to your clipboard. This snippet of code uses Crisp’s ‘Custom Data’ feature to pass the attribution information through. It ties it to the Chat, and then Crisp aggregates the data at the Contact level.
<!--
Attributer → Crisp Integration
Version: 1.0
Last Updated: 2025-11-26
This script listens for Crisp's "chat:initiated" event
and sends Attributer data into Crisp as
session custom data, so attribution details appear
alongside each new chat conversation.
-->
<script>
(function() {
// Ensures the code runs when the DOM is ready
function onDomReady(cb) {
if (document.readyState === "interactive" || document.readyState === "complete") {
cb();
} else {
document.addEventListener("DOMContentLoaded", cb);
}
}
onDomReady(function() {
// Ensure Crisp's queue object always exists
window.$crisp = window.$crisp || [];
// When the visitor starts a new chat
window.$crisp.push(["on", "chat:initiated", function() {
try {
var flare = document.FlareTrk;
if (!flare || !flare.data) {
console.warn("Attributer / FlareTrk data not available yet.");
return;
}
var d = flare.data || {};
var drill = d.drillData;
// Fallback if drillData isn't populated yet
if ((!drill || typeof drill !== "object") && typeof flare.DPdrillData === "function") {
drill = flare.DPdrillData() || {};
}
if (!drill) drill = {};
// Fields we will send to Crisp
var fields = [
["channel", drill.channel ? drill.channel : ""],
["channel_drilldown_1", drill.drillDown1 ? drill.drillDown1 : ""],
["channel_drilldown_2", drill.drillDown2 ? drill.drillDown2 : ""],
["channel_drilldown_3", drill.drillDown3 ? drill.drillDown3 : ""],
["channel_drilldown_4", drill.drillDown4 ? drill.drillDown4 : ""],
["gclid", d.gclid ? d.gclid : ""],
["msclkid", d.msclkid ? d.msclkid : ""],
["fbclid", d.fbclid ? d.fbclid : ""],
["gbraid", d.gbraid ? d.gbraid : ""],
["wbraid", d.wbraid ? d.wbraid : ""],
["id", d.id ? d.id : ""],
["landing_page", d.landing_url ? d.landing_url : (d.landingURL ? d.landingURL : "")],
["submit_page", d.submitPage ? d.submitPage : ""],
["landing_page_group", d.landing_page_group ? d.landing_page_group : ""],
["conversion_days", (d.conversiondays != null ? String(d.conversiondays) : "")],
["visits", (d.visits != null ? String(d.visits) : "")],
["device", d.device ? d.device : ""]
];
// Include custom fields configured inside Attributer
if (d.customFields && typeof d.customFields === "object") {
for (var key in d.customFields) {
if (!d.customFields.hasOwnProperty(key)) continue;
var value = d.customFields[key];
if (value == null || value === "") continue;
// Crisp requires lowercase + underscore keys
var safeKey = String(key)
.toLowerCase()
.replace(/[^a-z0-9_]/g, "_");
fields.push(["custom_" + safeKey, String(value)]);
}
}
// Remove empty values
var nonEmptyFields = [];
for (var i = 0; i < fields.length; i++) {
if (fields[i][1] !== "" && fields[i][1] != null) {
nonEmptyFields.push(fields[i]);
}
}
if (!nonEmptyFields.length) {
console.warn("No Attributer data to send to Crisp.");
return;
}
// Push fields to Crisp session data
window.$crisp.push([
"set",
"session:data",
[ nonEmptyFields ] // Crisp requires the nested array format
]);
console.log("Sent Attributer data to Crisp:", nonEmptyFields);
} catch (e) {
console.error("Error while sending Attributer data to Crisp:", e);
}
}]);
});
})();
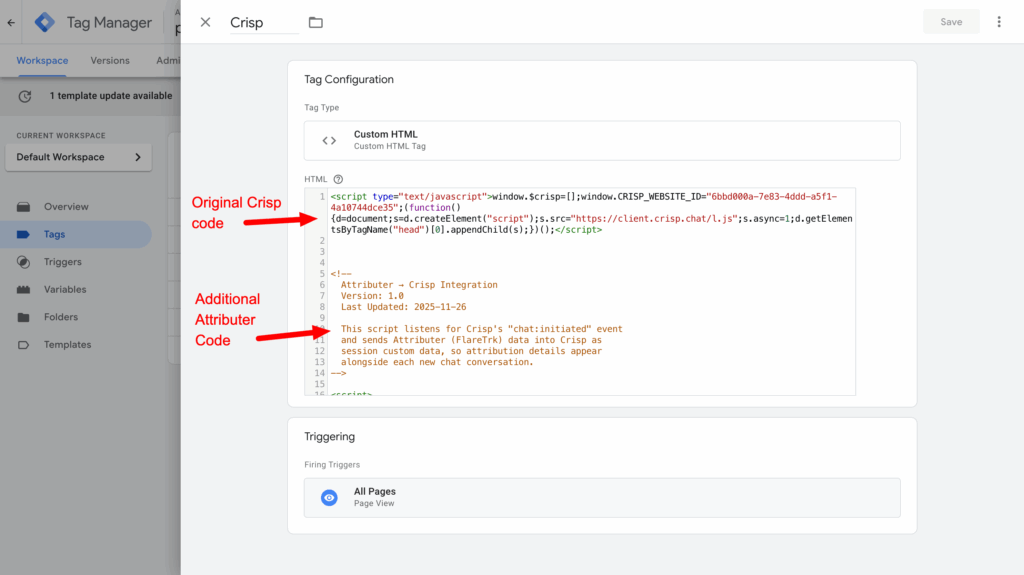
</script>Step 2: Add the code beneath your Crisp embed code
The next step is to place this additional snippet of code directly beneath the embed code you got from your Crisp account (the one that installs Crisp on your website).
See screenshot below:
Step 3: Test it works
The final step is to test it works. You can do this by navigating to your website in a new incognito window and starting a new chat.
You should see the data come through in the chat window:
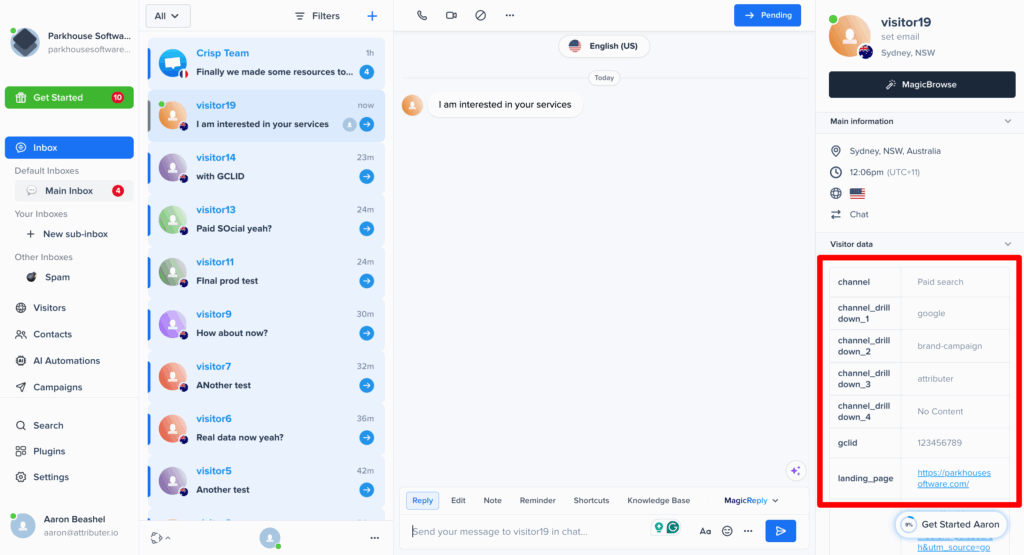
If the data is coming through and appearing in the chat window like the screenshot above, then you have set up Attributer with Crisp correctly!
We would also recommend reading this article for further information on how to test different channels (I.e. Organic Search, Paid Search, etc).
Can't find the answer you need? Contact us!
Our team are available to answer any questions you have
