Help Center
Add hidden fields to Squarespace forms in the Fluid Engine editor
These are instructions for setting up Attributer with forms in Squarespace’s “Fluid Engine’ editor. If you use Squarespace’s classic editor, then instructions for setting up Attributer can be found here.
Attributer is a little bit of code you add to your website. It tracks where your visitors are coming from (I.e. Paid Search, Paid Social, Organic Search, etc) and writes the data into hidden fields you add to your forms. This data is then captured in Squarespace and can be sent to your CRM and other tools.
In order for it to work, you need to add a series of hidden fields to your Squarespace forms. Here’s how to do it:
Step 1: Add 6x ‘Hidden’ form fields to your form
In your Squarespace account, open the page that contains your form in the Editor and then select the form on the page. A small popup will appear. Make sure the ‘Content’ tab is selected and then click on ‘Edit Form Fields’.
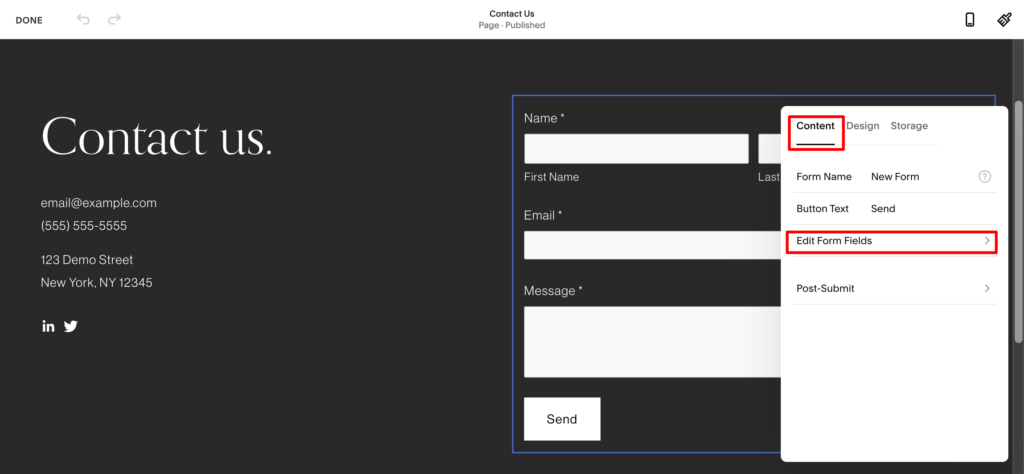
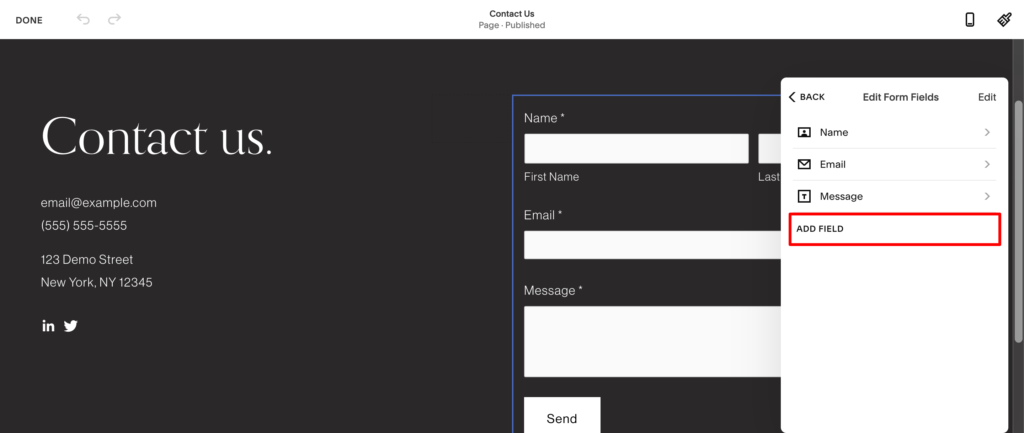
When the popup changes, you will see all of your existing form fields as well as an option to ‘Add New Field’. Select the option to ‘Add New Field’
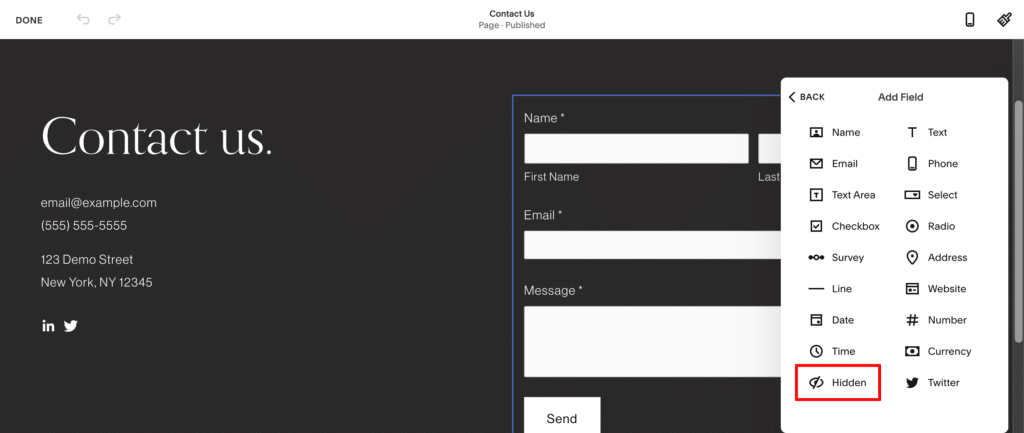
Finally, you will be present with a number of different types of form fields you can add. Select the ‘Hidden’ field type to add it to your form.
Repeat the above 6x so that you have 6 hidden fields in your form.
Step 2: Configure the fields
Now that the fields have been added to your form, it’s time to configure them so that Attributer knows which fields to write the marketing attribution data to.
To configure a field, simply select it from the list of fields in the popup:
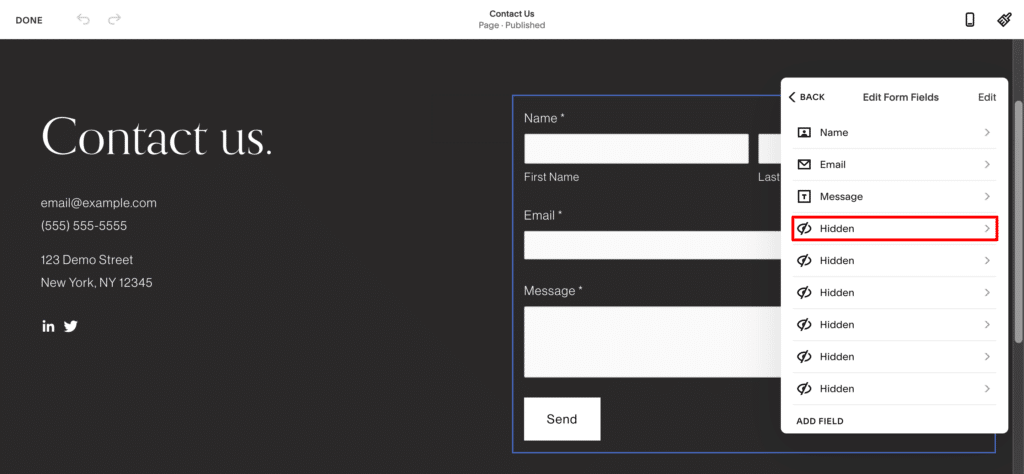
The popup will then change to show the various configuration options for the field. You’ll need to edit both the ‘Label’ and ‘Default Value’ fields.
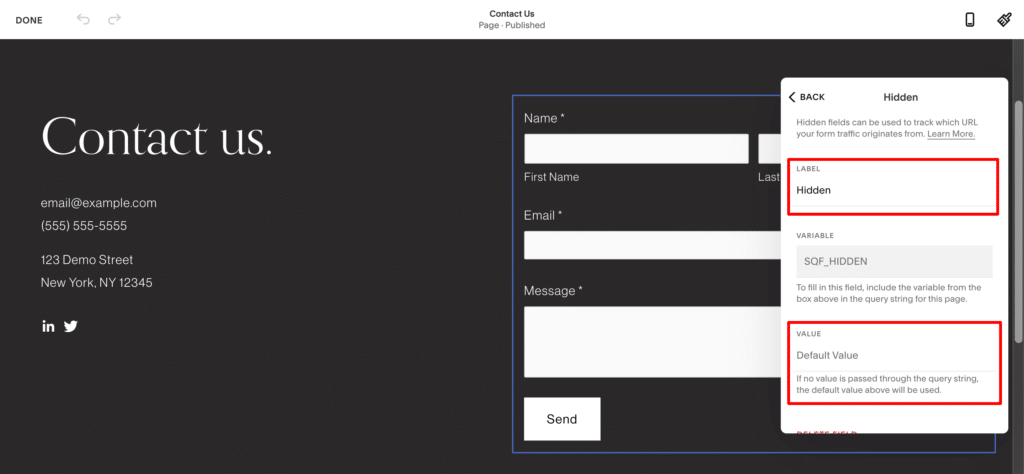
For each of the 6x hidden fields you’ve added, you’ll need to configure them as follows:
Field #1
- Label = Channel
- Default Value = [channel]
Field #2
- Label = Channel Drilldown 1
- Default Value = [channeldrilldown1]
Field #3
- Label = Channel Drilldown 2
- Default Value = [channeldrilldown2]
Field #4
- Label = Channel Drilldown 3
- Default Value = [channeldrilldown3]
Field #5
- Label = Landing Page
- Default Value = [landingpage]
Field #6
- Label = Landing Page Group
- Default Value = [landingpagegroup]
Step 3: Add some additional code underneath the original Attributer code
Finally, go back to where you added the Attributer code you got from your account.
This could be in the Code Injection section of your Squarespace settings, or it could be in a tool like Google Tag Manager
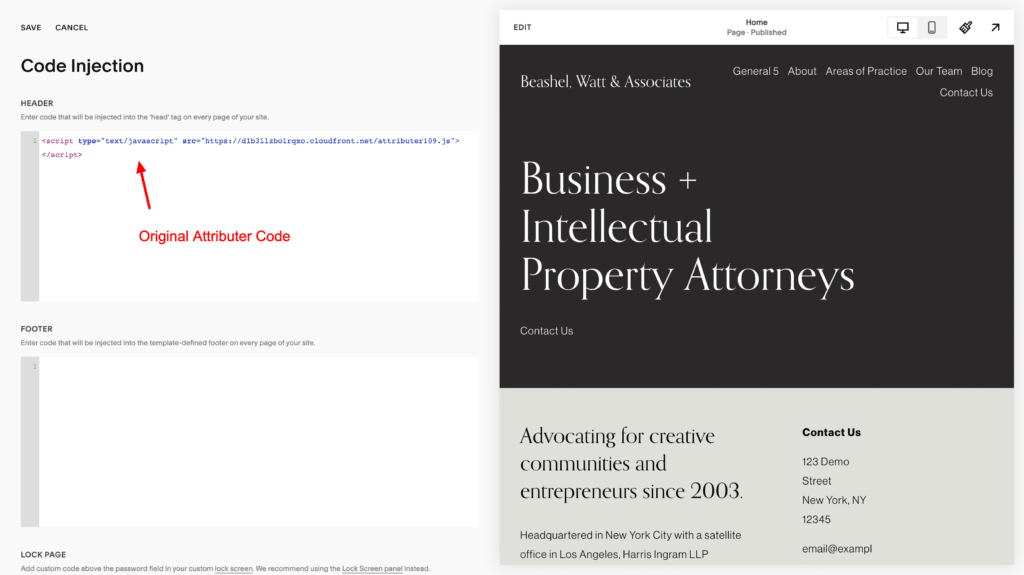
Underneath the original Attributer code, copy and paste the following code:
<script>
(() => {
function setFormValue(params, name, value) {
const key = "SQF_" + name.toUpperCase()
if (params.has(key)) return false;
params.set(key, value);

return true;
}

function fill_form() {
if (!document.FlareTrk?.data) {
return window.requestAnimationFrame(fill_form);
}
const params = new URLSearchParams(window.location.search);
const should_update = setFormValue(params, "channel", document.FlareTrk.data.drillData.channel);

if (!should_update) {
return;
}
setFormValue(params, "channel_drilldown_1", document.FlareTrk.data.drillData.drillDown1);
setFormValue(params, "channel_drilldown_2", document.FlareTrk.data.drillData.drillDown2);
setFormValue(params, "channel_drilldown_3", document.FlareTrk.data.drillData.drillDown3);
setFormValue(params, "channel_drilldown_4", document.FlareTrk.data.drillData.drillDown4);
setFormValue(params, "gclid", document.FlareTrk.data.gclid || "");
setFormValue(params, "fbclid", document.FlareTrk.data.fbclid || "");
setFormValue(params, "msclkid", document.FlareTrk.data.msclkid || "");
setFormValue(params, "id", document.FlareTrk.data.id || "");
setFormValue(params, "landing_page", document.FlareTrk.data.landing_url);
setFormValue(params, "landing_page_group", document.FlareTrk.data.landing_page_group);

for (var dp = 0; dp < document.FlareTrk.settings.customFields.length; dp++) {
const key = document.FlareTrk.settings.customFields[dp];
setFormValue(params, key, document.FlareTrk.data["customFields"][key] || "");
}

window.location.search = "?" + params.toString();
}
fill_form();
})();
</script>
Ultimately, it should look a bit like this:
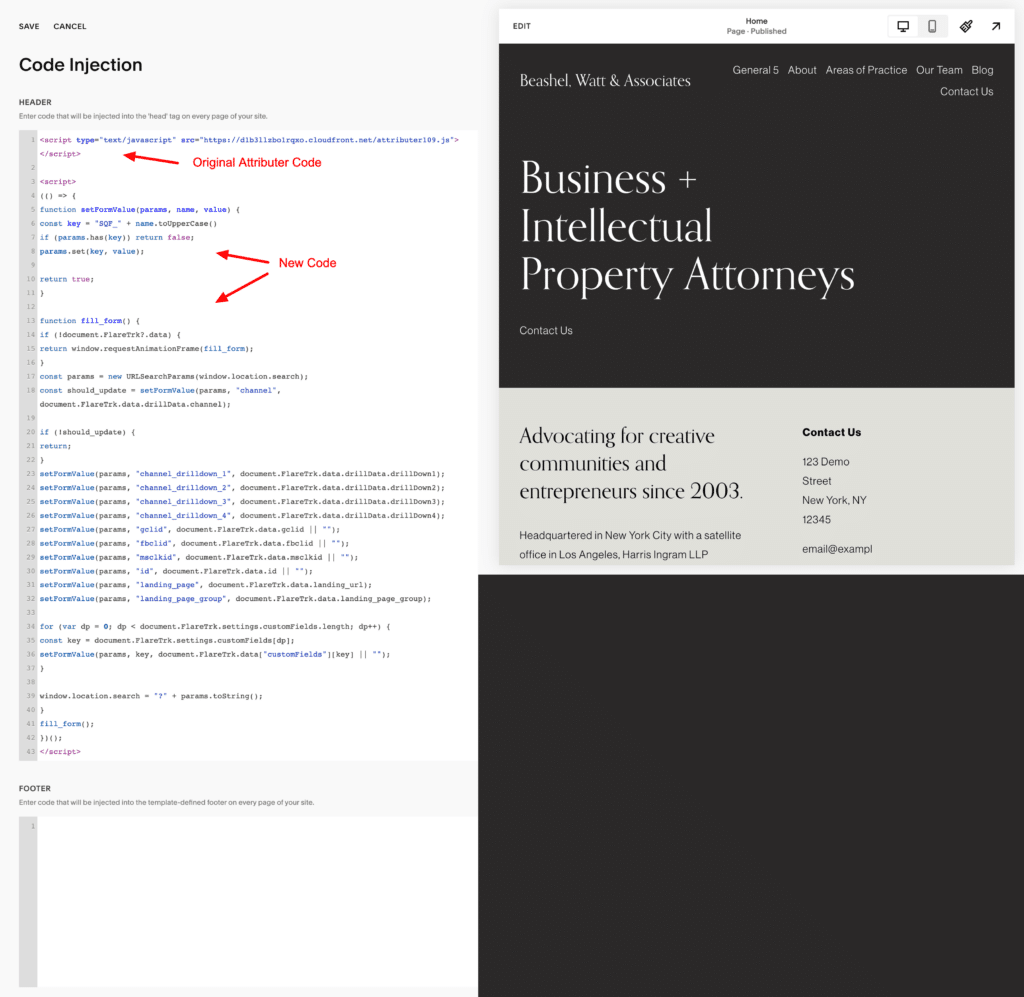
After pasting the code in, you can now click the ‘Save’ button in the top left corner to save the changes you made to your site.
That’s it! Attributer will now write the visitor’s marketing attribution data into these hidden form fields whenever they submit a form!
Can't find the answer you need? Contact us!
Our team are available to answer any questions you have

