Help Center
Add the Attributer code to your WordPress website
WordPress is the most popular website management tool on the market today, with an estimated 43% market share.
If you’re one of these businesses that use WordPress to manage your site, then adding the Attributer code is simple.
Step 1: Add the code to your website
There are a number of different ways to add code to your WordPress website, and the right one for you will depend on your particular WordPress setup.
This article outlines a number of ways in which you can add the Attributer code to your WordPress website.
Method 1: Theme Settings
Many popular WordPress themes and/or page builders like Elementor, Beaver Builder, and Divi have built-in options for adding code to your website.
These tend to be in the Settings section of these themes and/or page builders. As an example, Divi has the option to add code to your website in the ‘Integrations’ tab of its theme settings.
Regardless of whether you use Divi or another theme/page builder, the first place to look to add the Attributer code is the settings section of your theme. This is the quickest and easiest way to do it and doesn’t require any 3rd party tools or plugins.
Method 2: Use a code injection plugin
If your WordPress theme doesn’t have an option to add code to the head of your website, then your next option is likely to use a plugin.
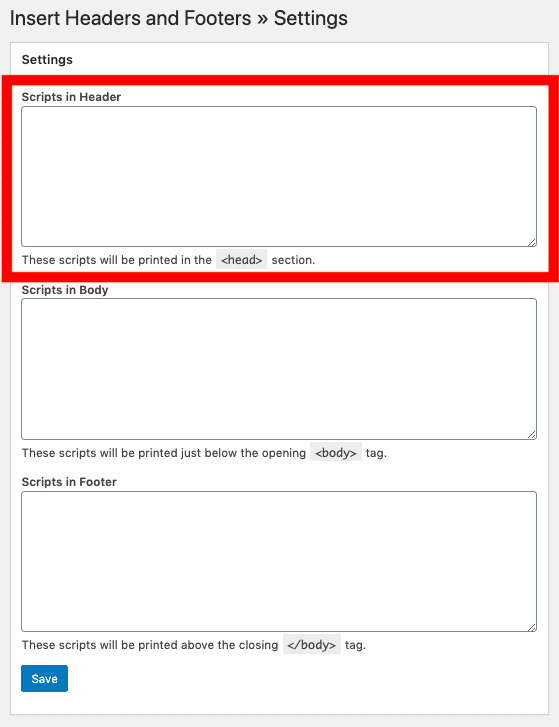
A good plugin to use is the Insert Headers and Footers plugin by WPBeginner. WPBeginner is one of the most popular WordPress blogs and plugin developers around, and the plugin is used on over 1 million websites worldwide.
Once you’ve installed the plugin (read this article for instructions on installing plugins if needed), you can simply paste the Attributer code into the section titled ‘Scripts in Header’ and click Save.
Method 3: Use Google Tag Manager
If your website uses tag management tools like Google Tag Manager to manage these pieces of code, then it’s probably best to insert the Attributer code that way, just to ensure all your code snippets are housed in one place.
You can get step-by-step instructions for adding the Attributer code to Google Tag Manager by reading this article.
Step 2: Test the Attributer code is installed correctly
Once you’ve installed the Attributer code snippet on your website using one of the above methods, it’s then a good idea to test that it is in fact installed properly.
You can test whether the attributer code is installed on your website by following the instructions here.
Can't find the answer you need? Contact us!
Our team are available to answer any questions you have
