Add the Attributer code to your website
Learn how to add the Attributer code to your website either directly or through a tag manager
The first step in getting Attributer set up is to add the code to your website. In this article, we'll give you general instructions as well as links to step-by-step instructions for specific technologies.
General instructions
To get started, navigate to the 'Getting Started' section of your Attributer account and copy the code from the page.
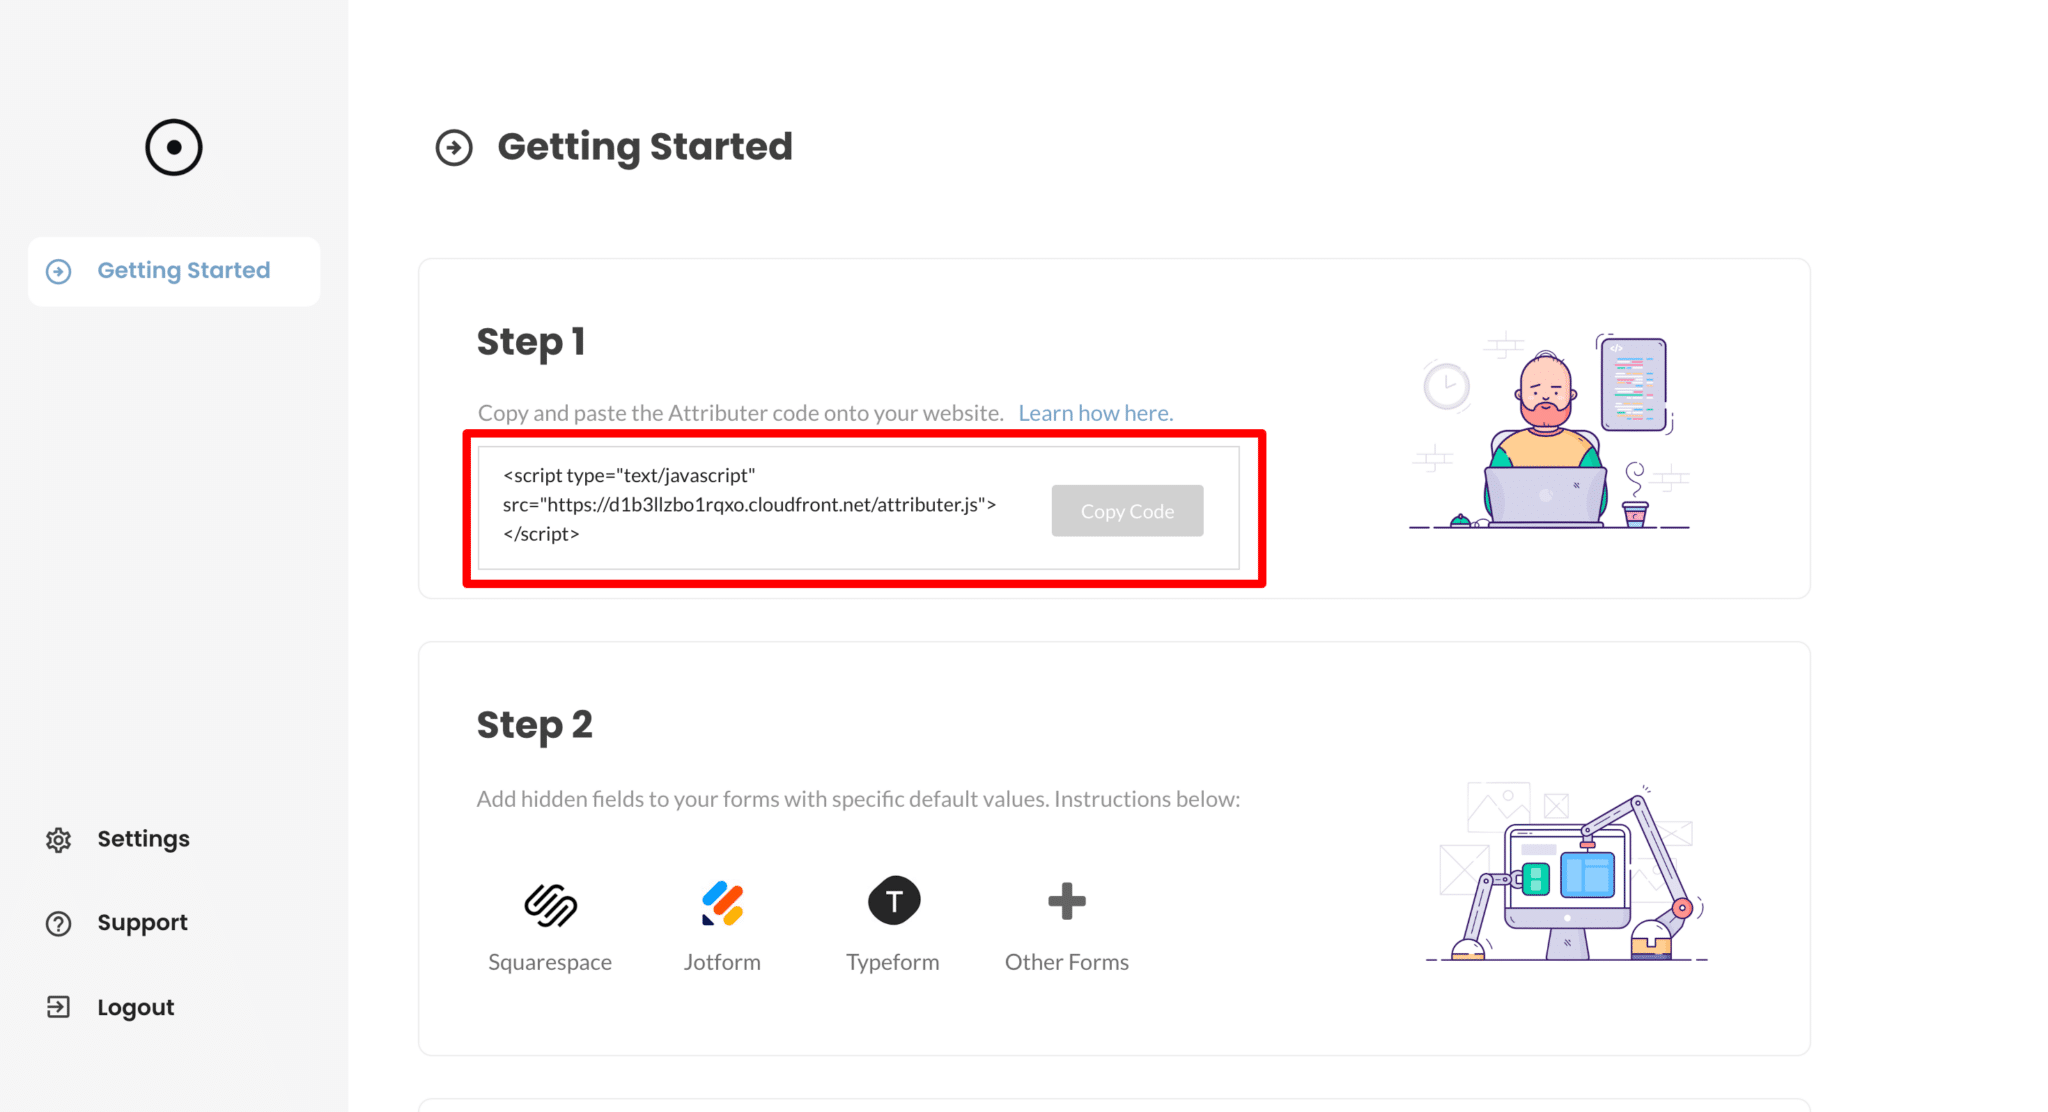
Next, paste this code onto your website. When putting the code on your site, follow these requirements:
- This code should ideally be put in the head tag. If it’s put in the middle or at the end of the page, some visitors who don’t wait until the whole page loads won’t be tracked correctly.
- The code needs to be put on every page of the website, including the page where the form is located (this is important to note if you are using a marketing automation tool or landing page tool and your forms are on separate pages to your main website).
Specific Instructions
Select the website technology you use below to see specific, step-by-step instructions for how to install the Attributer code on your website:


Can't find the answer you need? Contact us!
Our team are available to answer any questions you have
